Roasted Butternut Squash Salad

And the winner of last weeks poll was this Roasted Butternut Squash Salad. This is one of those recipes that I saw on Pinterest and thought looked rather yummy. In my usual fashion, I’ve made quite a few changes to it and have taste-tested this on my very willing coworkers. They believe I’ve perfected this and always hope I will bring some leftovers into the office for them.

This salad is excellent as a side dish or even as a main course. My preference is as a side dish with a good serving of protein (chicken breast, pork loin, steak) to go with it. As always, make changes to this to suit your own tastes, but try it my way first just in case I got it right for you too!
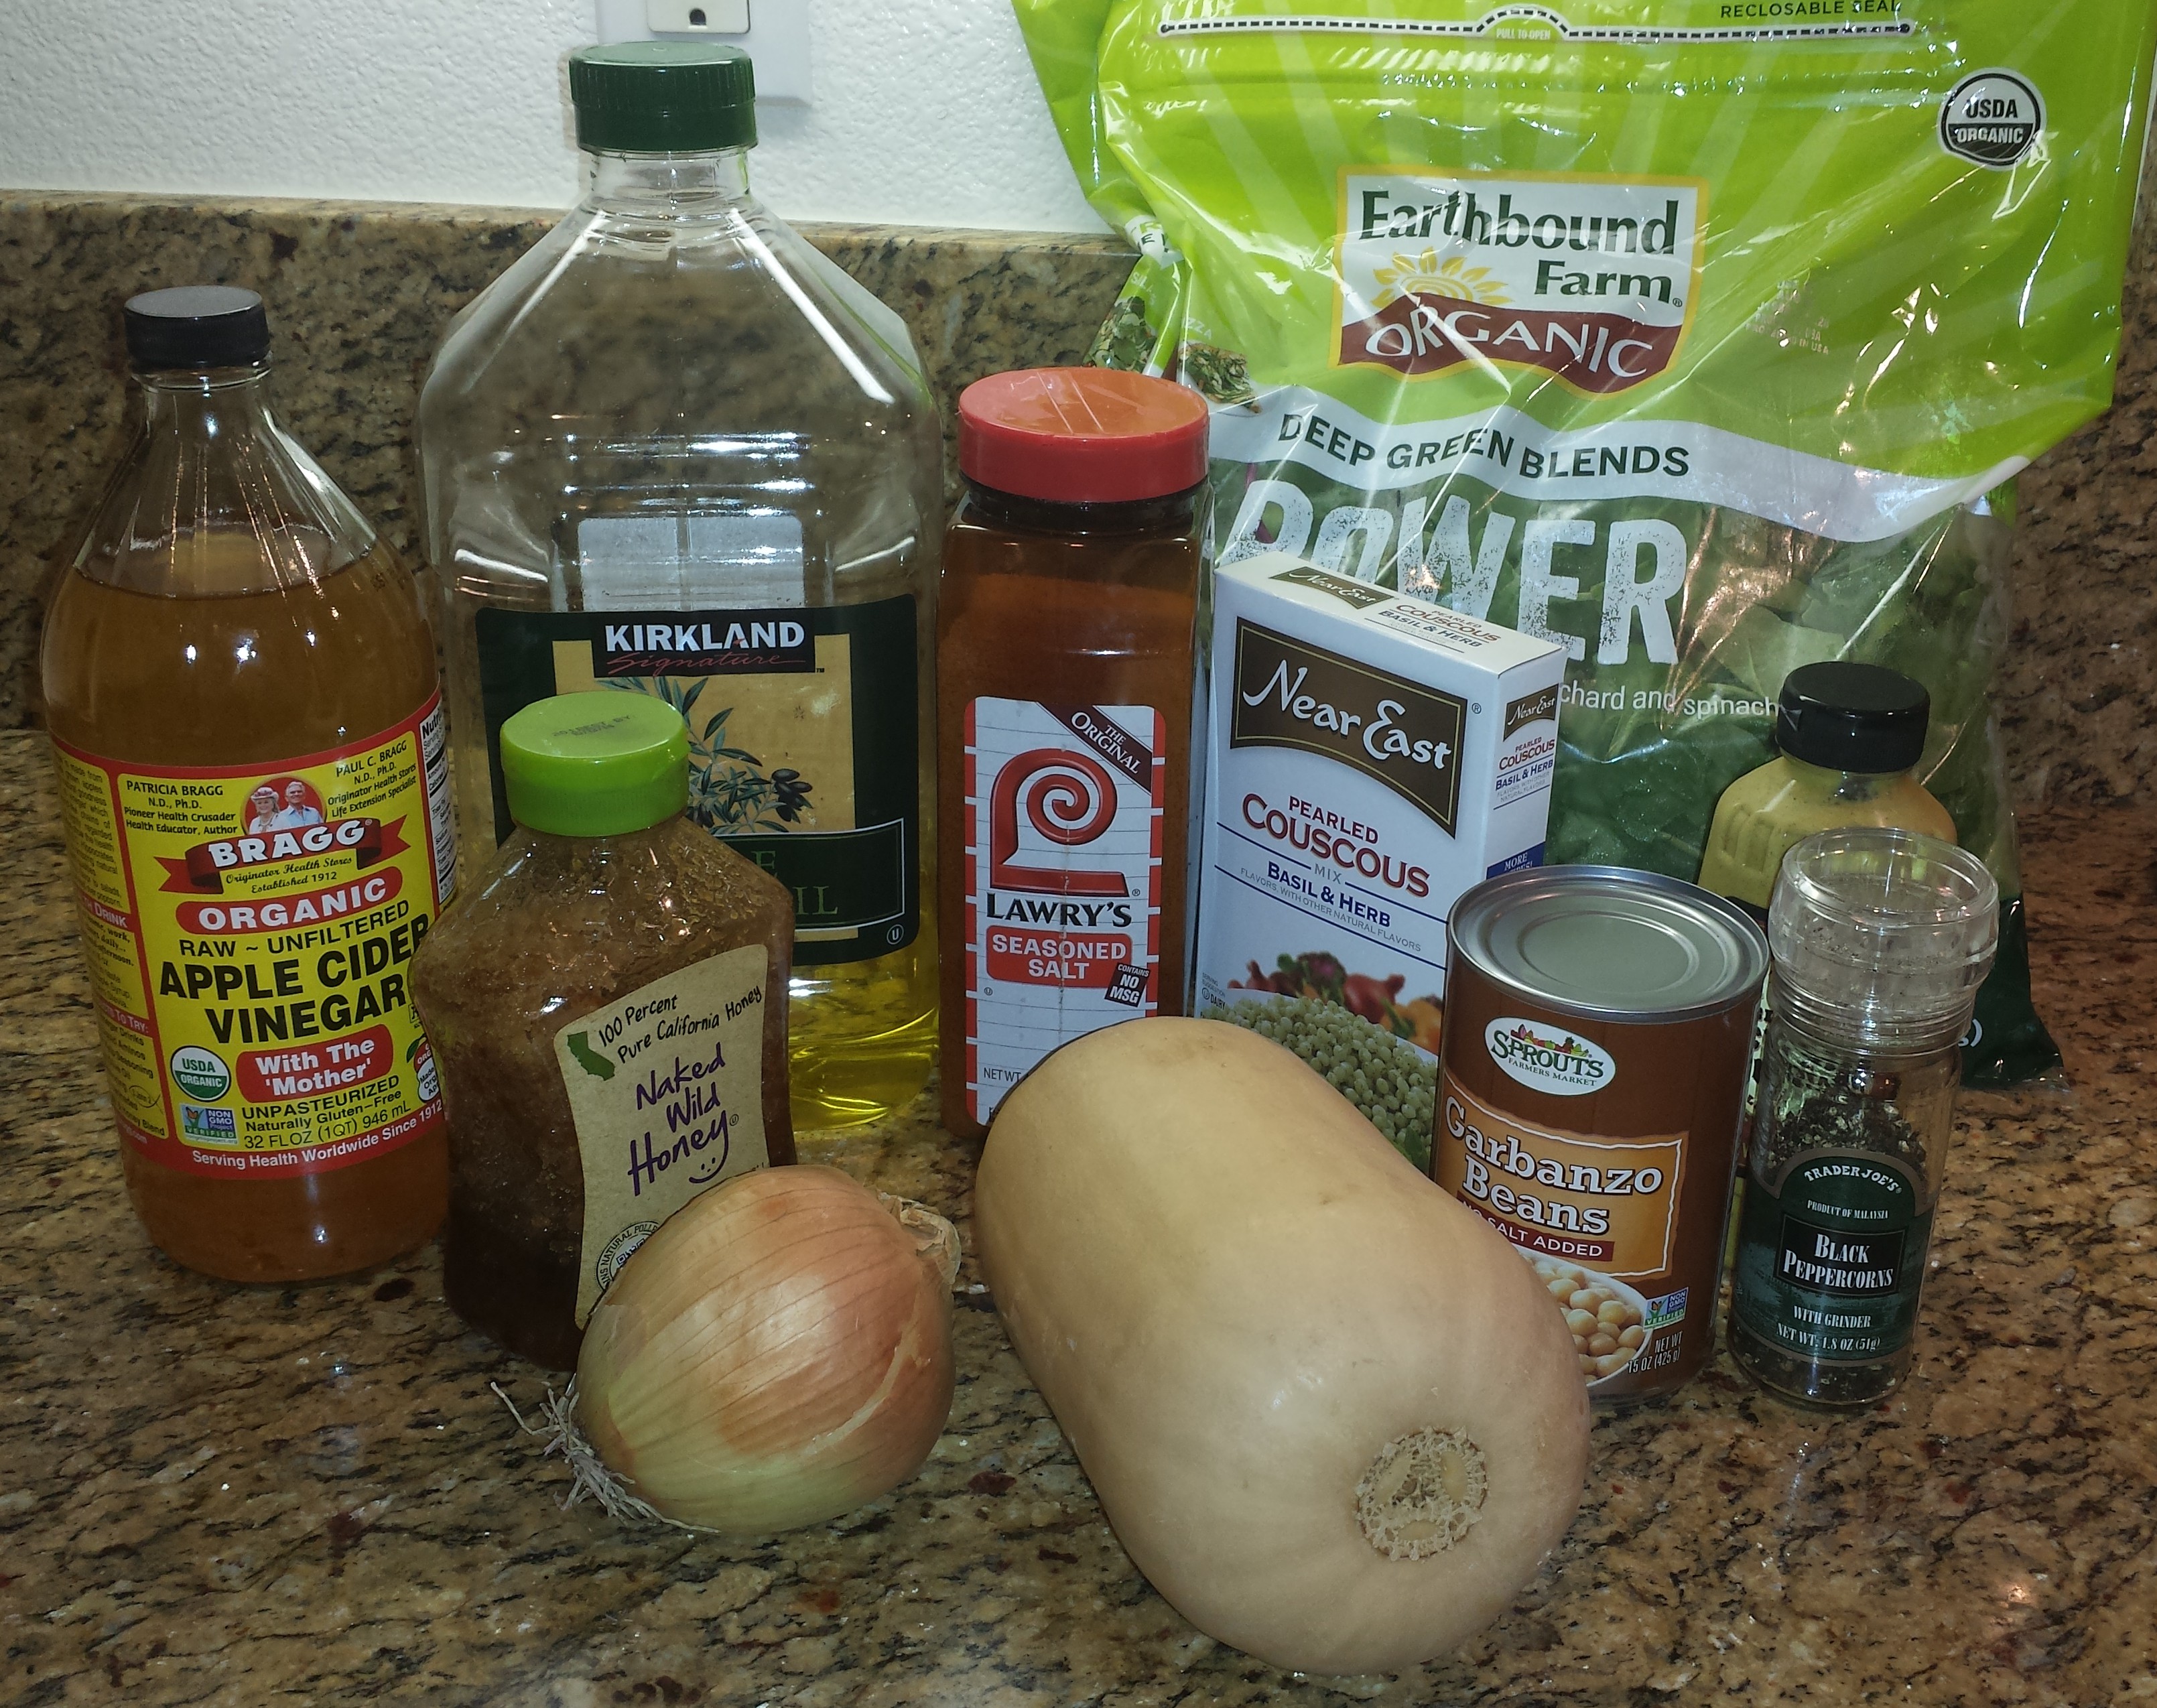
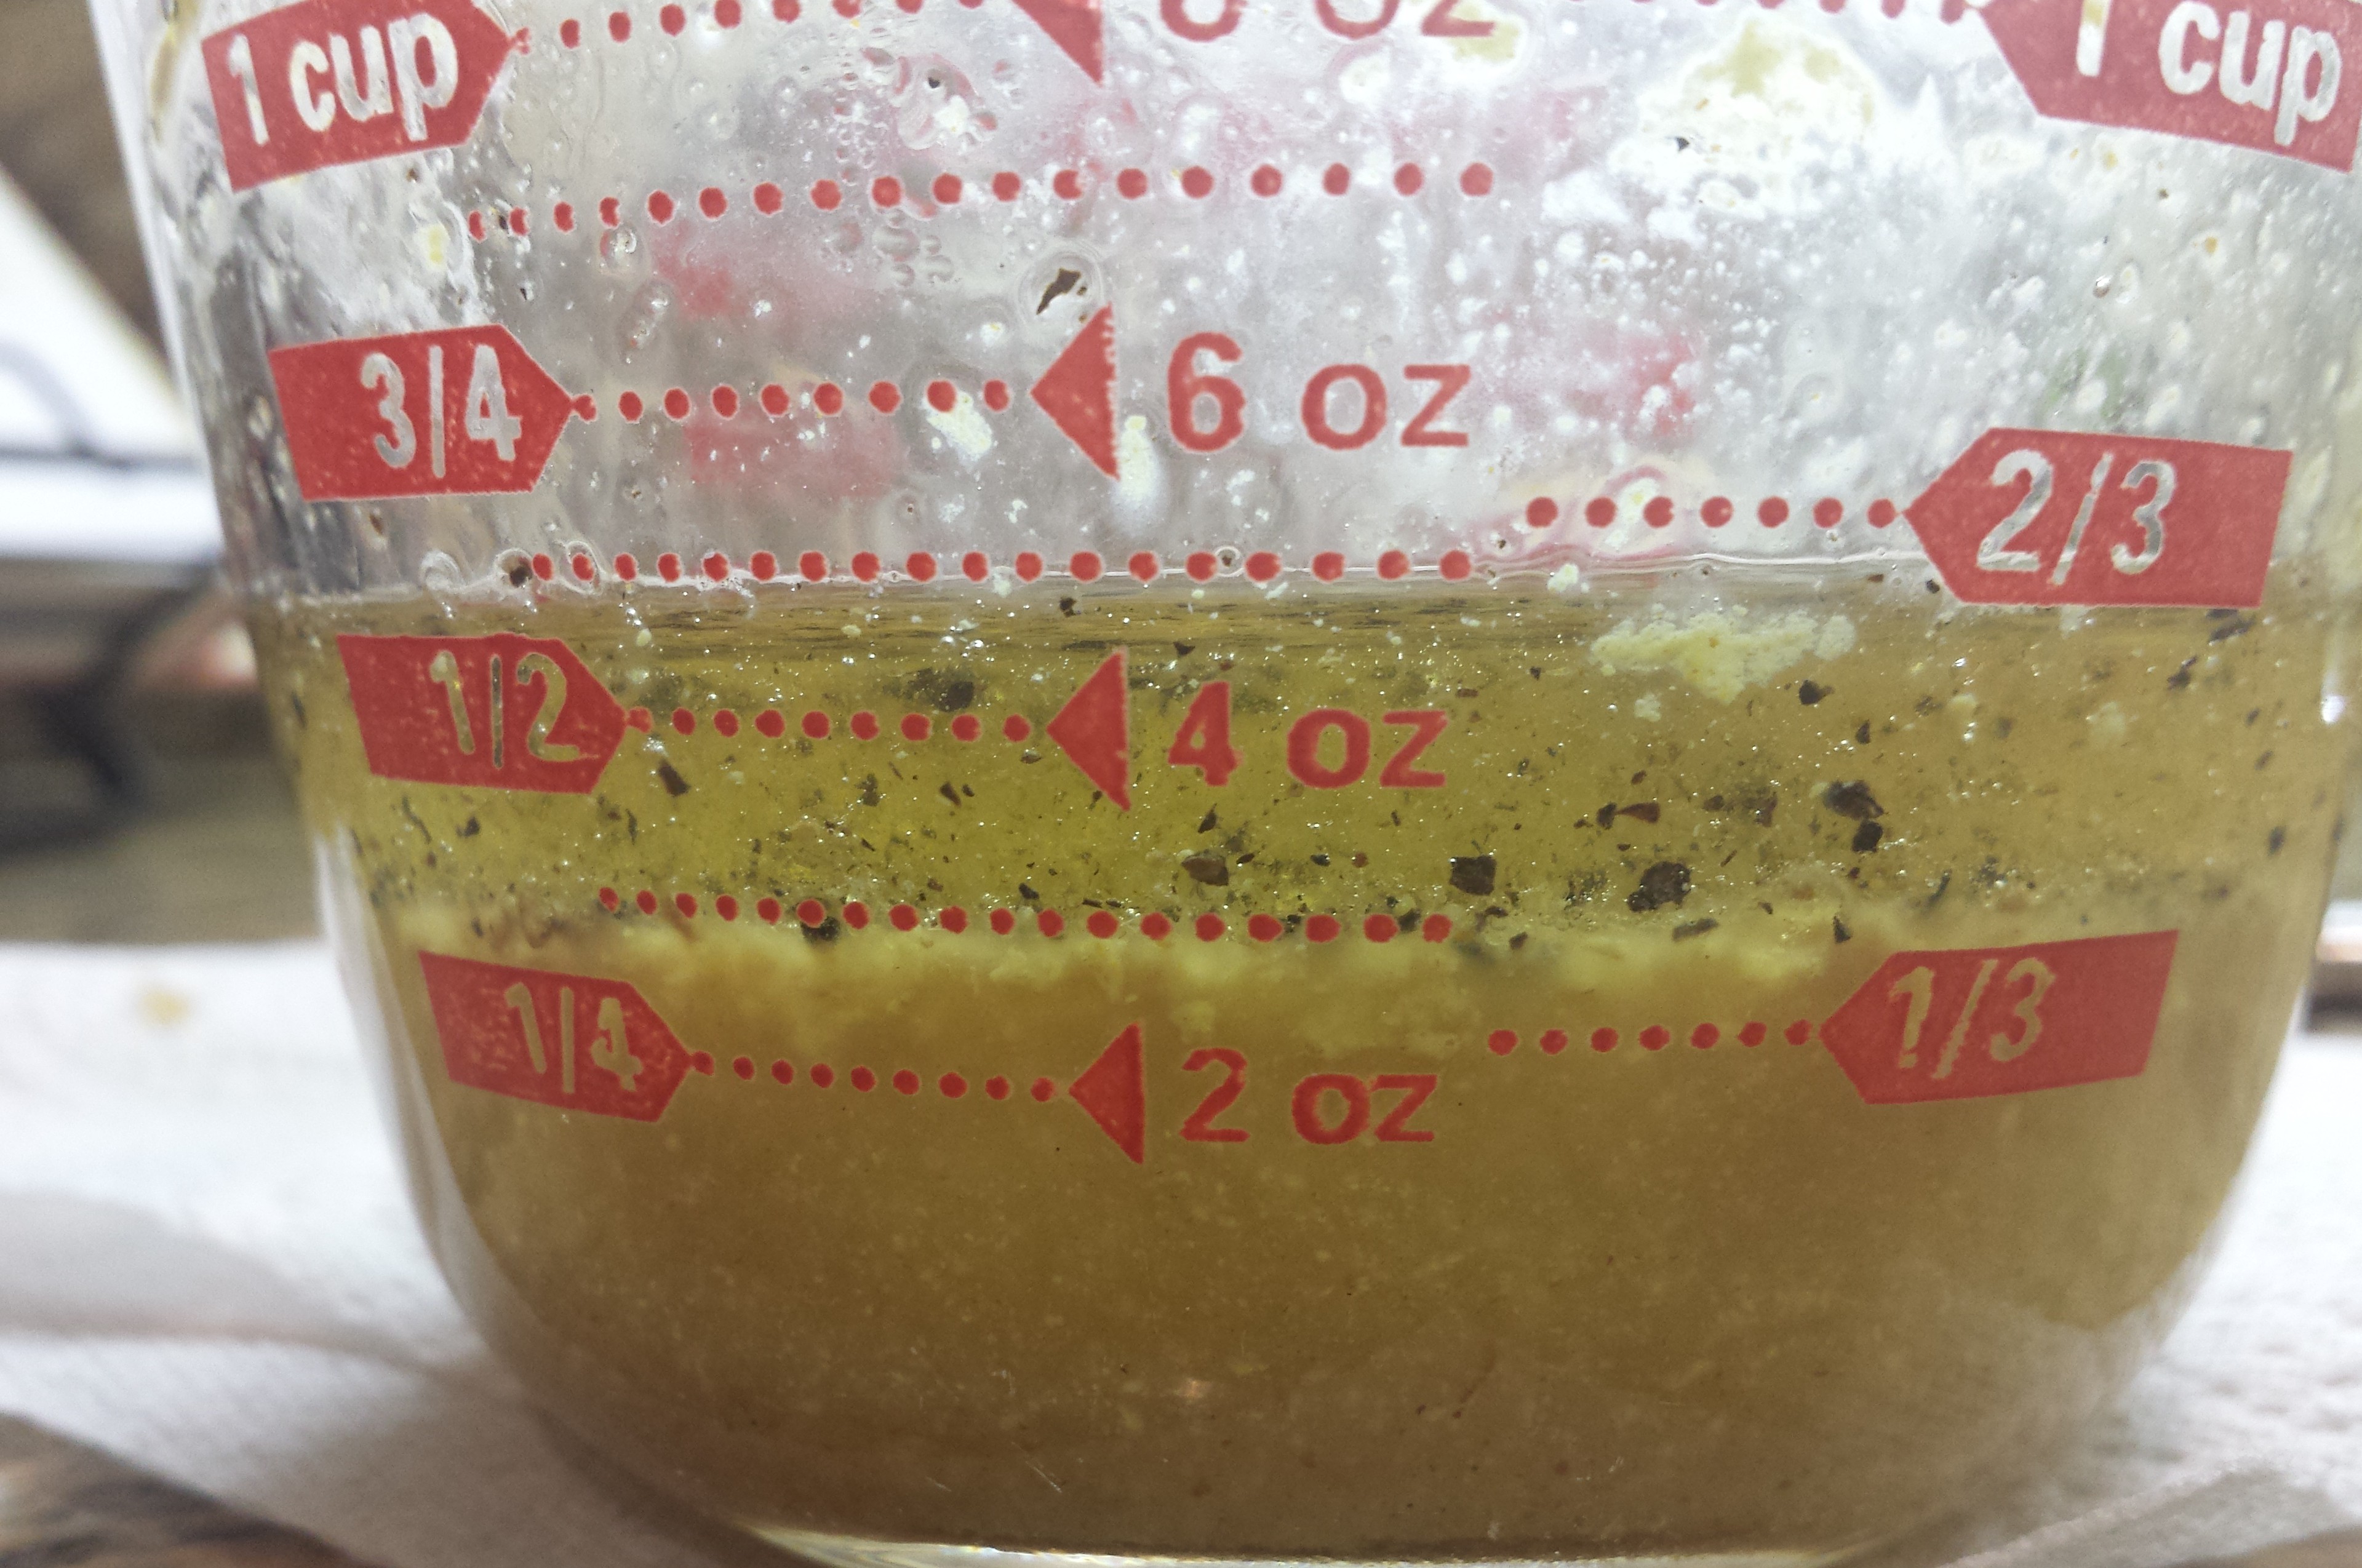
20150730_194917

Dressing

  • 4 T apple cider vinegar
  • 4 T extra-virgin olive oil
  • 1 T honey
  • 1 T dijon mustard (or your favorite mustard, just not yellow mustard)
  • 1/4 tsp salt
  • 1/8 tsp pepper

Salad

  • 1 butternut squash (between 1.5-2 lbs) peeled, de-seeded and cubed into 1/2″ pieces (Costco usually has a nice peeled, cut butternut squash you can purchase, but like today, not always)
  • 2 T olive oil
  • 1/2 tsp salt
  • 1/8 tsp pepper
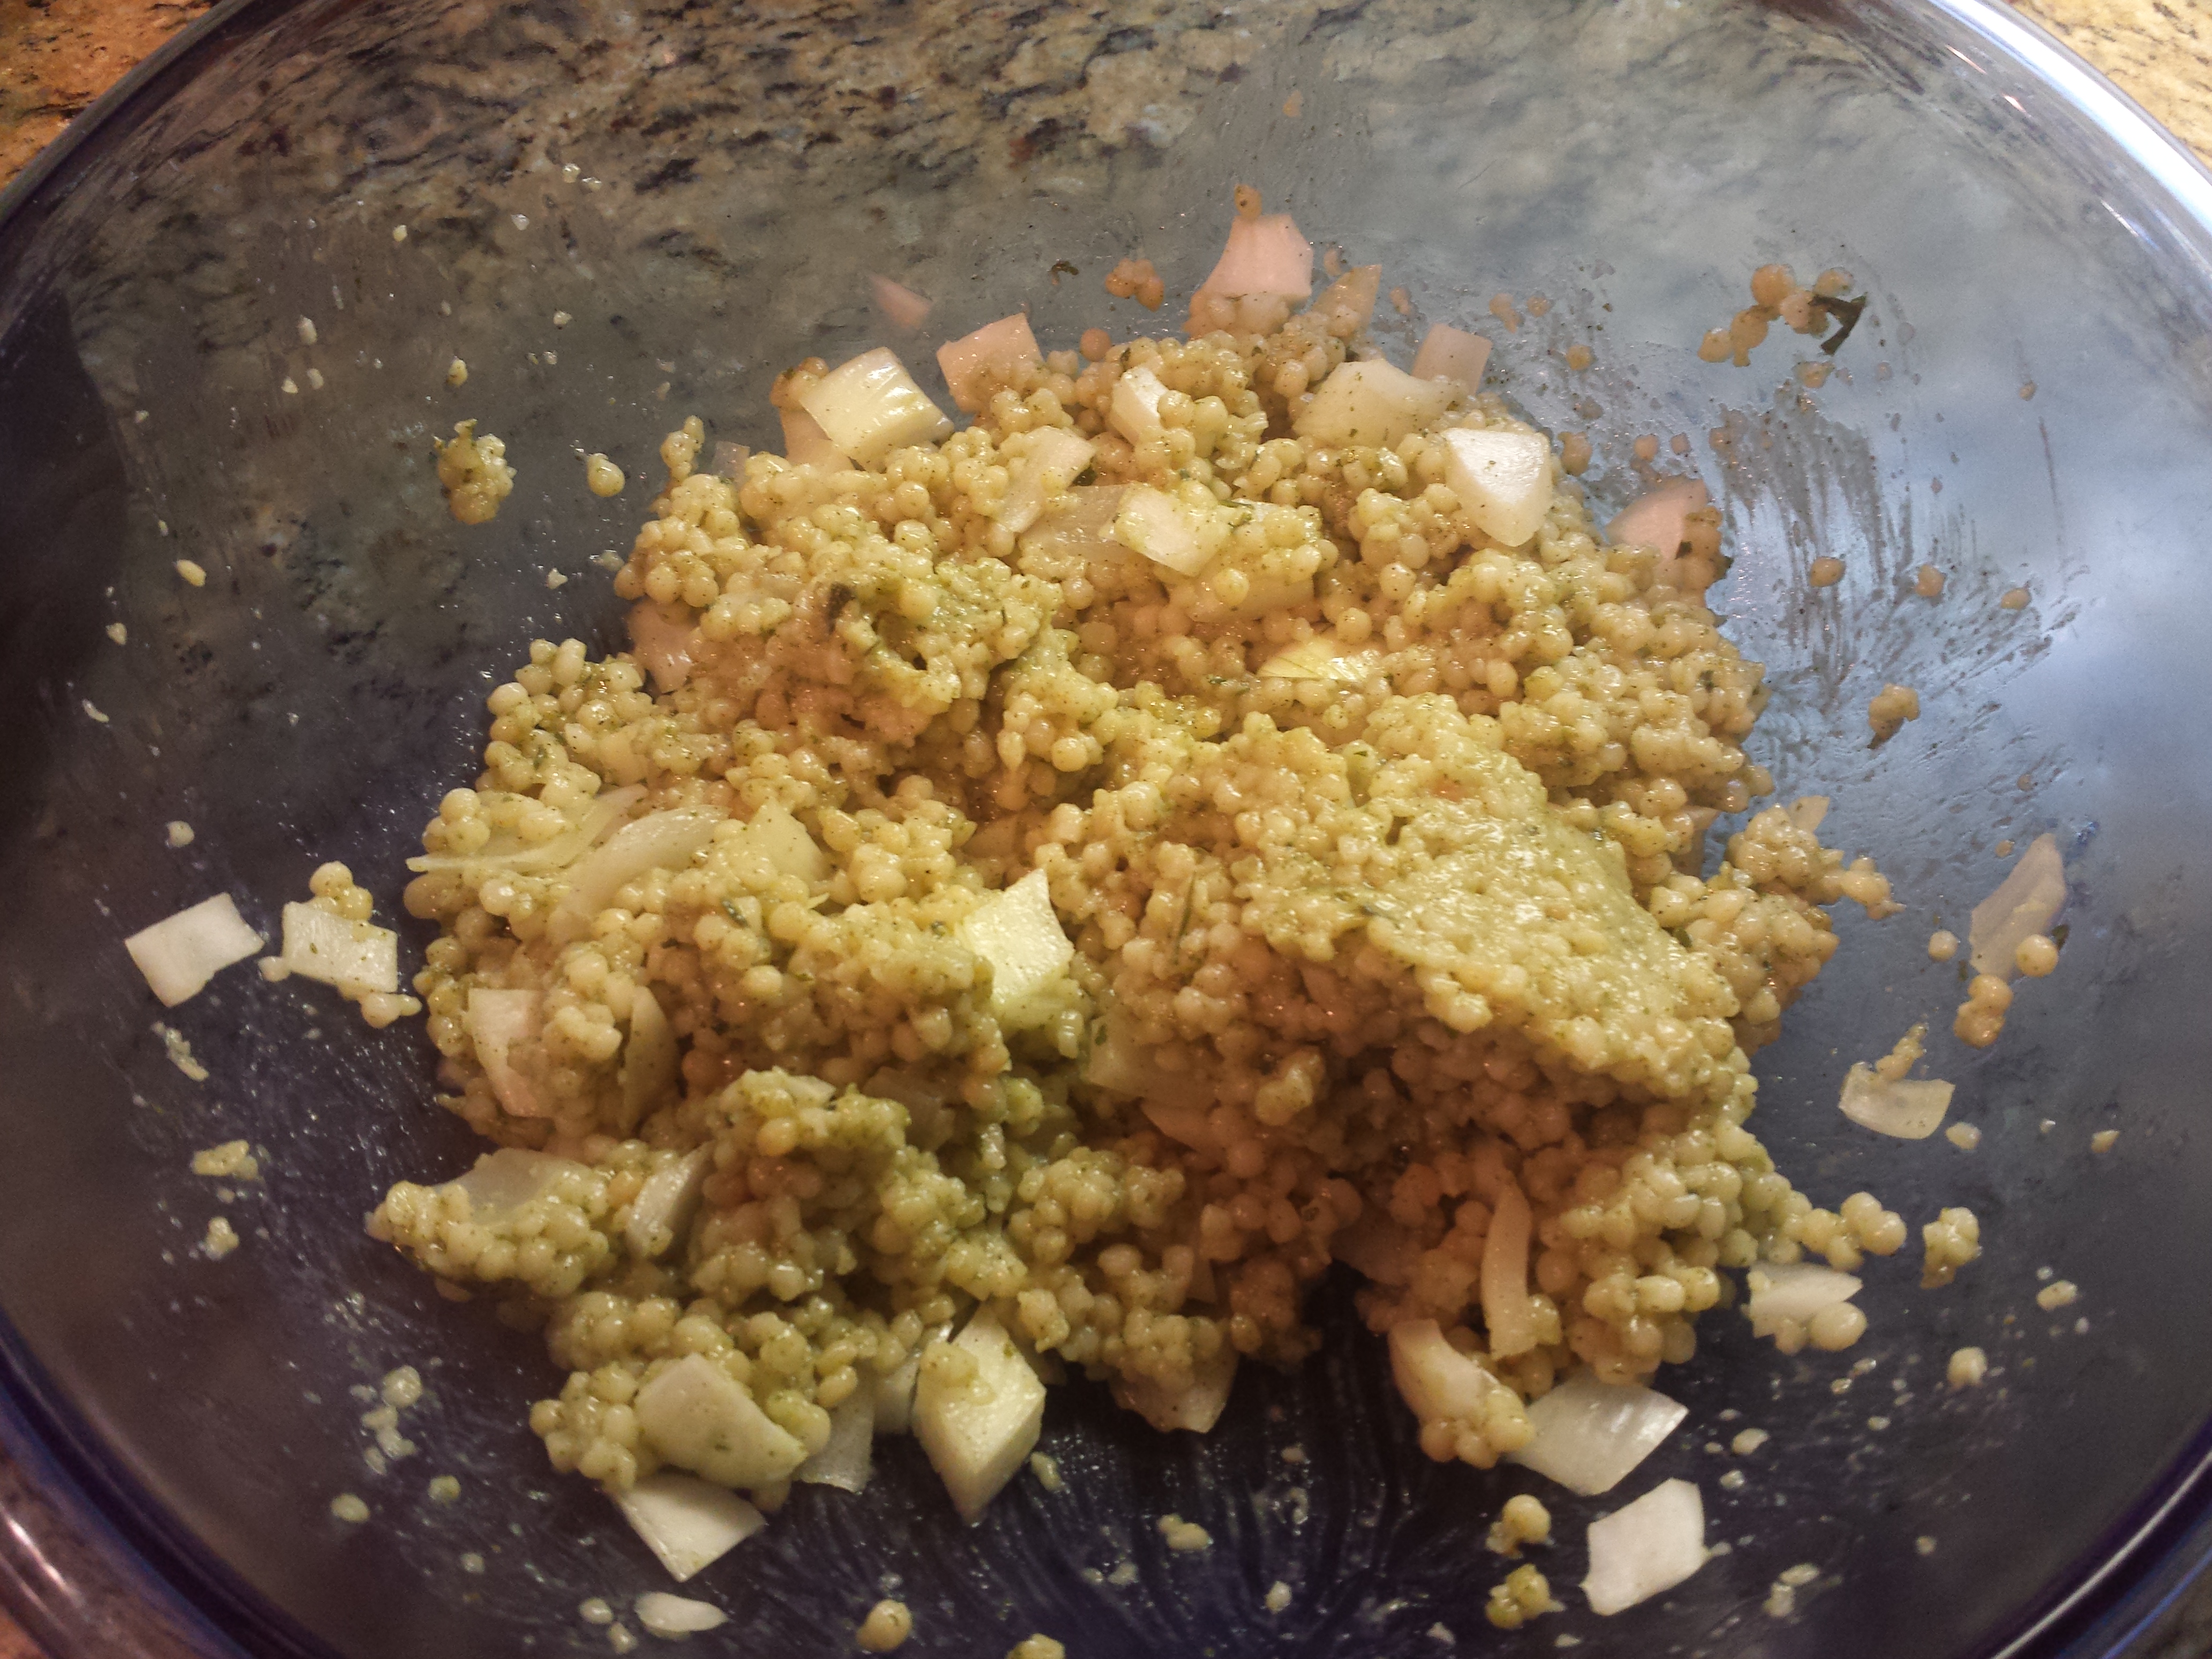
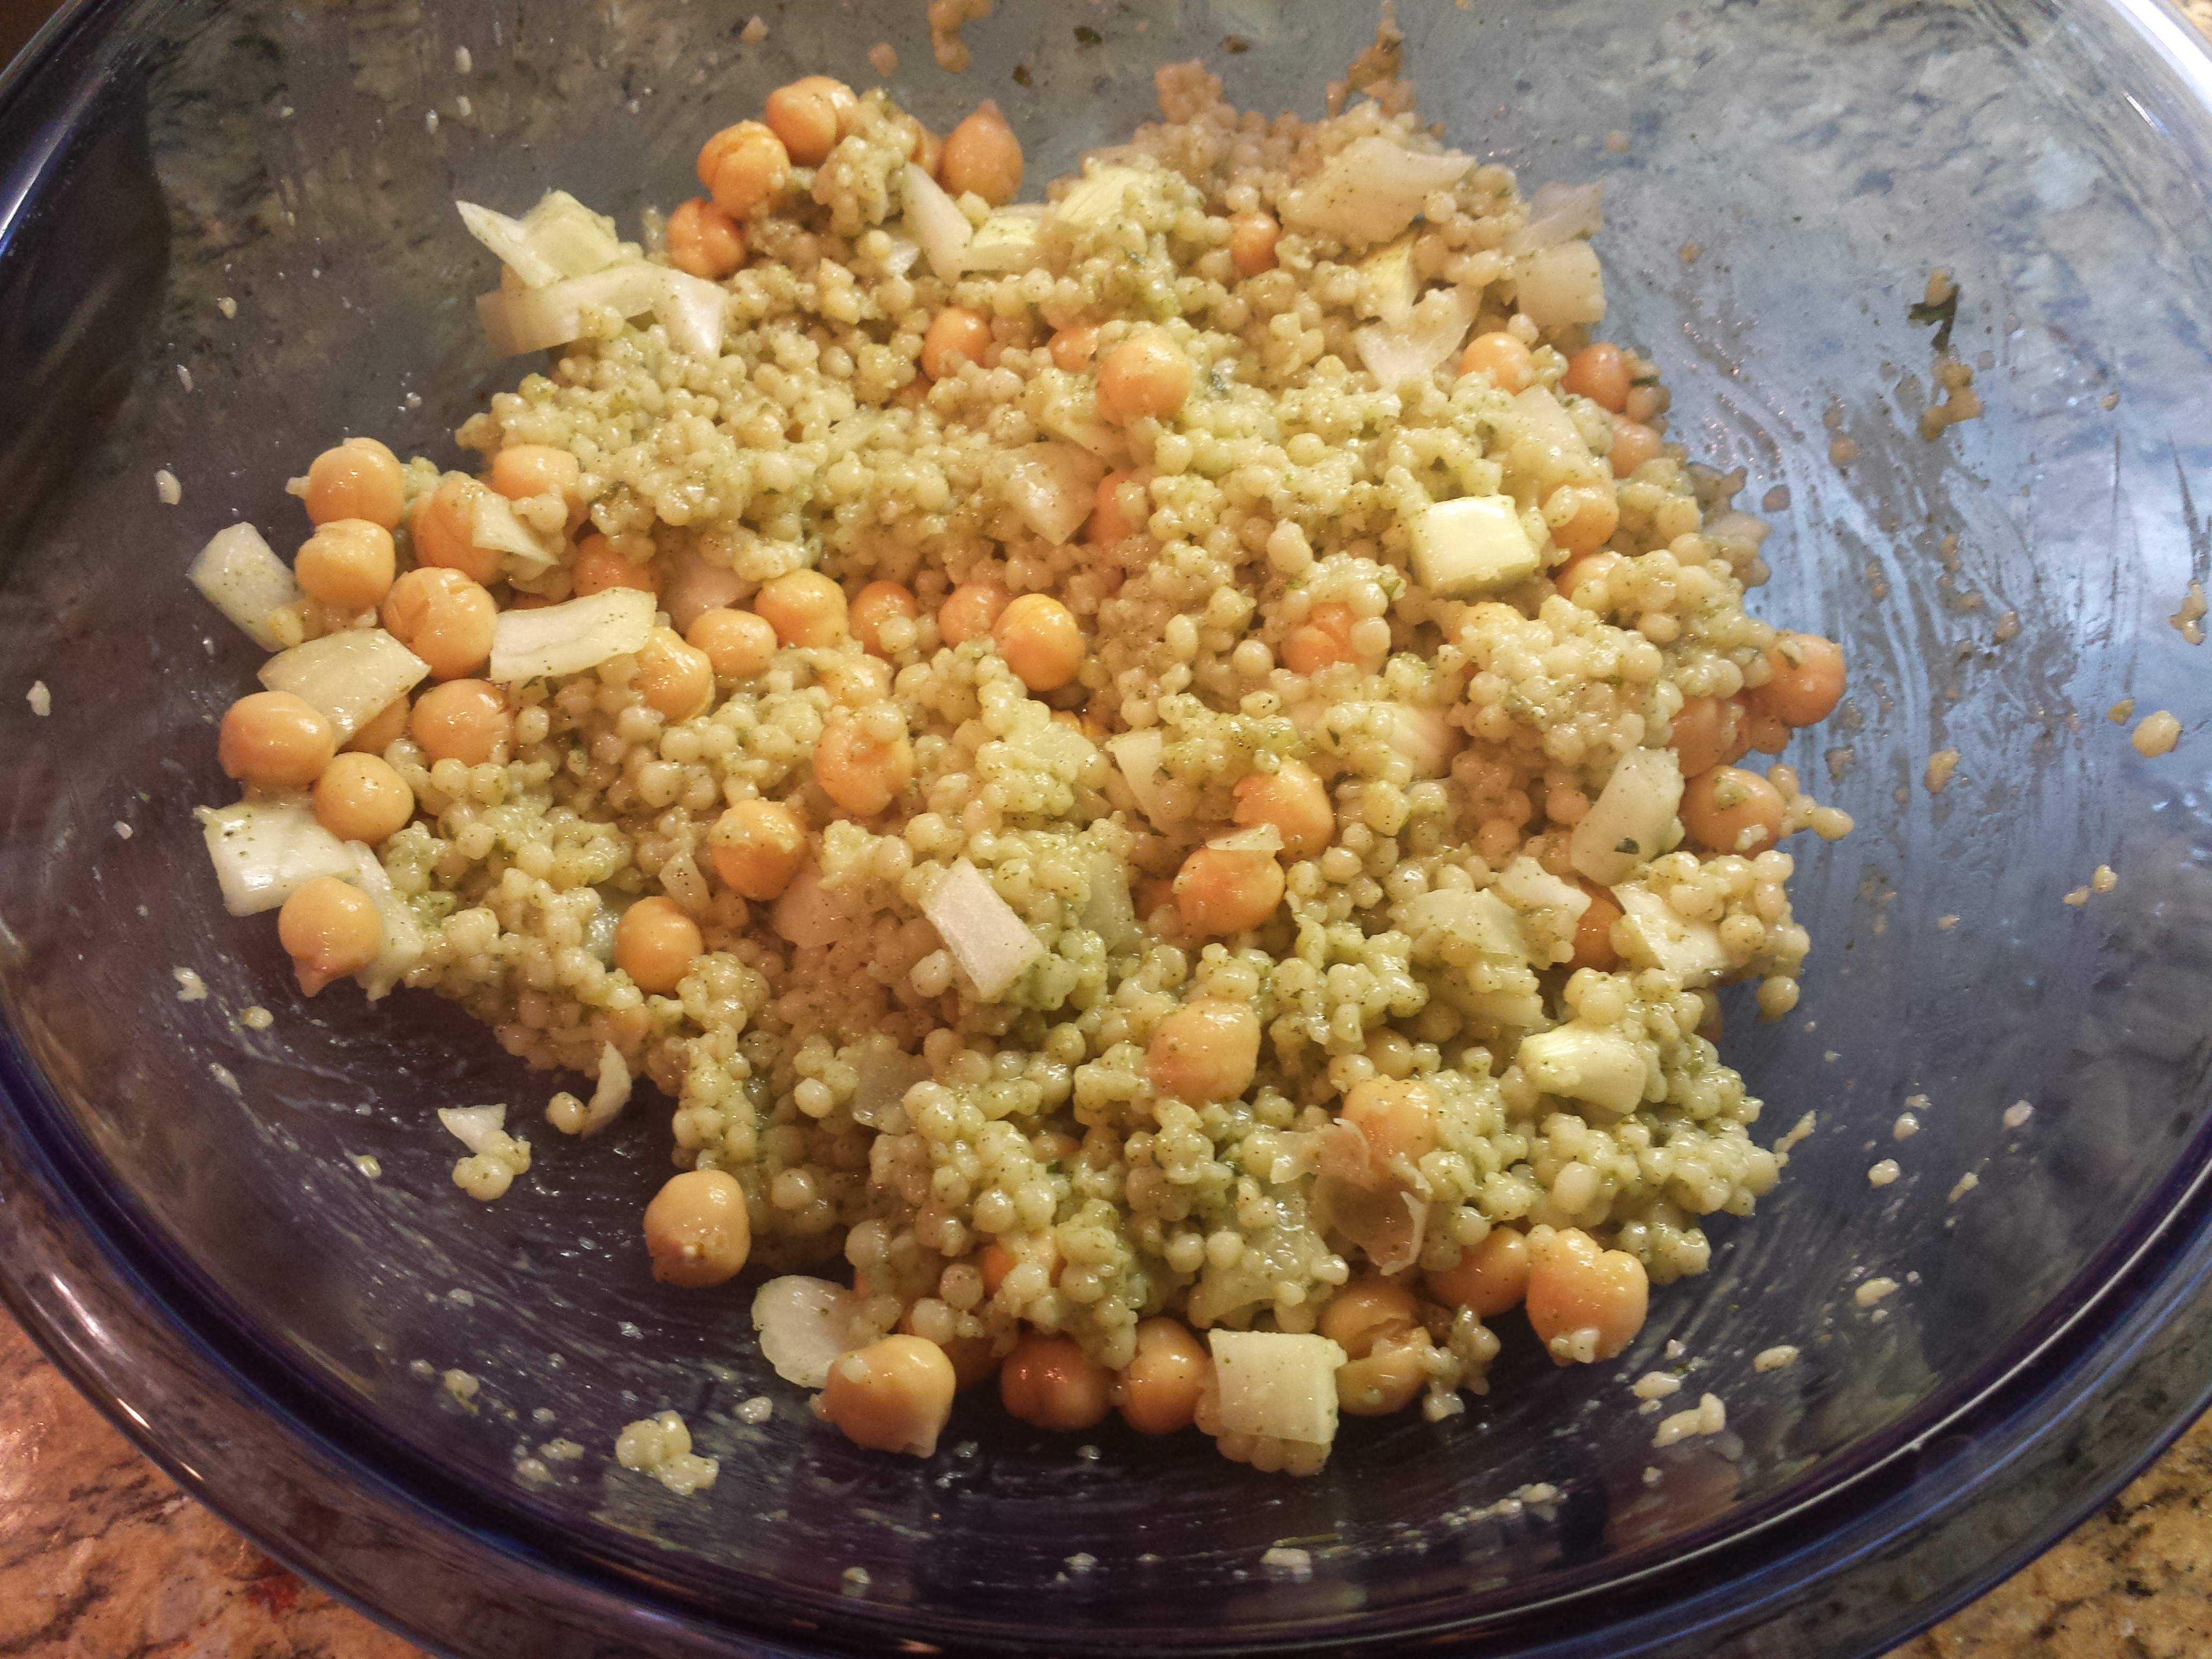
  • Flavored pearled couscous (my favorite is Basil and Herb) – follow cooking directions on the box and add 1 tsp of Lawry’s seasoning salt to it when you add the spice mix
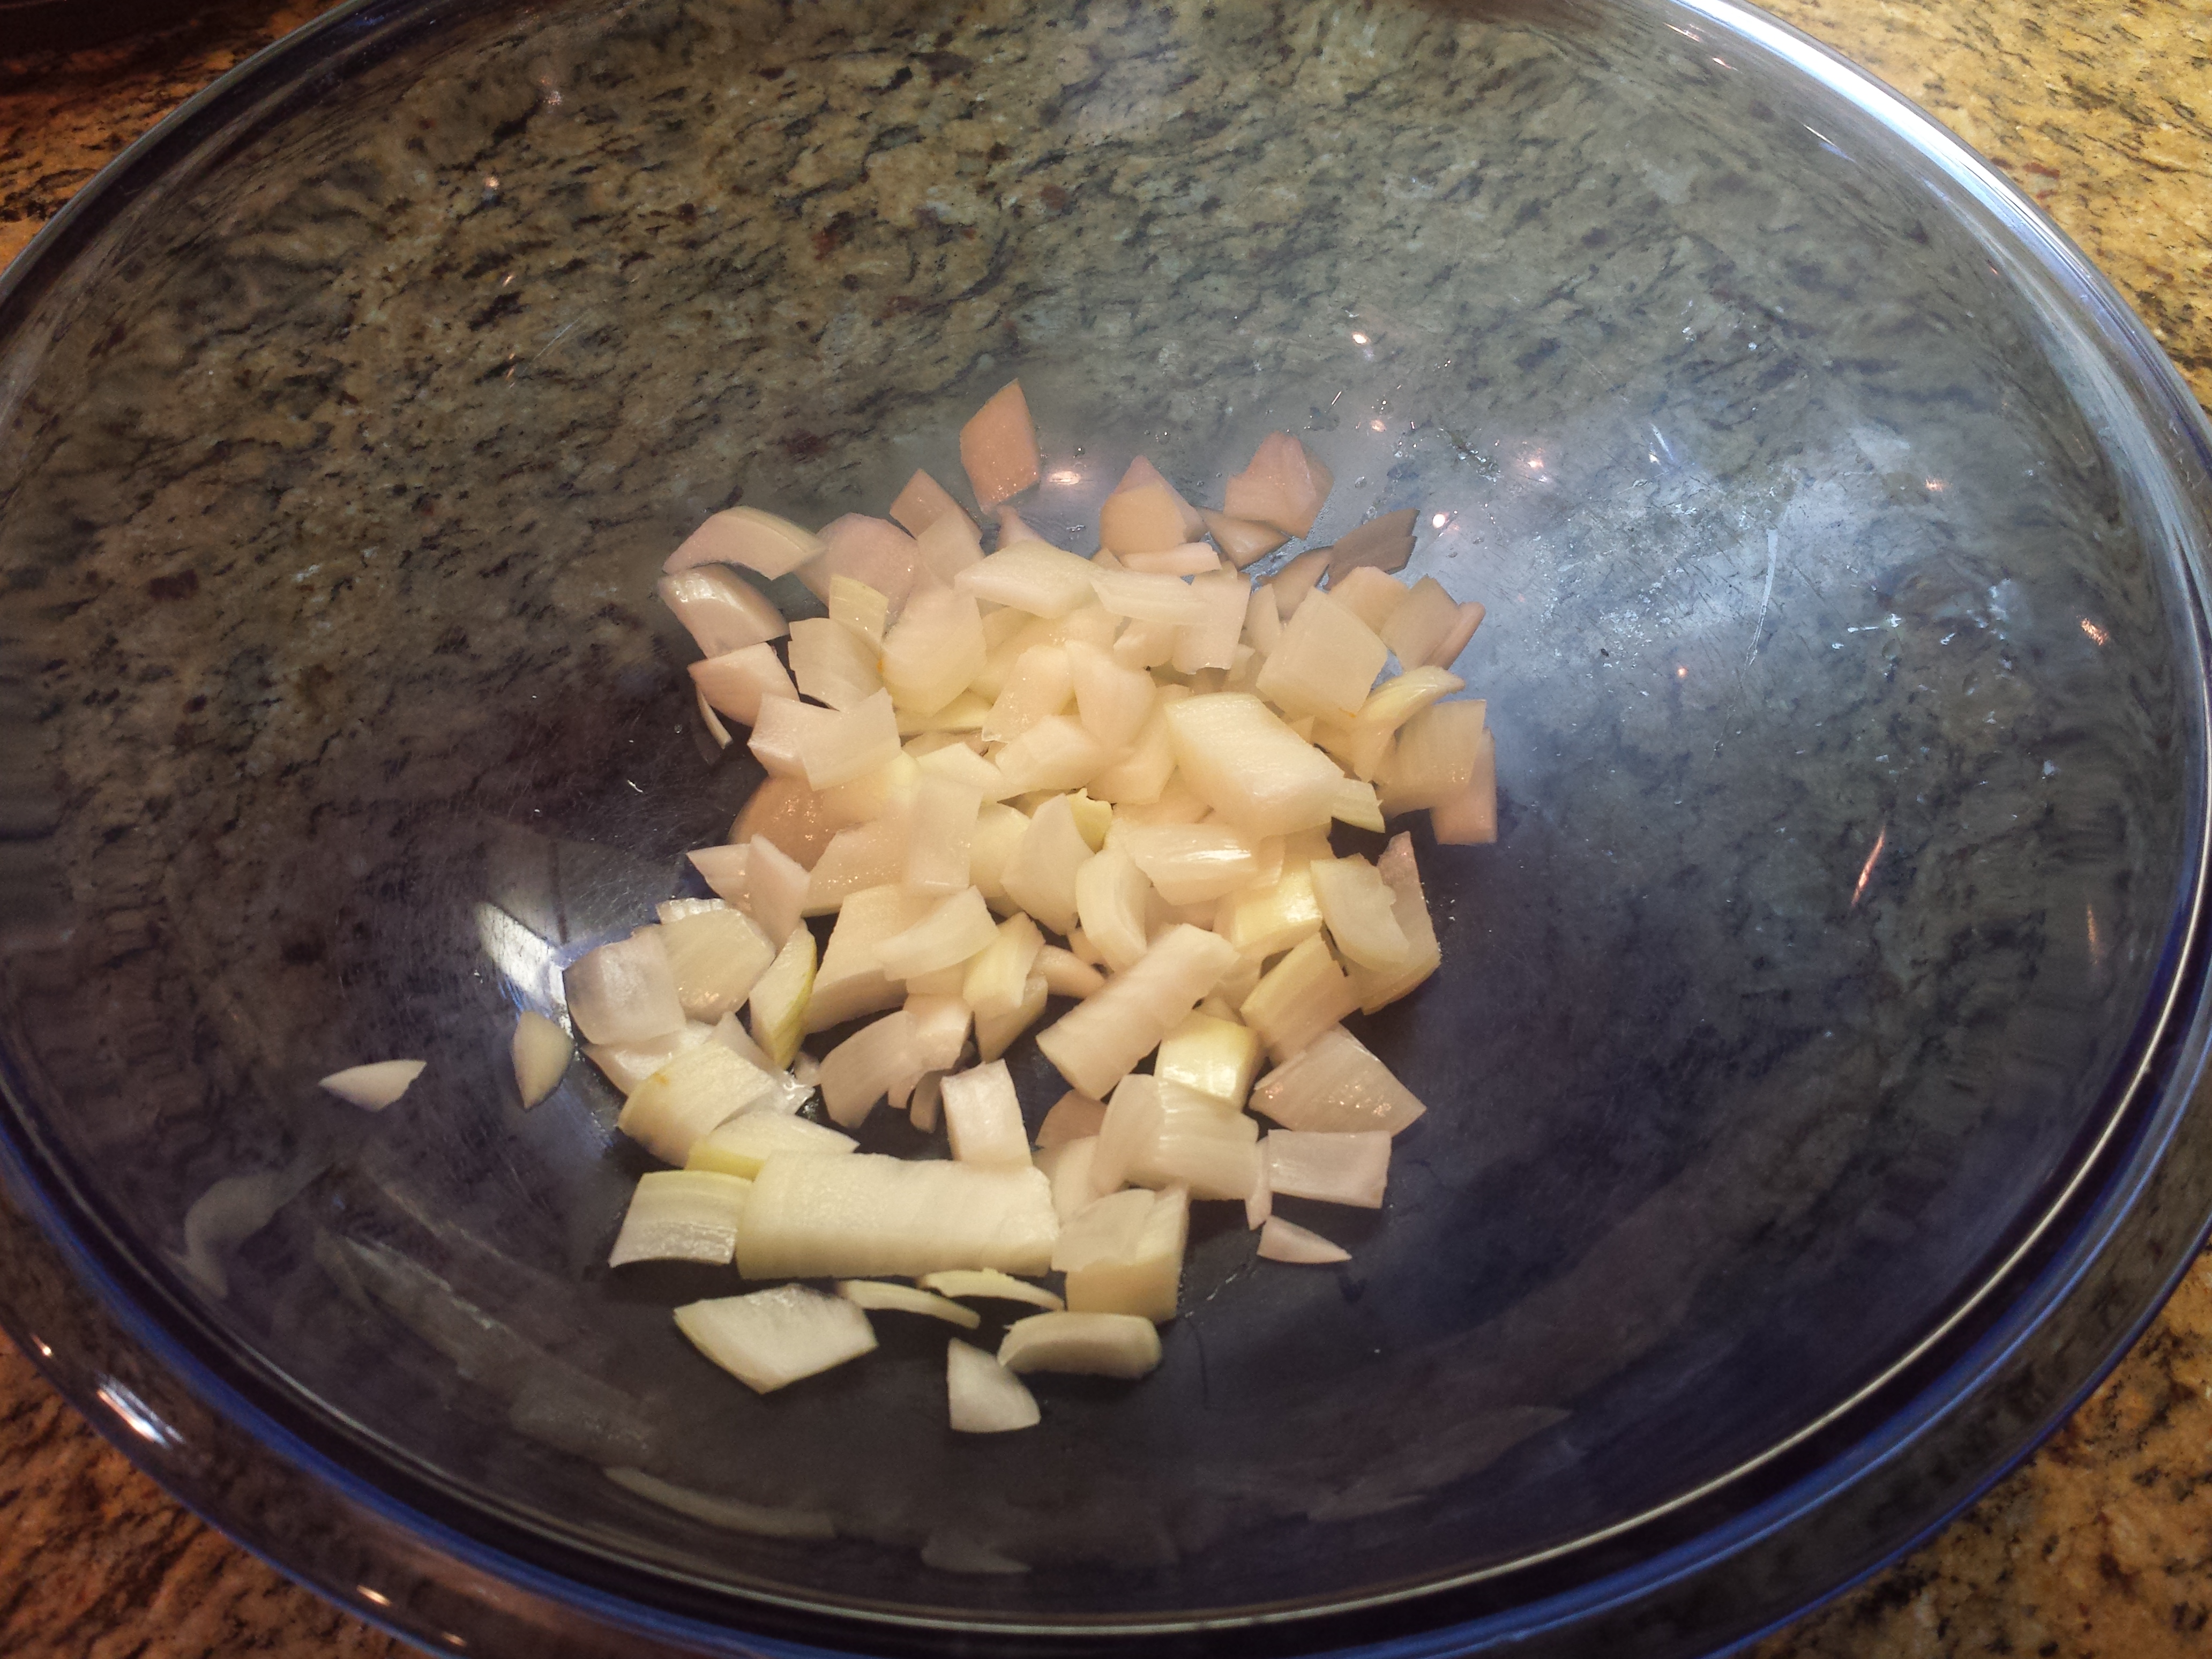
  • 1/2 large sweet onion, diced
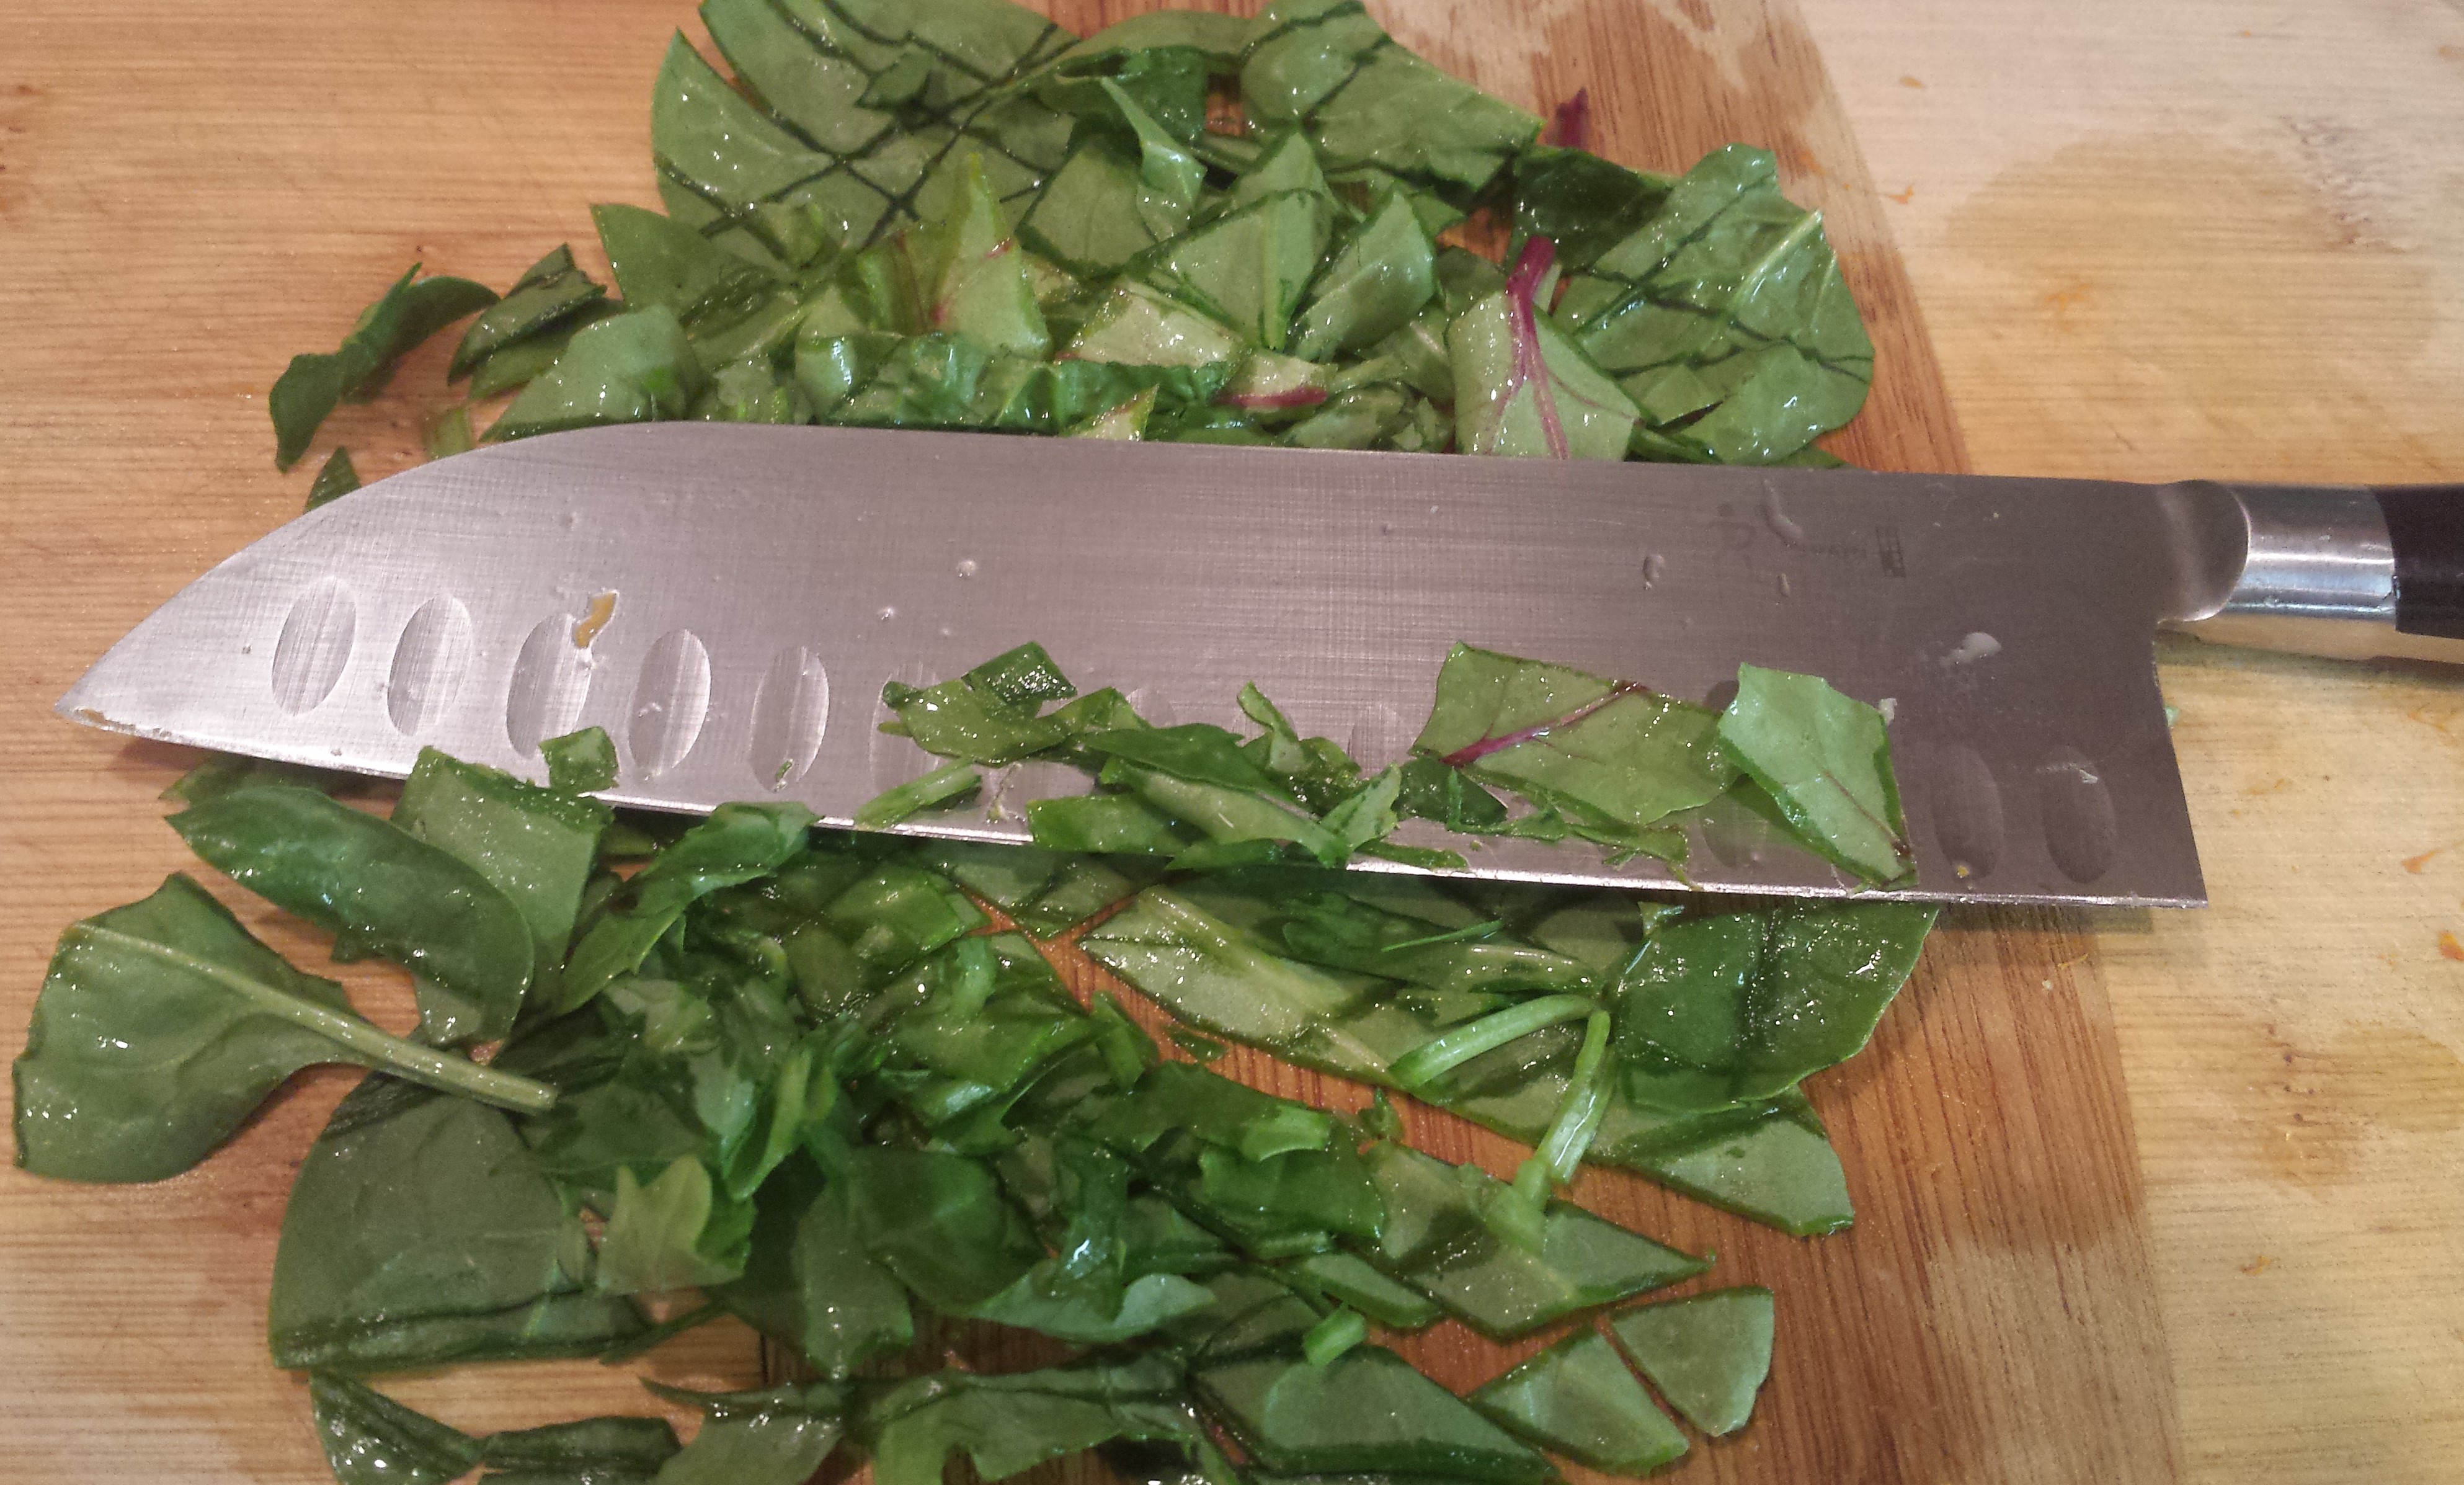
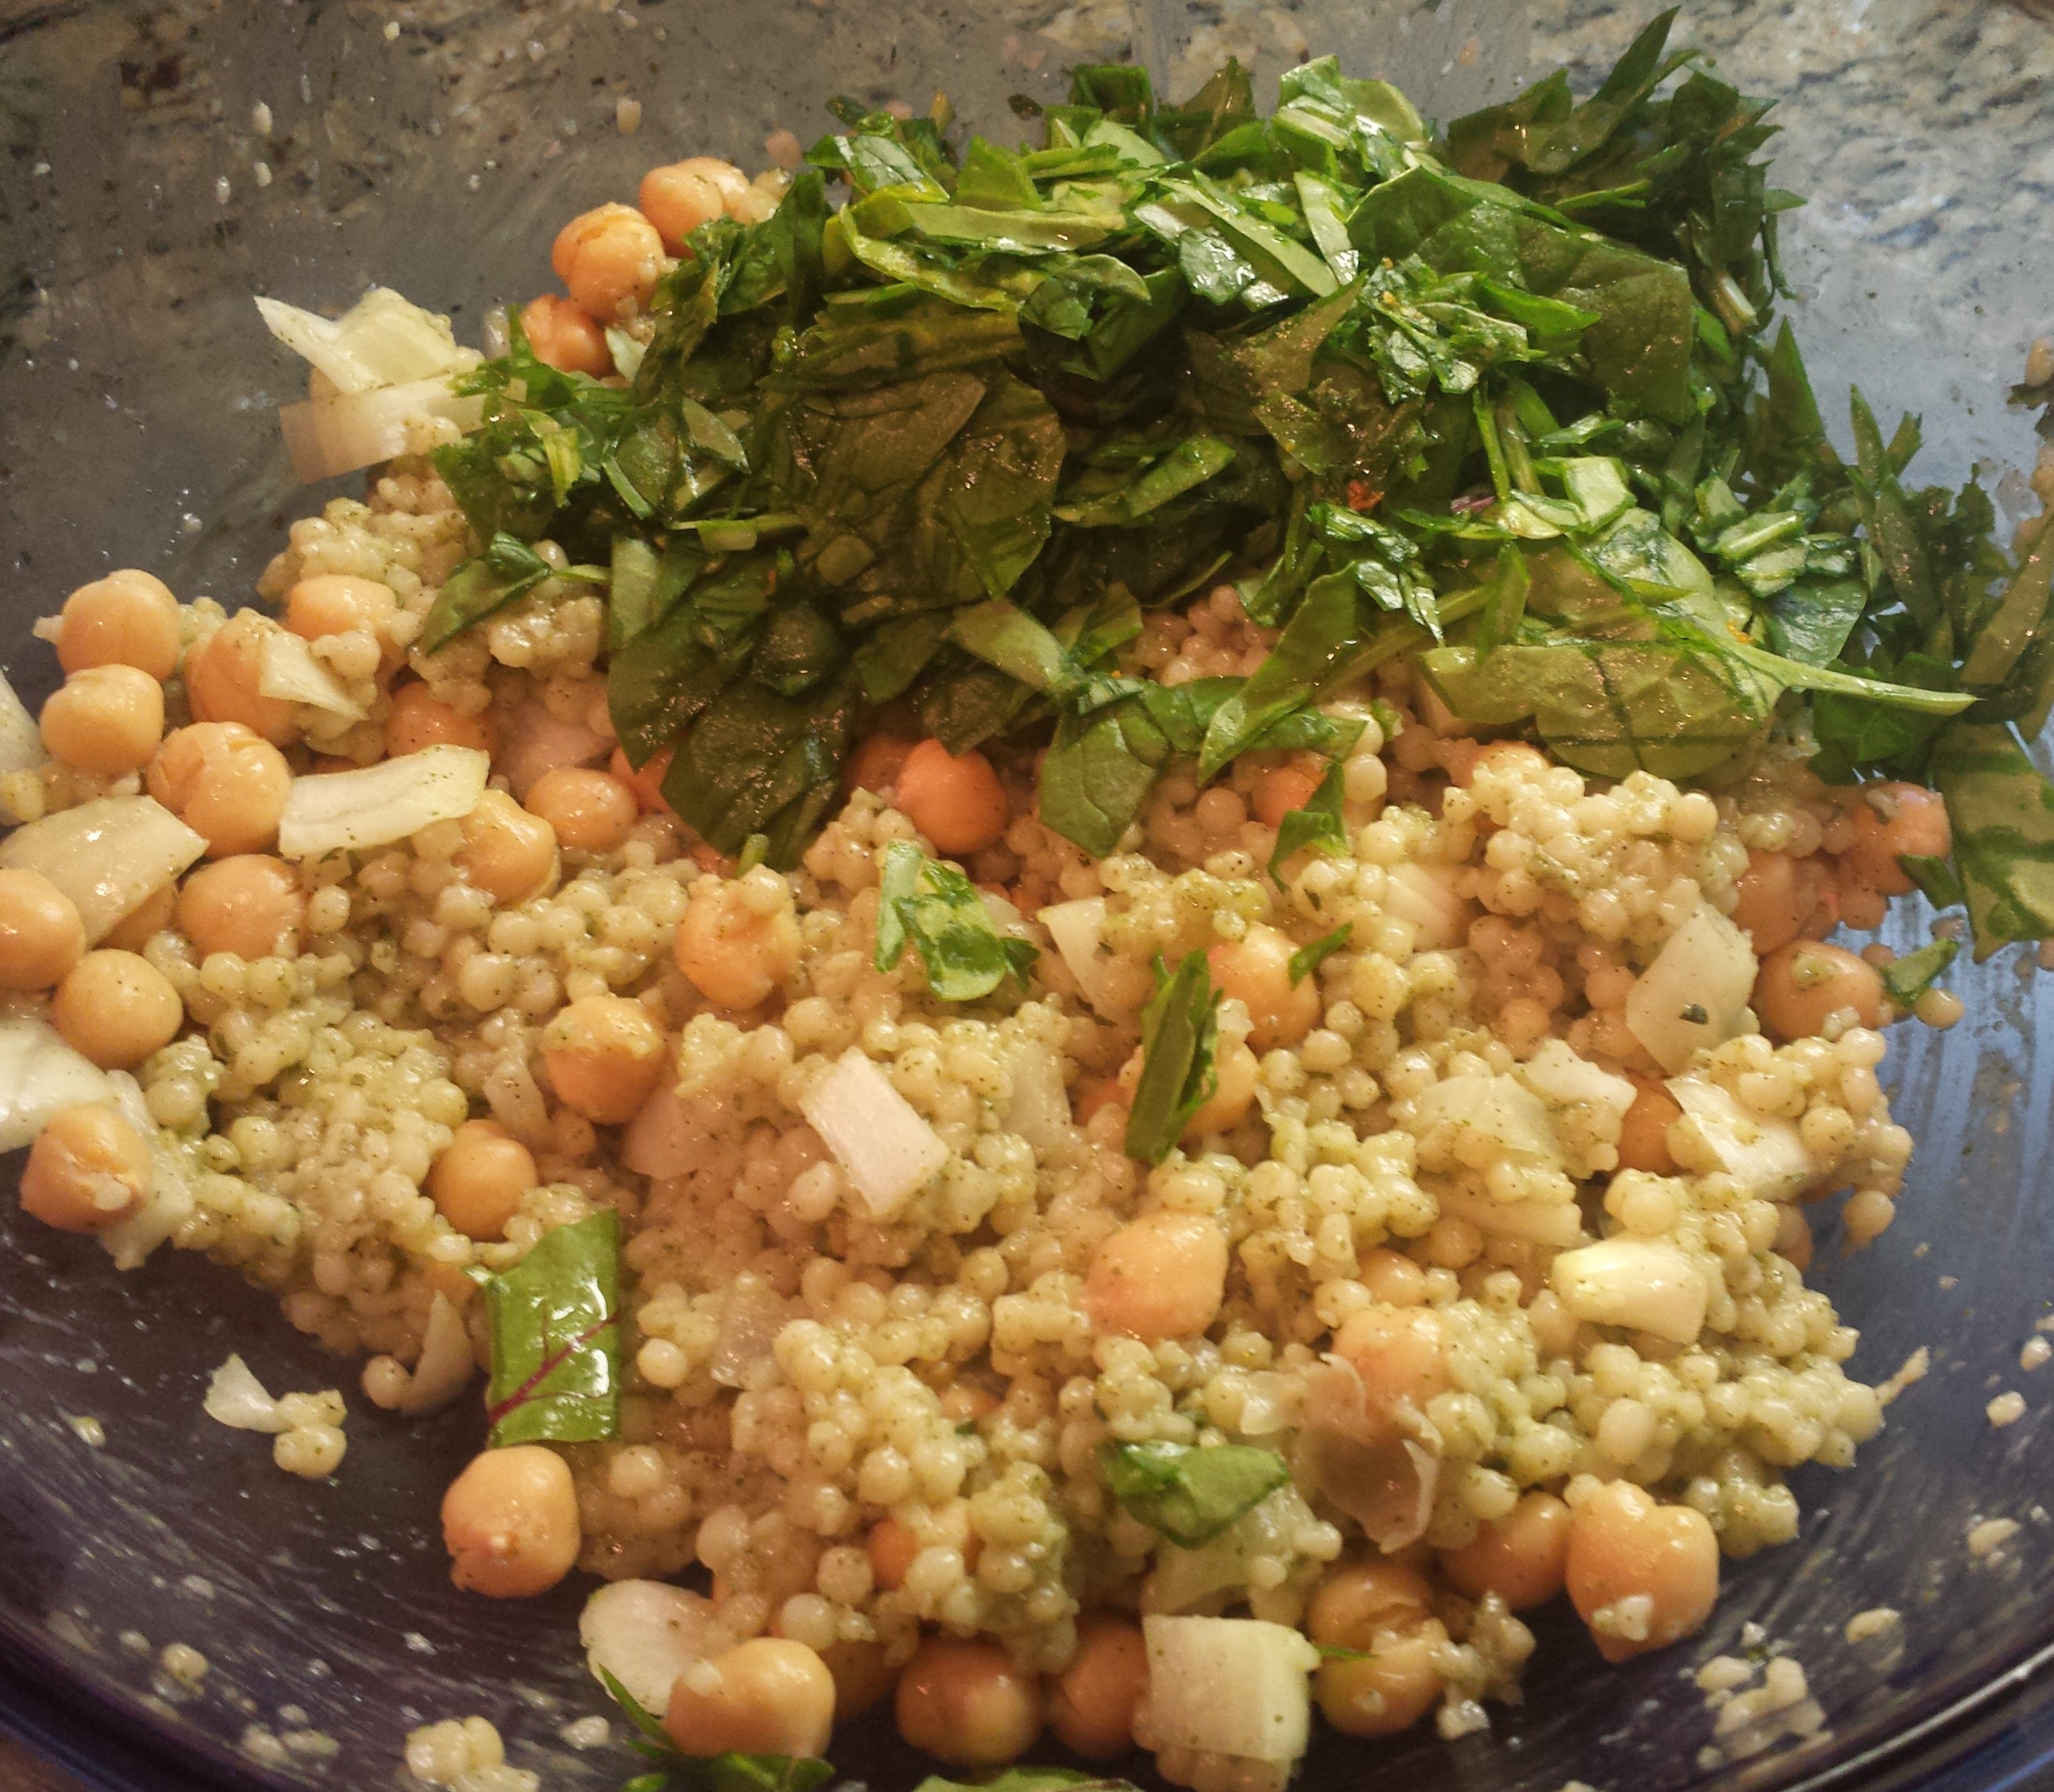
  • 5 oz (or as I use, 2 large handfuls) of kale or mixed greens, washed, de-stemmed and finely chopped
  • 1 can (15.5 oz) chickpeas/garbanzo beans, rinsed and drained

Instructions

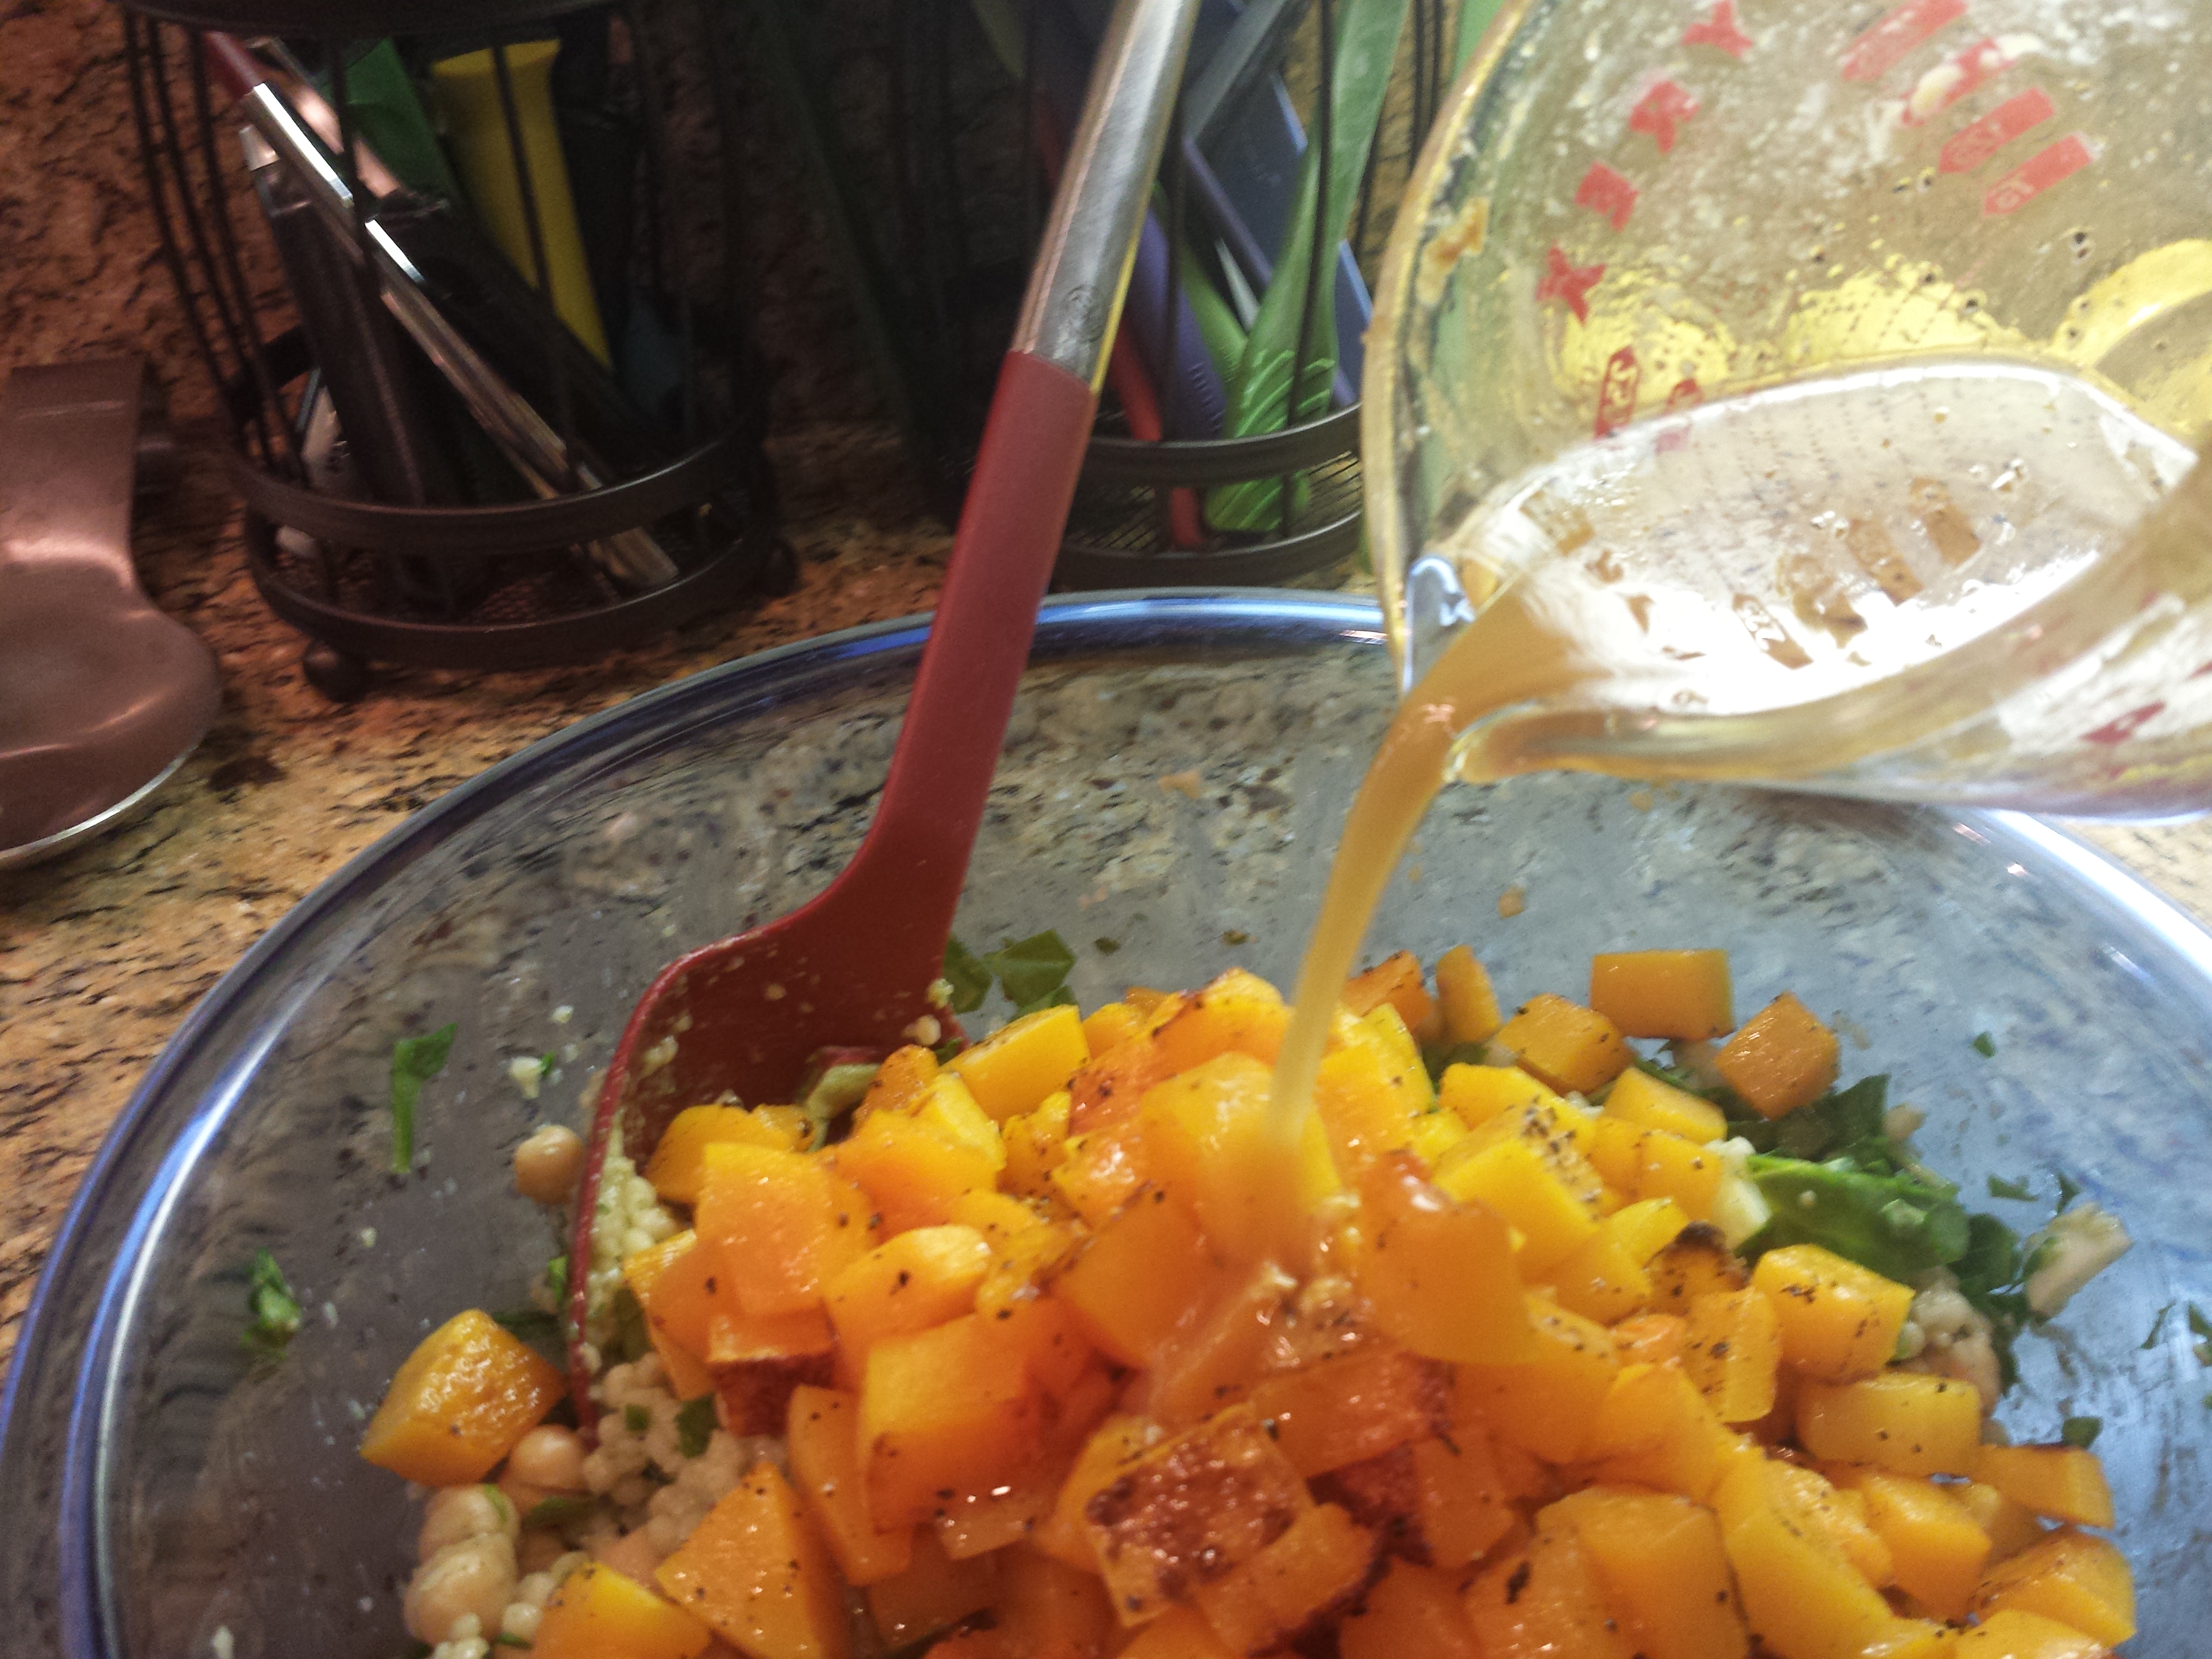
  • Whisk together all the dressing ingredients in a small bowl and set aside.20150730_203831
  • Preheat oven to 425 degrees F. Toss the cubed squash in a ziplock bag with the olive oil (less is more on the oil – I use less than the 2T above). Spread the squash in a single layer on an aluminum foil covered baking sheet. Sprinkle with salt and pepper. Roast the squash until tender and golden about 20 minutes. Toss halfway through. Cool.20150730_201650
  • Cook the couscous per directions on the box. Remove from heat and cool.
  • Put the onion in a small bowl and cook on high in the microwave for 30 seconds. This is just enough to make the onion a bit “milder” but not too long that the onion will lose its crunch. 20150730_202538
  • Start adding ingredients to a large bowl. My usual order is:
    1. Add onions
    2. Add couscous, mix
    3. Add garbanzo beans, mix
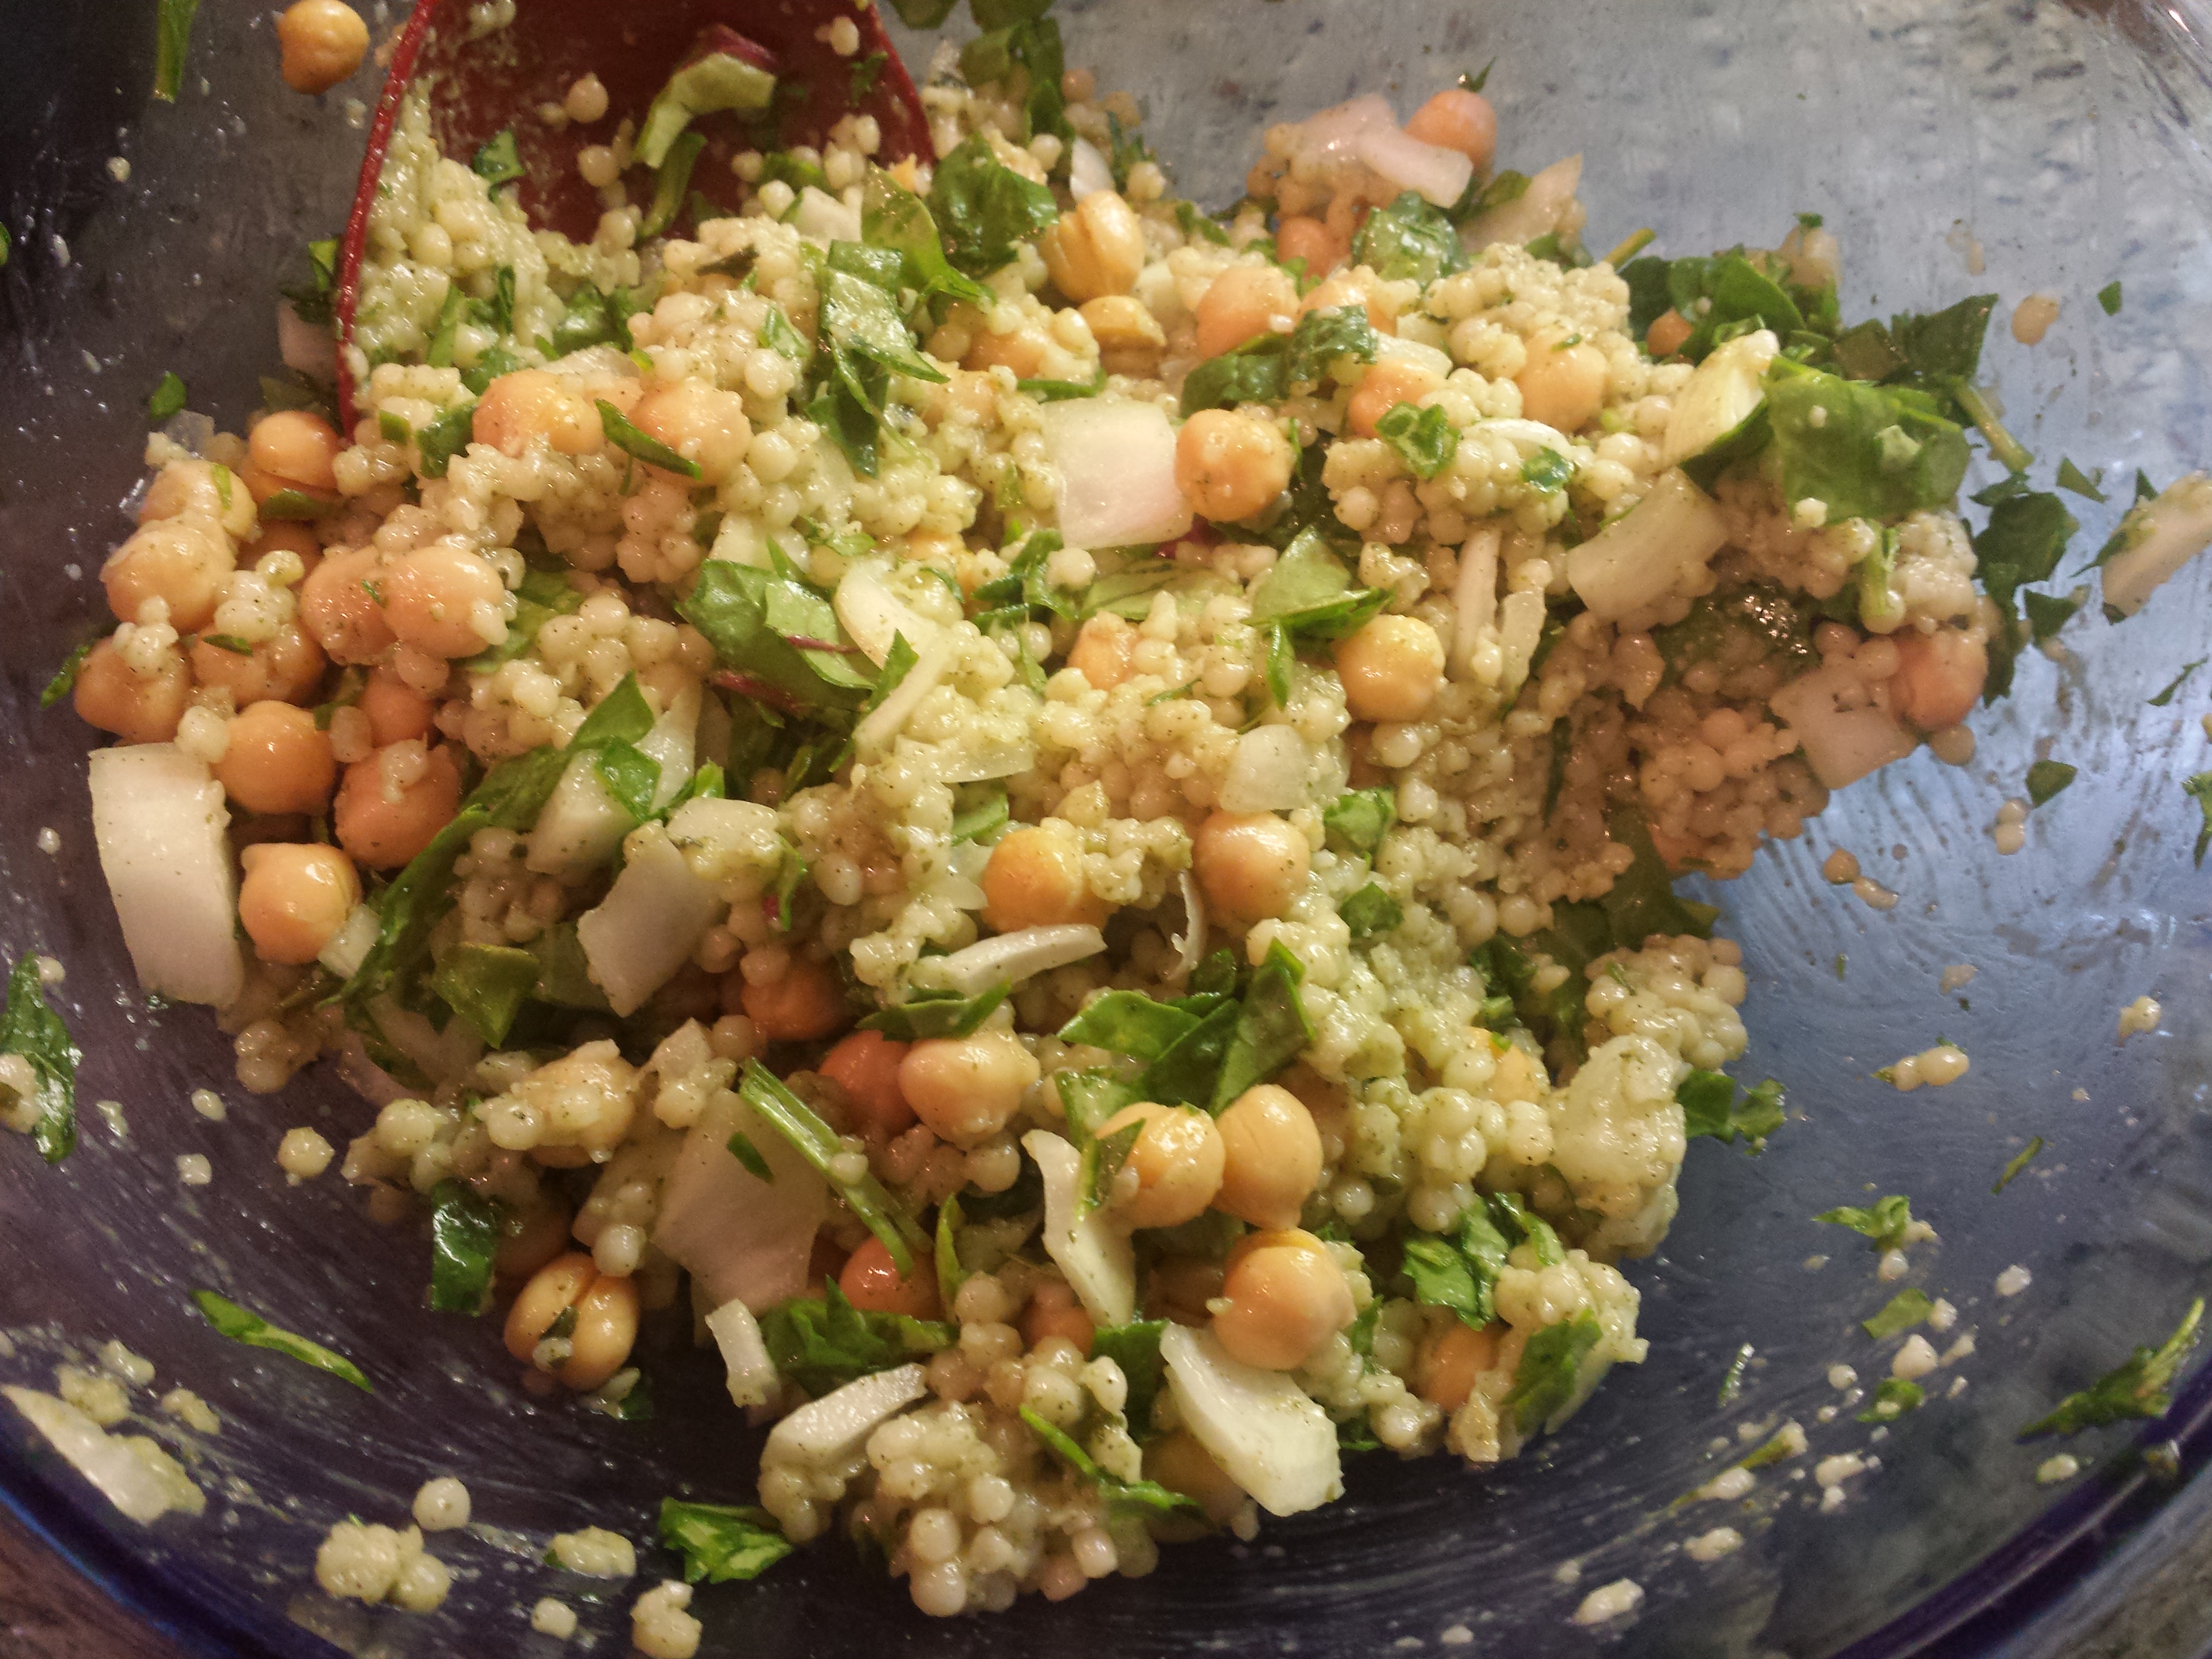
    4. Add kale/greens, mix
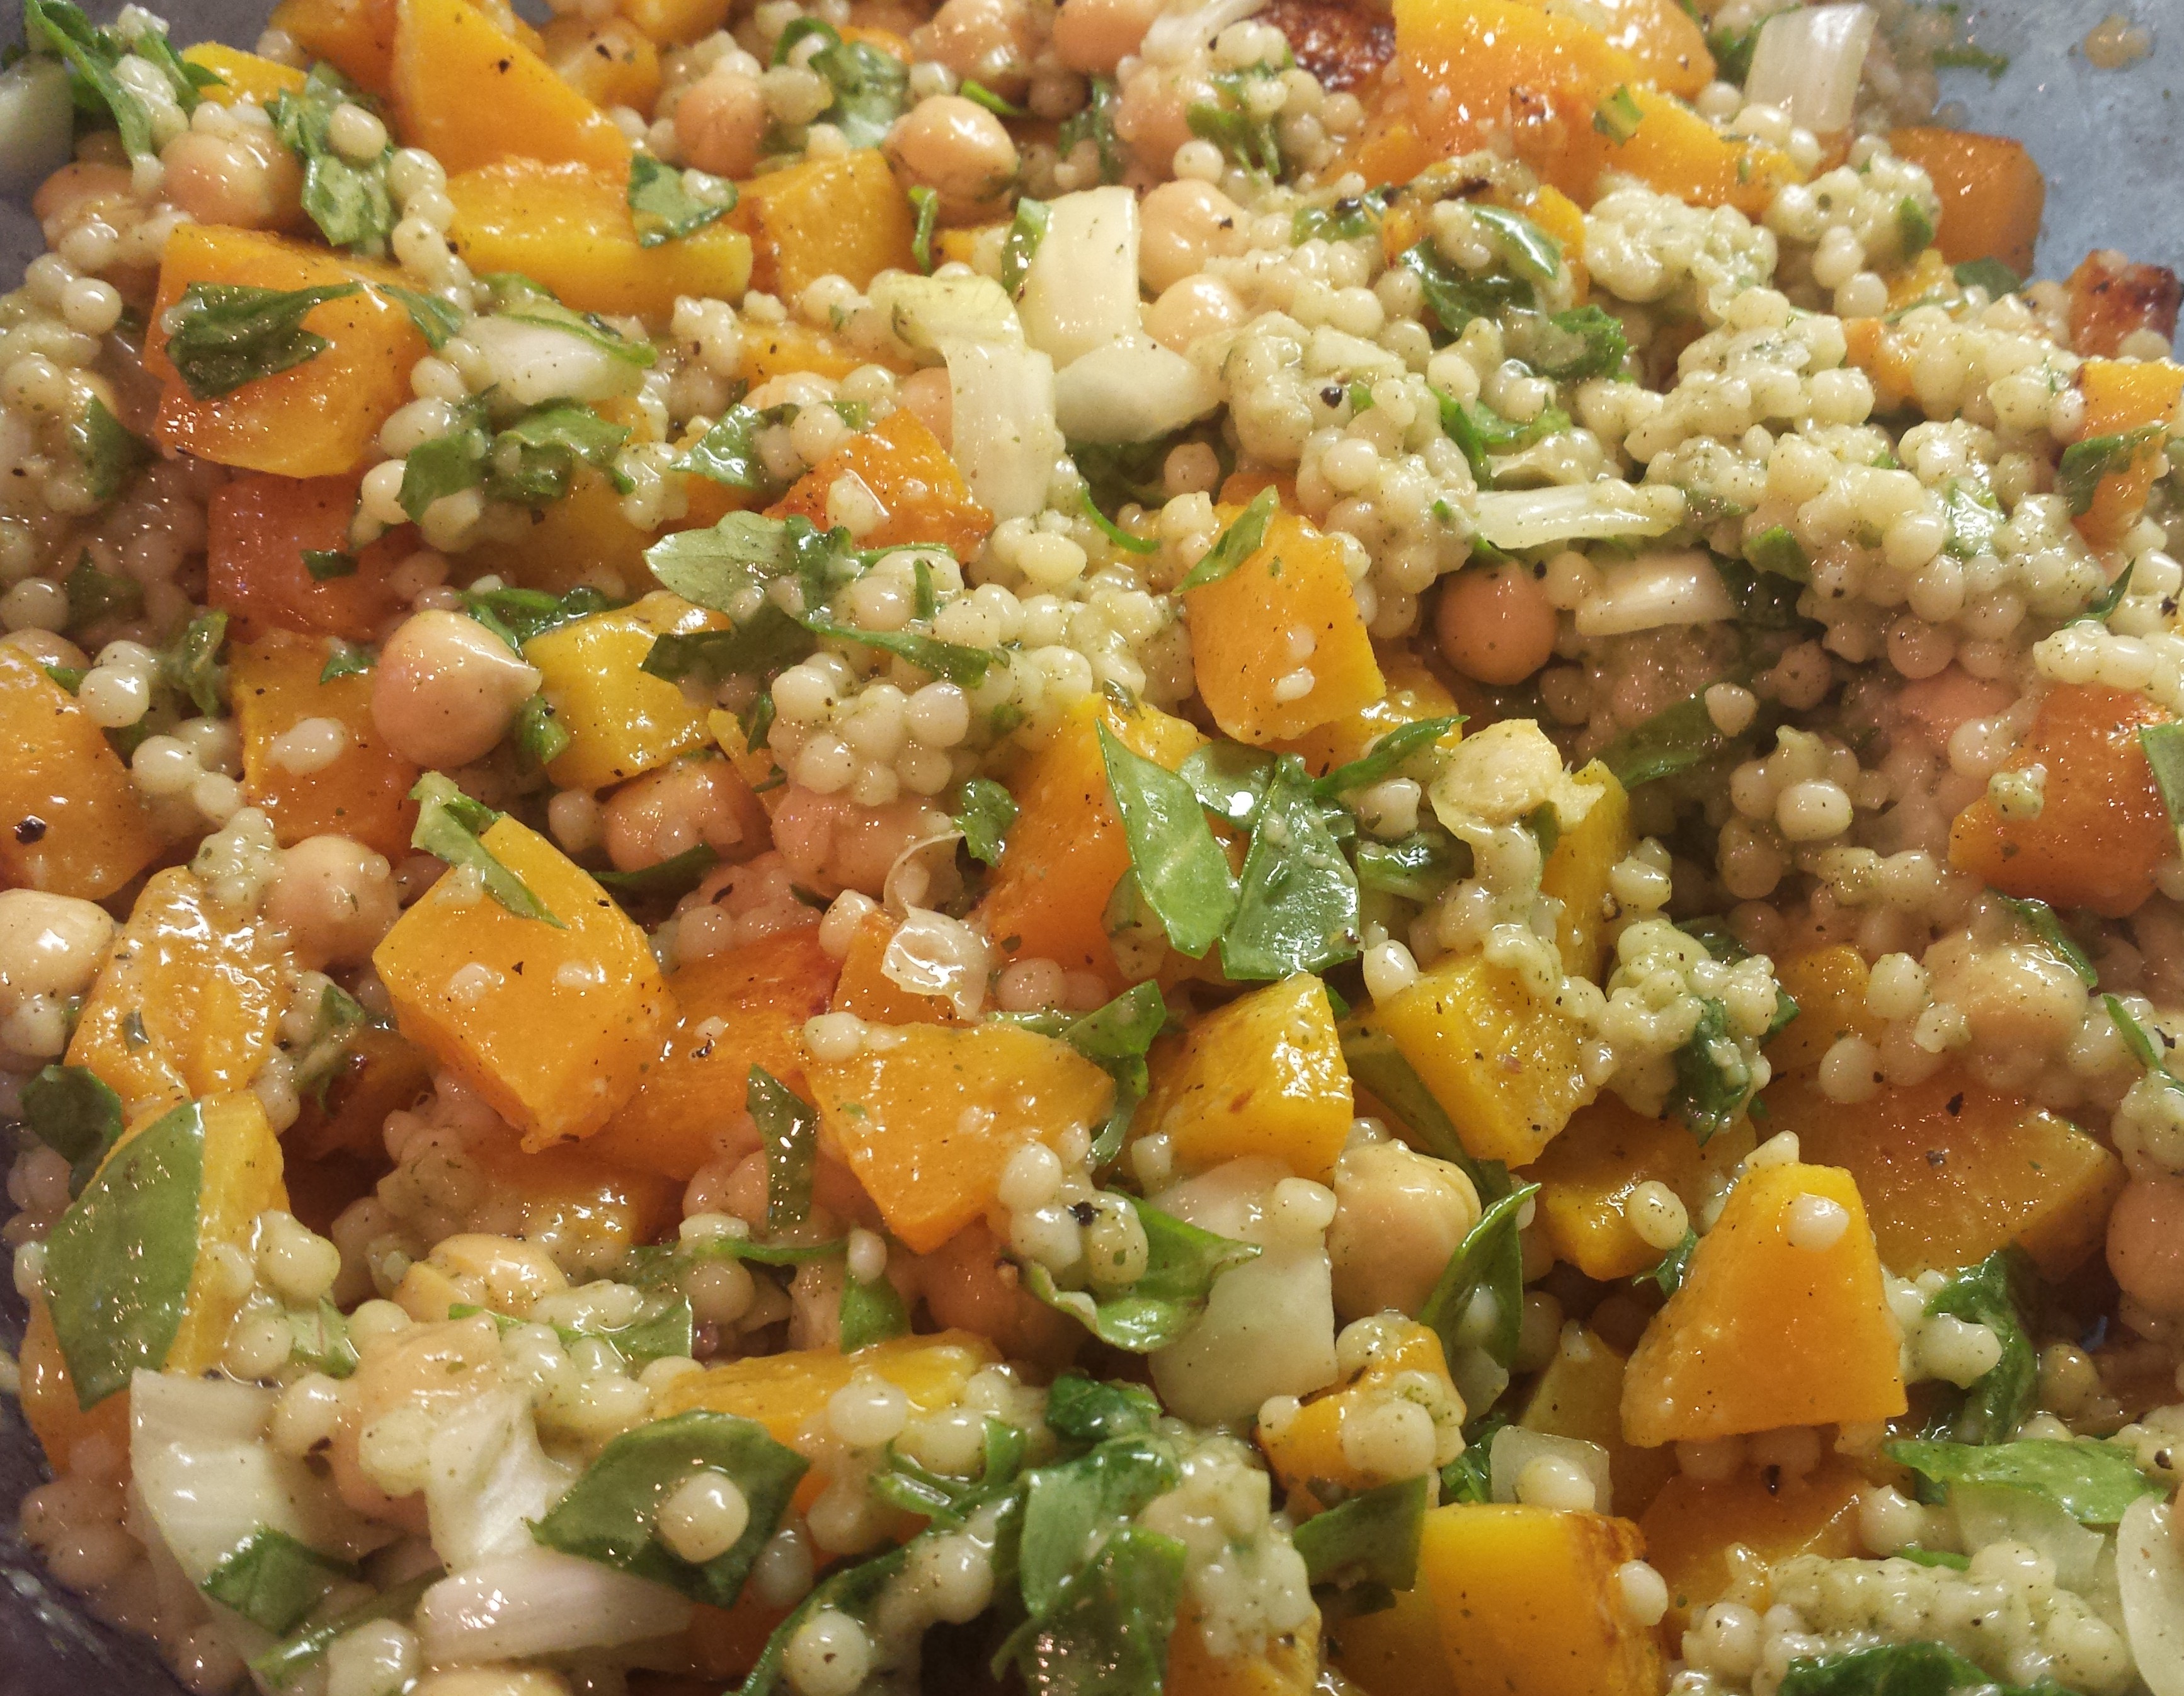
    5. Add squash and dressing, mix
20150730_204214
1. Add onions
20150730_204307
2. Add couscous
20150730_204532
3. Add garbanzo beans
20150730_204712
chop up the greens for 4
20150730_205024
4. Add greens
20150730_205049
Mix well
20150730_205355
5. Add butternut squash and dressing

You can serve this now, if you want. I prefer to make this the night before I plan to eat it as I like it cool from the refrigerator. It can keep in the frig up to 2 days.

20150730_205512
Enjoy!

Ideas

  • When picking a butternut squash, choose one just over 2 lbs. Better to have more than less. And really, roasted butternut squash is super delicious (and healthy), so why not have a bit more in your salad?
  • You can use whichever greens you prefer. Kale is recommended, but I love the Power Greens Blend from Costco.
  • Also, if you are missing any of these ingredients, the one I’d miss the least is the greens. Had to make it without then once and the salad was just as delicious, just not as colorful.

Go back

Your message has been sent

Warning
Warning

Warning.

What Every Home Cook Needs – Part 1 Essential Tools For Cooking

In writing this blog, I’ve received questions about what I use all the time in my kitchen. So, I thought I’d share with you my must haves for cooking simple and yummy food. This is the first of many posts to help you make your own versions of my recipes. Future topics listed at the bottom of this post. If I didn’t mention something you’d like to read more about, send me a comment and I’ll be sure to add it to the list.

Essential stove top items 

  • 3 non stick frying pans: 8″, 10″ and something larger
  • 1 large deep dish saute pan with cover
  • Cast iron skillet (with or without ridges) – mine has ridges, but does make it harder to clean
  • Dutch oven (essentially a big cast iron pot) – you’ve seen my red dutch oven in the albondigas soup and chicken fricassee recipes
  • 3 sizes of pots with lids
  • 1 extra large soup stock size pot with lid
  • Splatter cover

Essential counter top items

  • Blender – a nice one that can whip up an amazing smoothie, etc. – I have a Vitamix, but a Ninja or Blendtec is just fine – or one of those really great hand blenders
  • Crockpot – any size that works for your family
  • Rice cooker – you’ll thank me later
  • Pressure cooker – electric is my personal favorite because it’s easy for a novice to use and takes away the guess work… “is this at high pressure yet?” The capacity difference from the stove top versions shouldn’t be an issue for the average 3-5 person family.
  • Food saver – I use mine only a few times per month, but it makes sure you don’t get freezer burn when you buy meats and stuff (my “not so scientific terminology”) in bulk

Next issues: Spices, cooking utensils, serving, oven pans, taking the leftovers to work for lunch, baking, preserving

Chicken Fricassee

Chicken Fricassee was always something that I sort of liked, but felt was too greasy and too heavy. I liked the idea of it though. Last year I came across a great recipe that fixed those issues, but which I still felt could use a few modifications. Try my recipe below for a full-flavored fricassee that is minus the grease and very light on the lactose. It’s not a difficult recipe but does take a good hour to make. The time is well worth it as your family will really like it. Even my 5 year old loves the “soup” as she calls it and will eat a bowl of that without anything else.

You’ll note that I mention a large range in the amount of chicken. My family likes more “soup”, if you do as well, follow us. If you aren’t a fan of chicken thighs, feel free to use white meat instead. Just be careful on the cooking times as white meat can dry out pretty quickly.

20150721_182108

Ingredients

  • 2-4 lbs of boneless, skinless chicken thighs
  • Salt and pepper
  • 4 tsp vegetable oil
  • 4 T unsalted butter
  • 10 oz of button mushrooms, quartered (I prefer crimini)
  • 1 medium onion, minced
  • 2 large carrots (or as I call it, enough carrots equal the onions and mushrooms)
  • 3 garlic cloves, minced
  • 2 tsp minced fresh thyme
  • 3 T flour
  • ½ c dry white wine
  • 2-1/2 c chicken broth
  • 2 bay leaves
  • ½-2/3 cup of milk (I prefer 1%)
  • Frozen peas
  • 1/8 c T fresh lemon juice
  • Minced fresh parsley (optional)
  • Egg noodles, extra wide

Pat the chicken dry with paper towels and season with salt and pepper. Heat oil in a Dutch oven over medium-high heat. Add ½ the chicken (if using 2 lbs, it should all fit in now) and cook until golden on both sides, about 10 minutes. Transfer chicken to a plate. Pour off fat from Dutch oven as needed. Repeat process to brown the rest of the chicken.

20150721_182605
Salt and Pepper Seasoned Chicken Thighs
20150721_182845
Chicken Thighs in Pot
20150721_184518
Cooked chicken


20150721_183938
Chopped Vegetables
20150721_184629
Vegetables in the Pot

Pour off any leftover grease in the pot. Add the butter and heat over medium until melted. Add the mushrooms, onions, carrots and ¼ tsp of salt. Cook until the vegetables are brown, about 10 minutes.

Stir in the garlic and thyme. Then stir in the flour until it is well mixed with the vegetables. Add the wine and scrape up any browned bits on the bottom of the pot. Add the broth and bay leaves. Place the chicken and any accumulated juices into the pot.

20150721_185518
Garlic and Thyme
20150721_185606
Flour Added
20150721_185628
Wine Added
20150721_185758
Broth and Bay Leaves Added

Cover and simmer until the chicken is tender, about 30 minutes.

While chicken is simmering, boil water in a medium pot and cook some extra wide egg noodles.

Transfer chicken a dish and cover with foil.

Add the milk to the sauce plus ~ 1 cup of frozen peas and simmer about 5 minutes (longer for a thicker sauce). Season with salt and pepper per your taste (I don’t usually add any now, but some like to). Remove the bay leaves. Stir in lemon juice (per taste – I like a little more, but be careful you do not add too much).

20150721_193121
Plus Chicken – Ready To Simmer
20150721_193422
Final Cooking Time

Put egg noodles in the bottom of a shallow bowl. Place chicken on top. Then ladle the sauce over both. Sprinkle parsley on top (optional) and eat.

Enjoy!

Go back

Your message has been sent

Warning
Warning

Warning.

Quick and Easy Waffles

I wasn’t planning on putting up more than one post a week, but at the beginning of a blog, it seems a bit sad to have only one recipe posted. One of my family’s favorite weekend breakfast is waffles. My husband purchased us (me, really) a waffle iron a few years ago and I went on the search for the perfect waffle recipe. By perfect, I mean delicious, repeatable, fast and super easy. This recipe is all those things. If you don’t have a stand-mixer, it’s a little less easy though, but do not skip whipping the egg white. This is what gives your waffles a light and fluffy texture.

Ingredients

  • 2 cups of Bisquick waffle mix20150716_192416
  • 1-3/4 cups of milk (2% is my favorite)
  • 2 T vegetable oil
  • 1 egg
  • 1 tsp vanilla extract

Directions

  • Separate egg. Put whites in a bowl and whip until peaks form (a loose meringue is perfect).20150716_193145

20150716_193203

  • Add all other ingredients into a separate bowl and whisk together. When egg whites are ready, fold in.
  • Measure correct amount of batter for your waffle iron. 20150716_193516
  • Spray waffle iron with non-stick spray.

20150716_194222

  • Add batter (and berries, if you like them, which I do but the rest of my family does not).
  • Cook and serve.

20150716_194819

Go back

Your message has been sent

Warning
Warning
Warning
Warning

Warning.

Albondigas Soup (Mexican Meatball Soup)

This simple soup is full of complex flavors to delight any palette. Make it as spicy (hot) as your family prefers, but try my standard recommendation first.

Albondigas Ingredients

Broth Ingredients

  • 1 medium/large onion, finely chopped
  • 14 oz. can of chopped or diced tomatoes
  • 1/2 chipotle chili canned in adobo sauce (1/2 a chili, not 1/2 a can), mashed or finely chopped
  • 28 oz. of chicken broth
  • 28 oz. of beef broth
  • 2 cloves garlic, pressed or diced fine
  • 2 tsp oregano
  • Salt (if needed for flavor)
  • Cilantro

Meatballs

  • 1 lb lean ground beef
  • 1/2 lb ground pork
  • 1/3 cup uncooked rice
  • 1 egg
  • 1 clove garlic, pressed or diced
  • 1/2 chipotle chili (the other half from the broth), mashed or finely chopped
  • 1 T adobo sauce from the chilies
  • 1 tsp oregano
  • 1 T salt
  • Pepper

Other

  • Gloves
  • 1 cup of rice

OnionsDutch OvenStart by heating about 2 T of olive oil in a dutch oven.

Saute the onion until softened and they start to brown a bit (7-8 minutes).

Add the tomatoes and cook another 5-6 minutes. 
Oregano-Garlic-Chili Simmer timeThen add the garlic, the chili and oregano. Stir to distribute about 45 seconds.

Add the broths and reduce heat to simmer. Cover, leaving a small gap at the edge of the pot.

Cook for about 20 minutes. During this time, you will make the meatballs.

Mix together all the meatball ingredients and form small balls (see picture below, right). Think of these as the size you would want on your soup spoon without necessitating splitting them in half to eat. Wear gloves – no one wants uncooked meat residue on their hands.

Meatball Ingredients Ready to make meatballs Meatballs

After the broth has cooked for 20 minutes, drop in the meatballs. Simmer for another 20 minutes and it’s ready to eat.

Ready to simmer with meatballs Adding Meatballs3

Check the meatballs to make sure they are cooked, by cutting one open. 5 minutes before serving toss in about 1/3 of a bunch of cilantro, coarsely chopped with stems. Alternatively, finely chop cilantro and garnish soup (per my picture).

Cook rice (takes about 20 minutes) in rice cooker or on top of stove, per your preference.

cropped-20150714_1948511.jpg

Serving tips

  • Place about 1/2 cup of cooked rice in bowl. Ladle soup over rice. Sprinkle chopped cilantro on the top.

Recipe tips

  • For lesser spice, do not use a smaller amount of the chili or adobo sauce as you will lose flavor. Either add additional broth (chicken and beef) and tomatoes to the overall recipe (and everyone will have a less spicy soup) or have extra warmed up broth (minus the tomatoes) on the side, so people can add to their soup individually.
  • You can use canned beef and chicken broth. I prefer the powdered as it dissolves quickly and is easily scaled up to make more for those who need a less spicy soup.

Go back

Your message has been sent

Warning
Warning

Warning.

Welcome and Happy Eating

Welcome to the Not So Scientific Gourmet blog where it’s all in the name except for when it isn’t. I work in science and my coworkers keep asking for my recipes. They suggested something scientific. On the other hand, the way I create (aka cook) is more from instinct than science. Hence the name, Not So Scientific.

Enough about the name and more about why you want to read this on a weekly-ish basis. I’ve been cooking ever since I can remember, why don’t we just say for over 30 years, and I love it. Cooking is not only about making something delicious that my family can enjoy but also about perfecting recipes that seem perfect already, but really aren’t. In keeping with Chef Gusteau from Ratatoullie, “Anyone can cook”, which is true, but also anyone can tweak and perfect recipes to the personal preferences of themselves and their families.

Each week, I will post one of the recipes that people keep asking me for. Try it out yourself. Let me know what you think and send me your ideas for what you want to taste next.