Stuffed Mushrooms

For the mushroom lover, stuffed mushrooms can be the ideal appetizer just about any time. As for me, I love to get the cremini mushroom container from Costco at least once a month. Usually, I’m planning to make some pasta sauces, chicken fricasse or maybe a chicken marsala. Every so often though, I just want to have some stuffed mushrooms. For instance, today is Christmas and my mother was over. She loves mushrooms as much as I do. Our menu was light on vegetables so this was the perfect excuse (as if I really need one) for stuffed mushrooms. There is nothing difficult about making these tasty tidbits, but they are a little time consuming and do take some work. However, your taste buds will tell you that it’s worth it. Happy eating!

Ingredients 20151225_124052

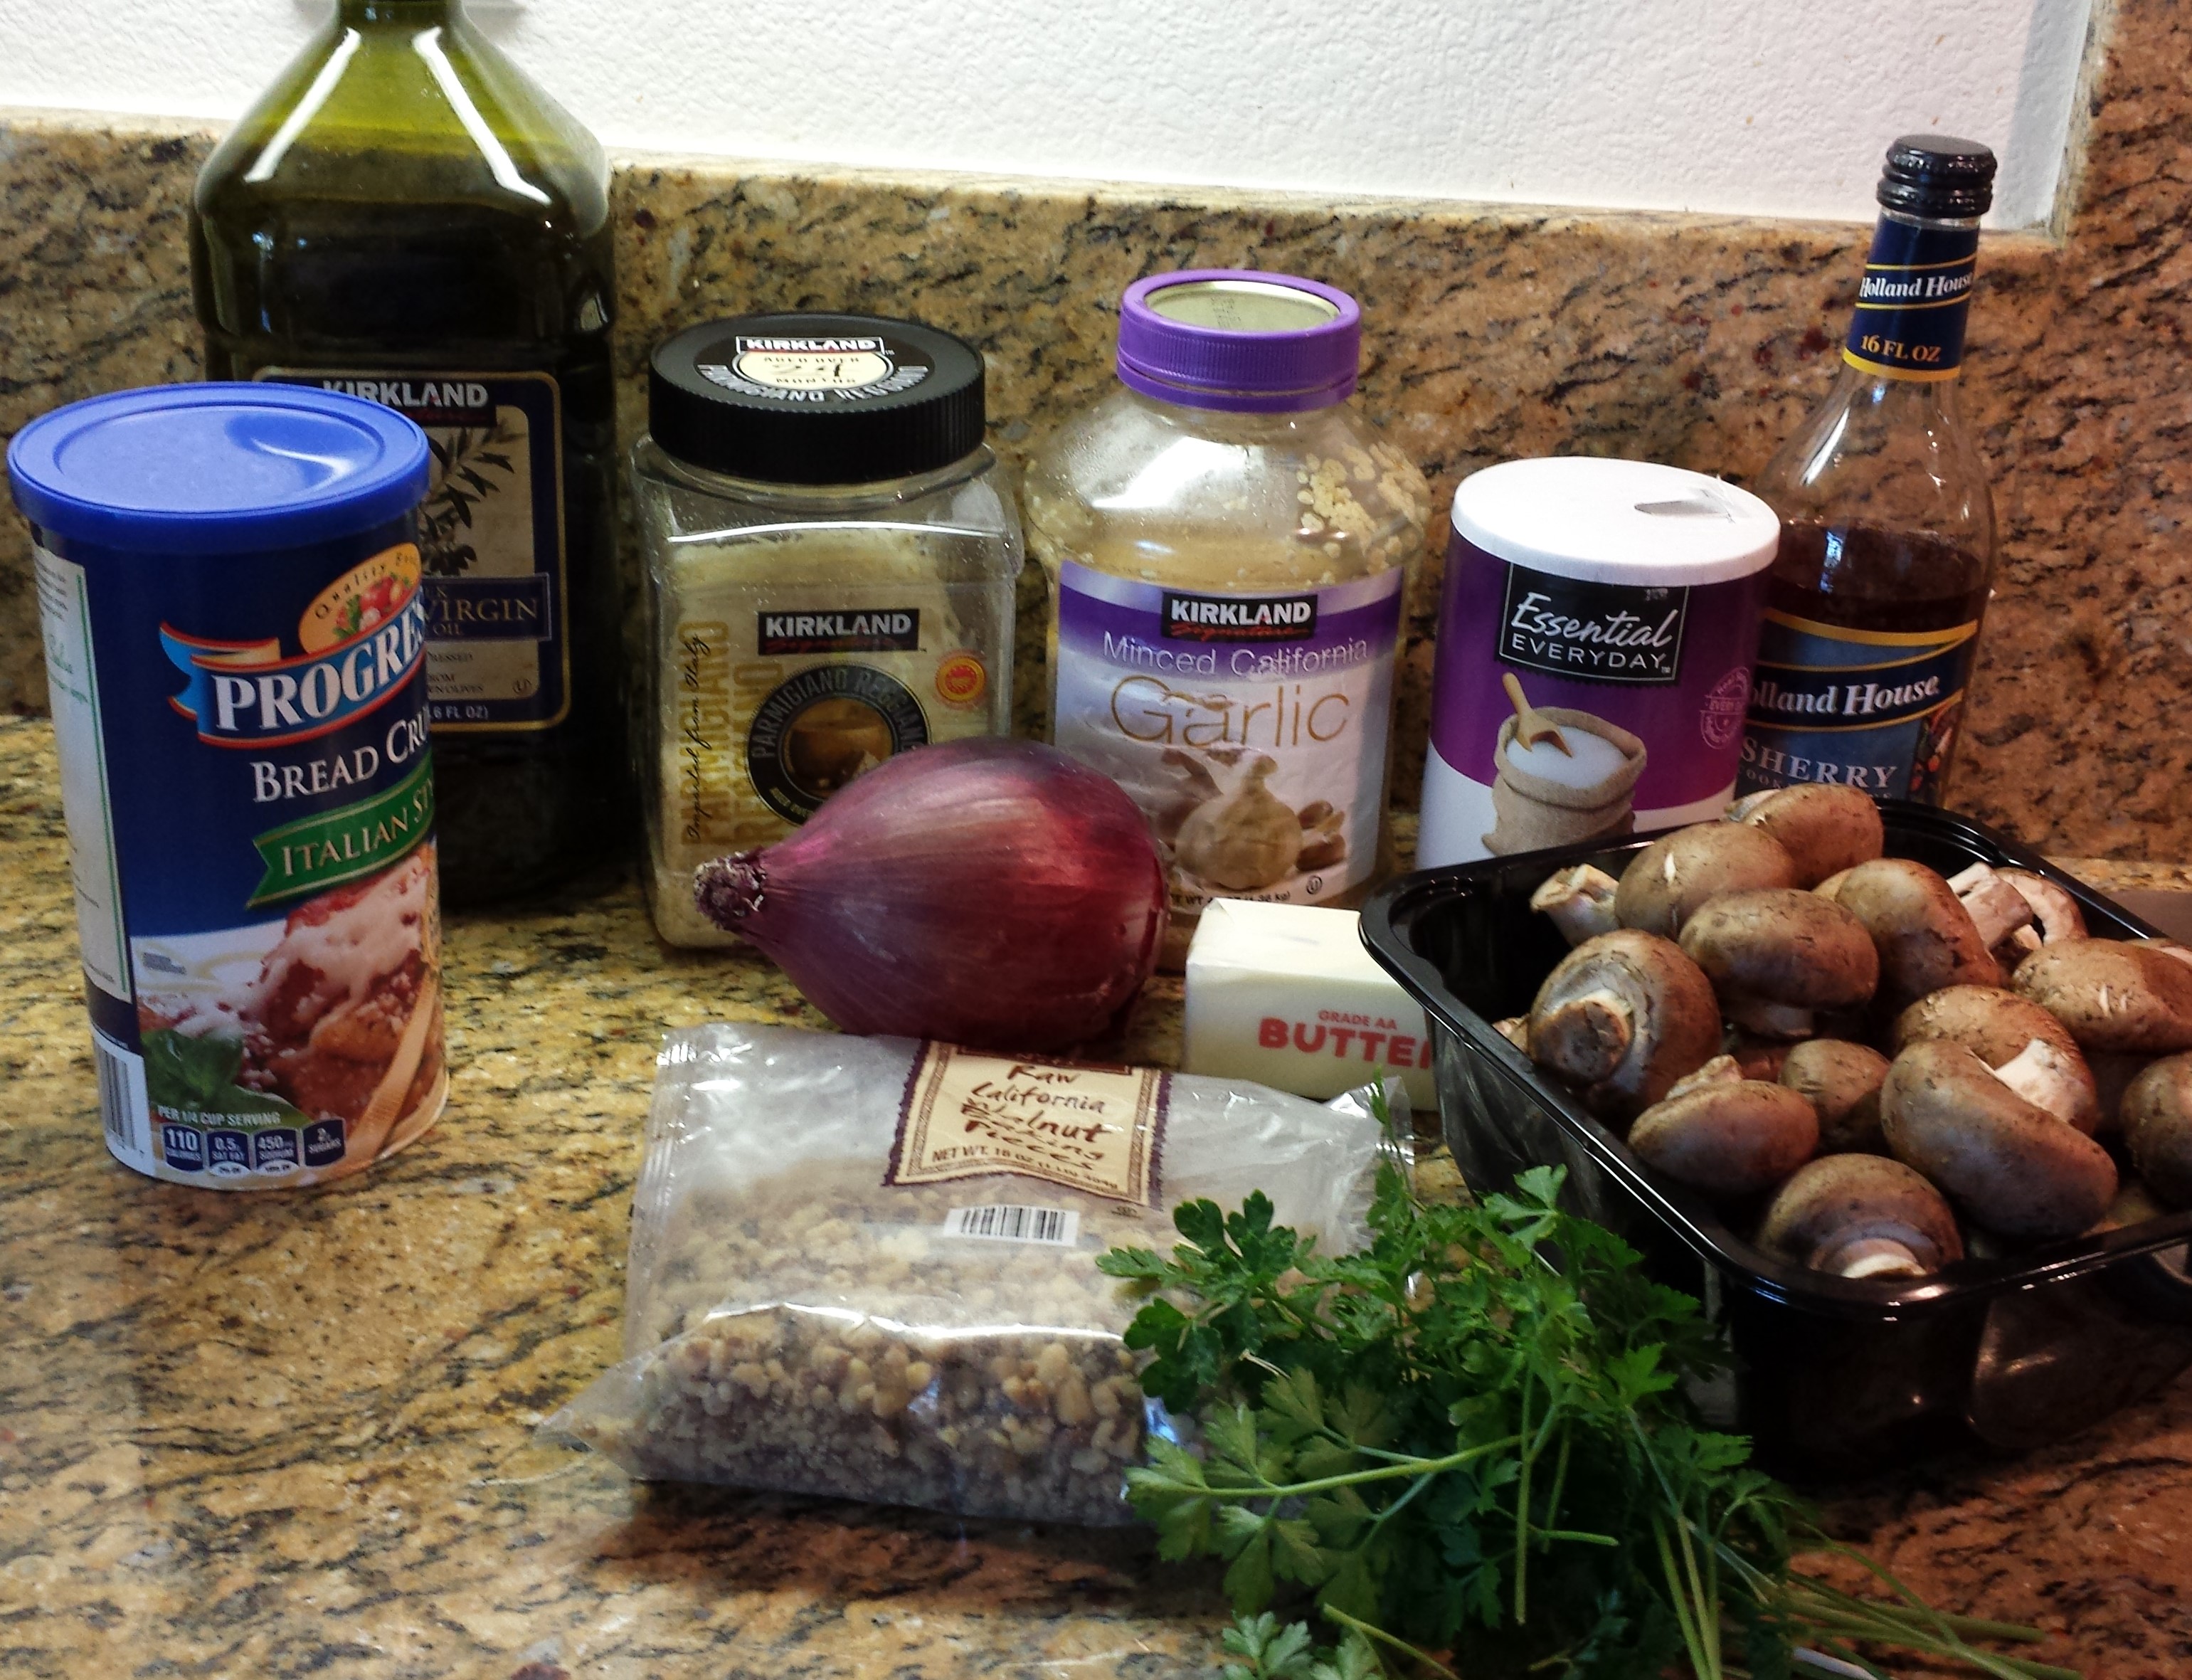
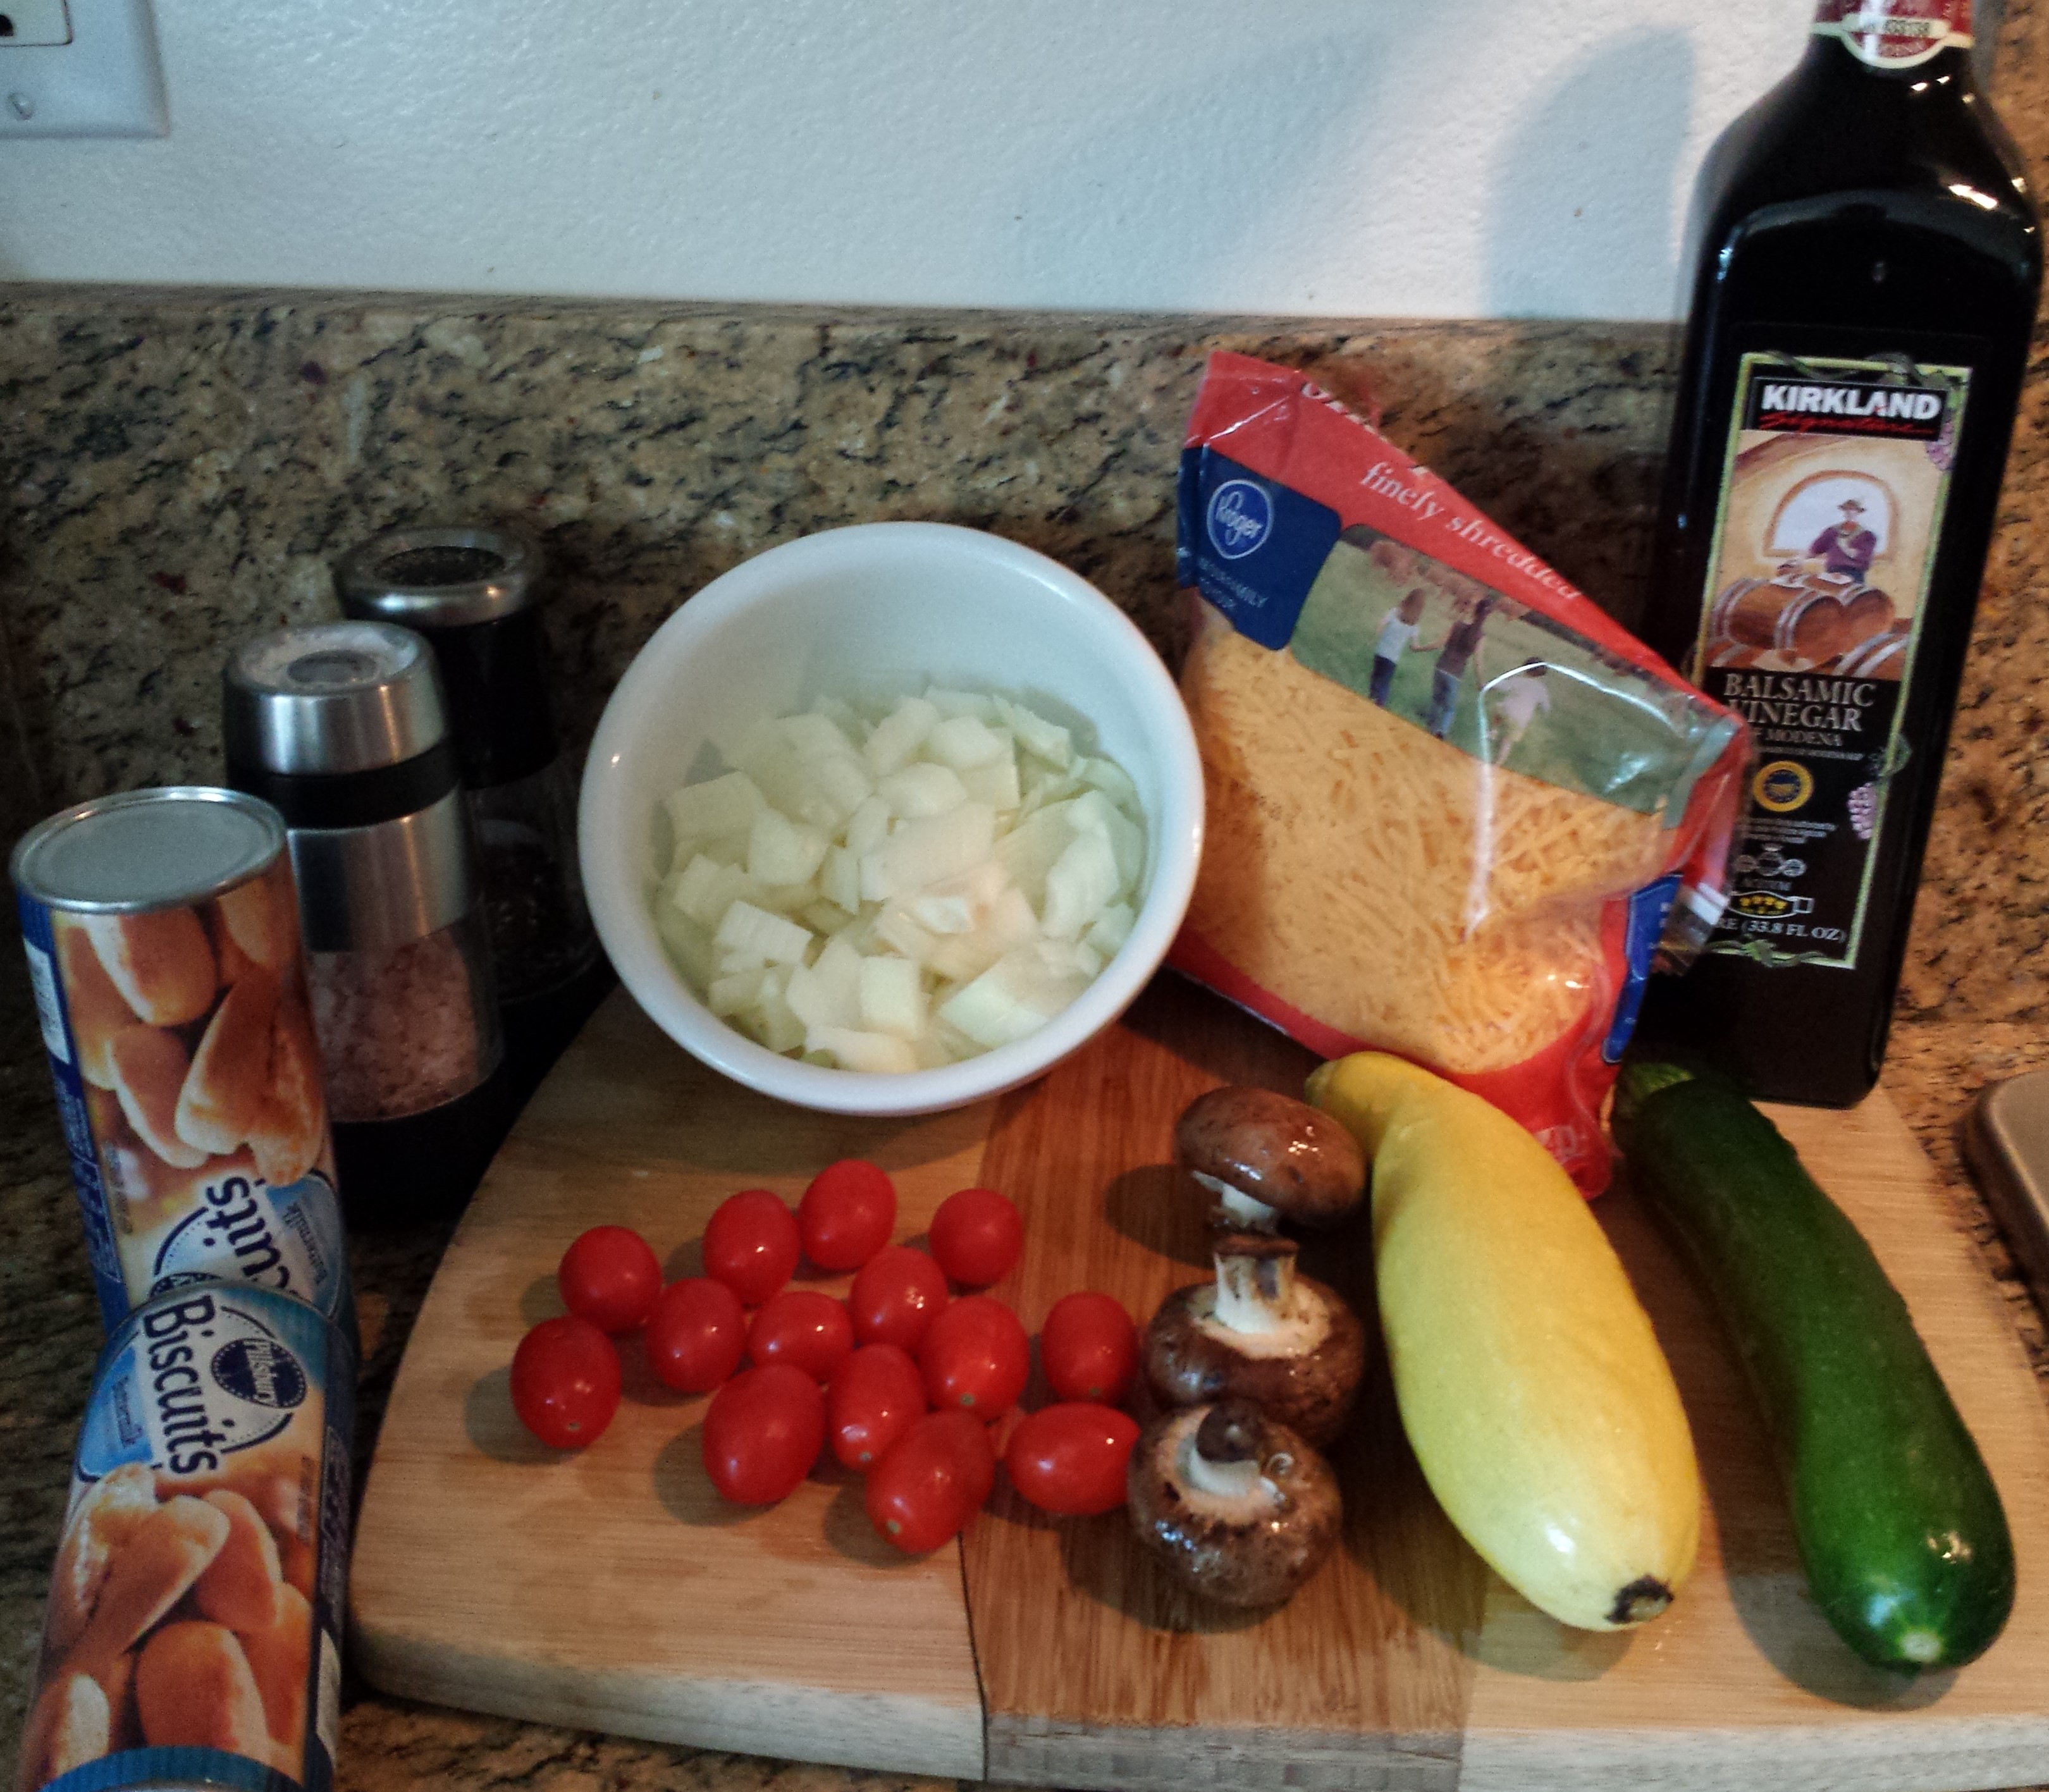
  • 20-24 cremini mushrooms, scrubbed clean
  • 2 T butter
  • 2 T of minced red onion
  • 1/2 tsp minced garlic
  • 2 T finely chopped walnuts
  • 1/2 tsp salt
  • 2 T chopped fresh parsley
  • 1 tsp dried thyme
  • 2 T Italian breadcrumbs
  • 2 T cooking sherry or chicken stock
  • 2 T olive oil
  • 2 T grated parmesan cheese

Instructions

  • Preheat oven to 375 degrees.
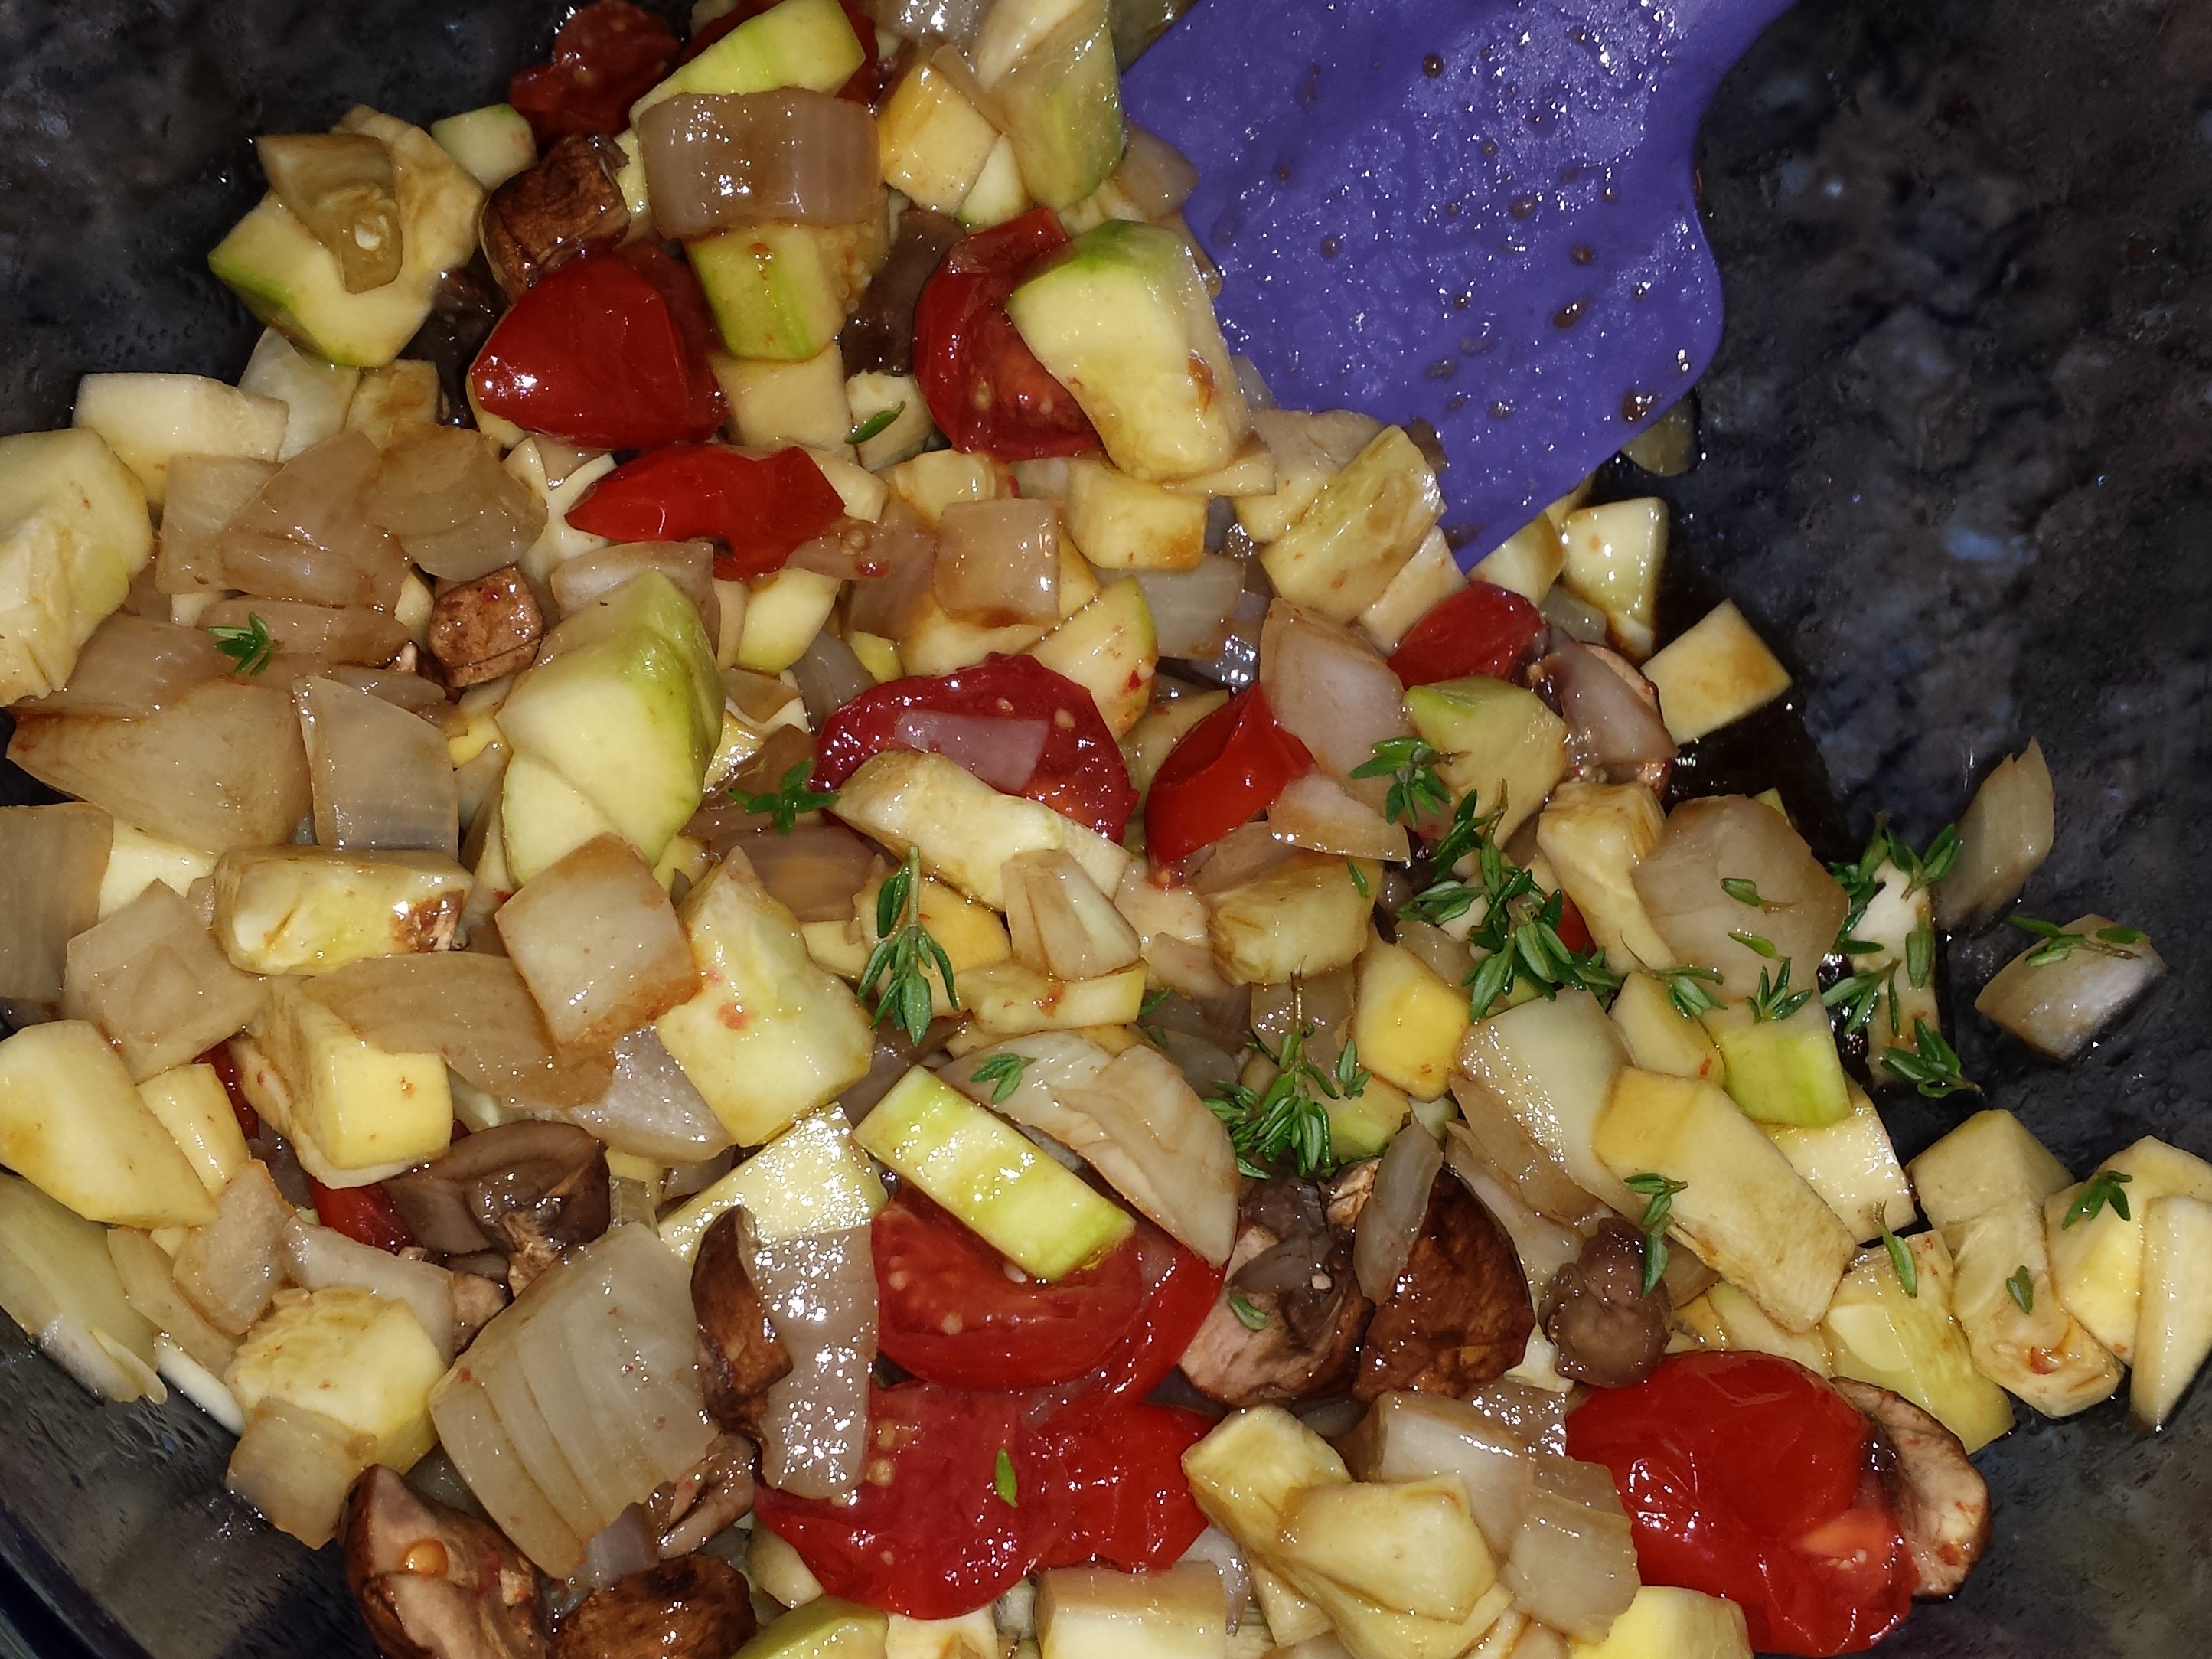
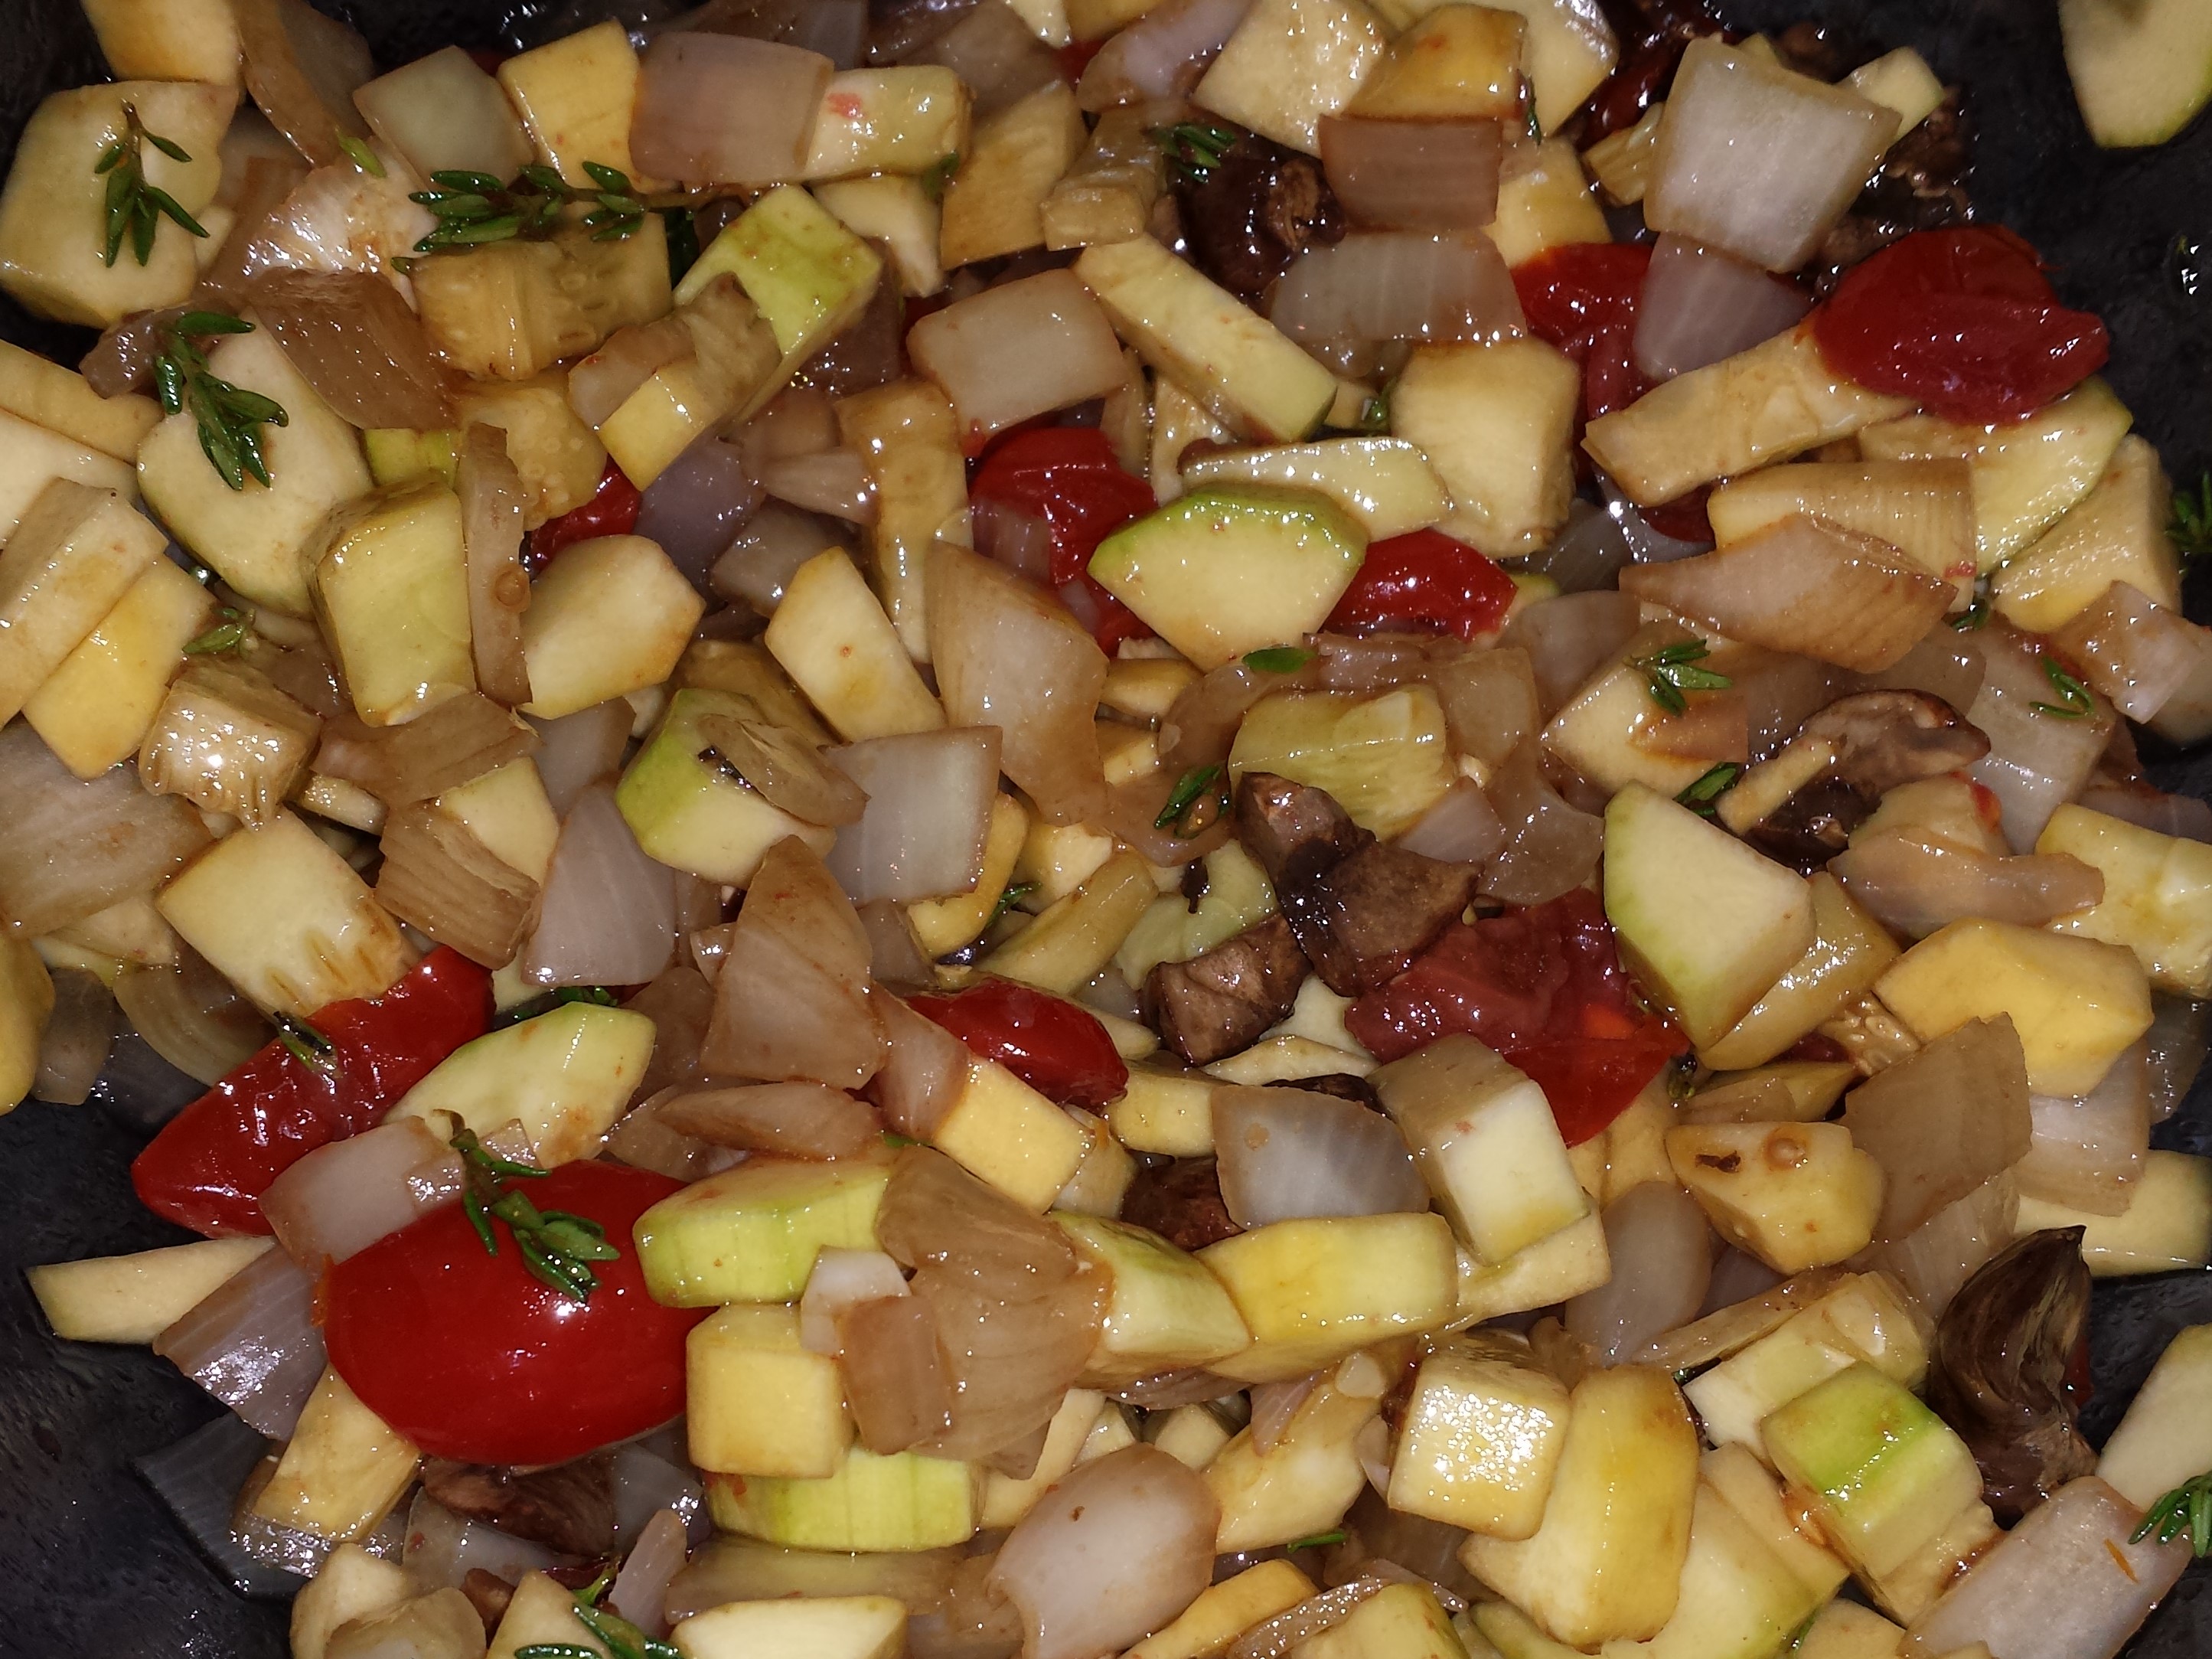
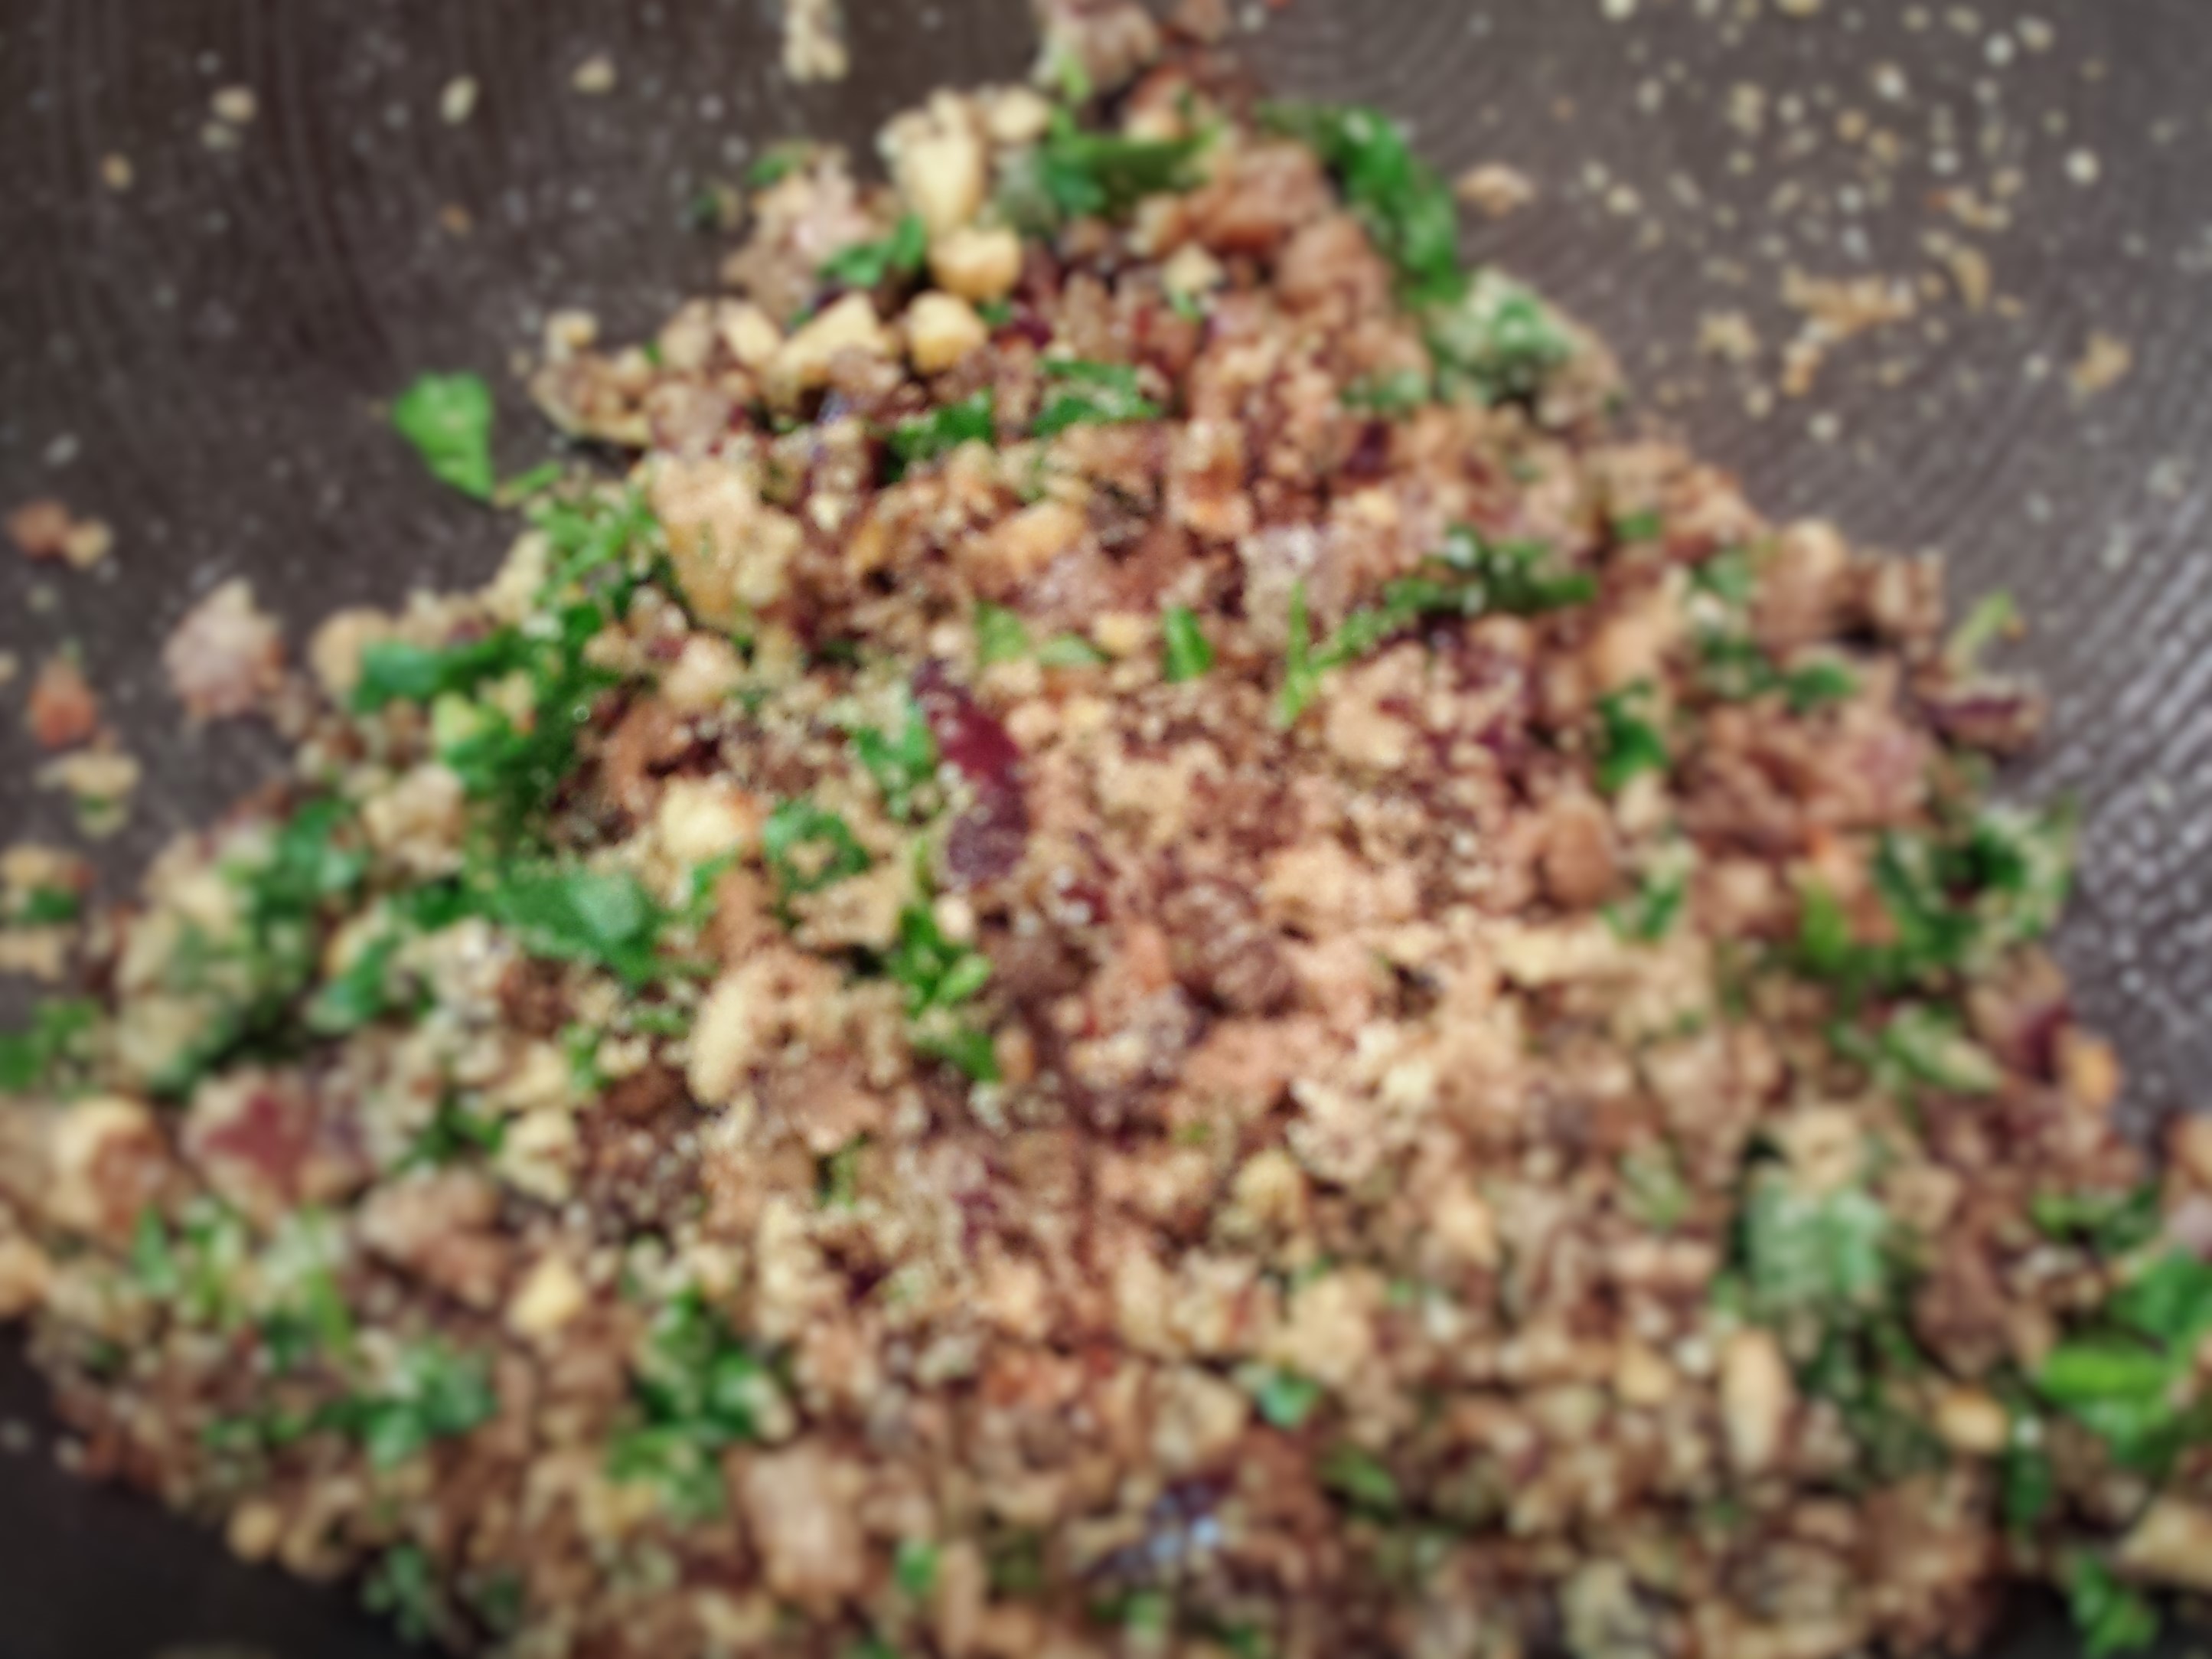
  • Separate the stems from the onion caps and finely chop the stems.
  • Heat 1 T butter in a frying pan over medium heat.
  • Saute the chopped mushroom stems and the red onion about 4 minutes, stirring often.

20151225_125256  20151225_125940

  • Add the remaining 1 T butter.
  • Add the garlic, walnuts, and salt. Stir  well and cook for about 2 additional minutes.
  • Turn off the heat.
  • Add the parsley, thyme and breadcrumbs.

20151225_130428  20151225_131155

  • Stir well.
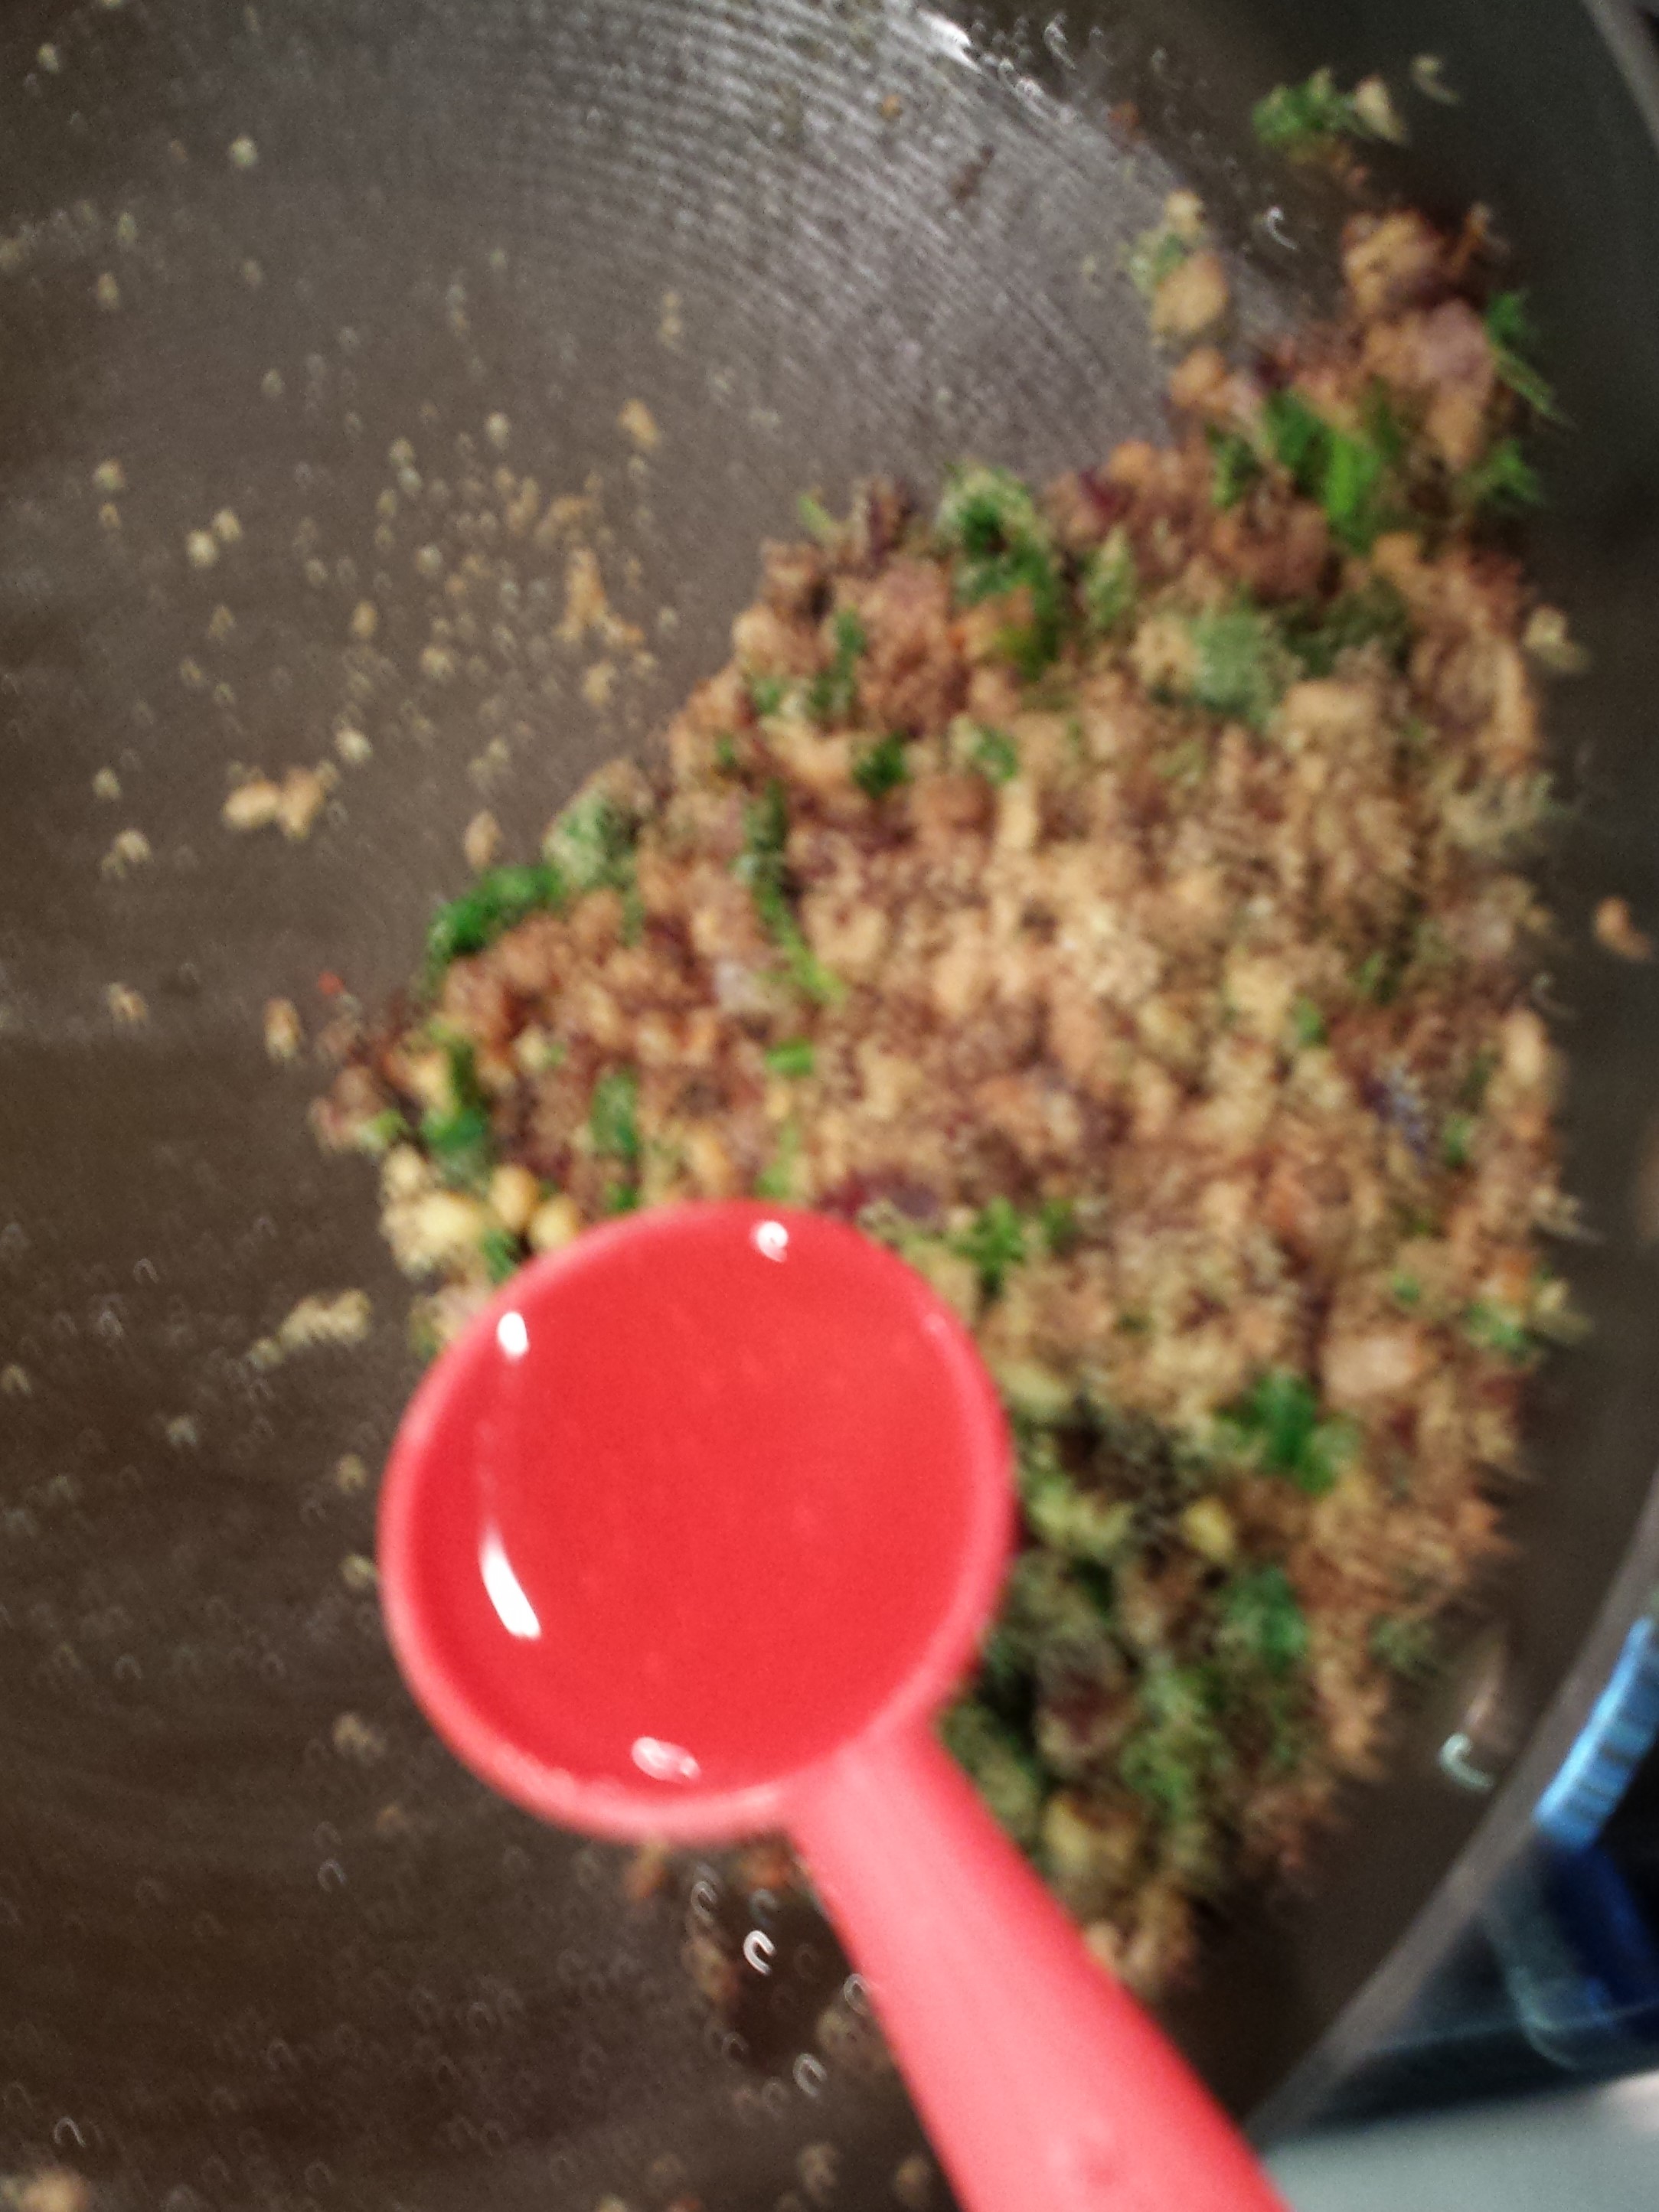
  • Add the sherry or chicken stock and mix well.

20151225_131236  20151225_131616

  • In a ziplock bag, toss the mushroom caps with olive oil.

20151225_131341

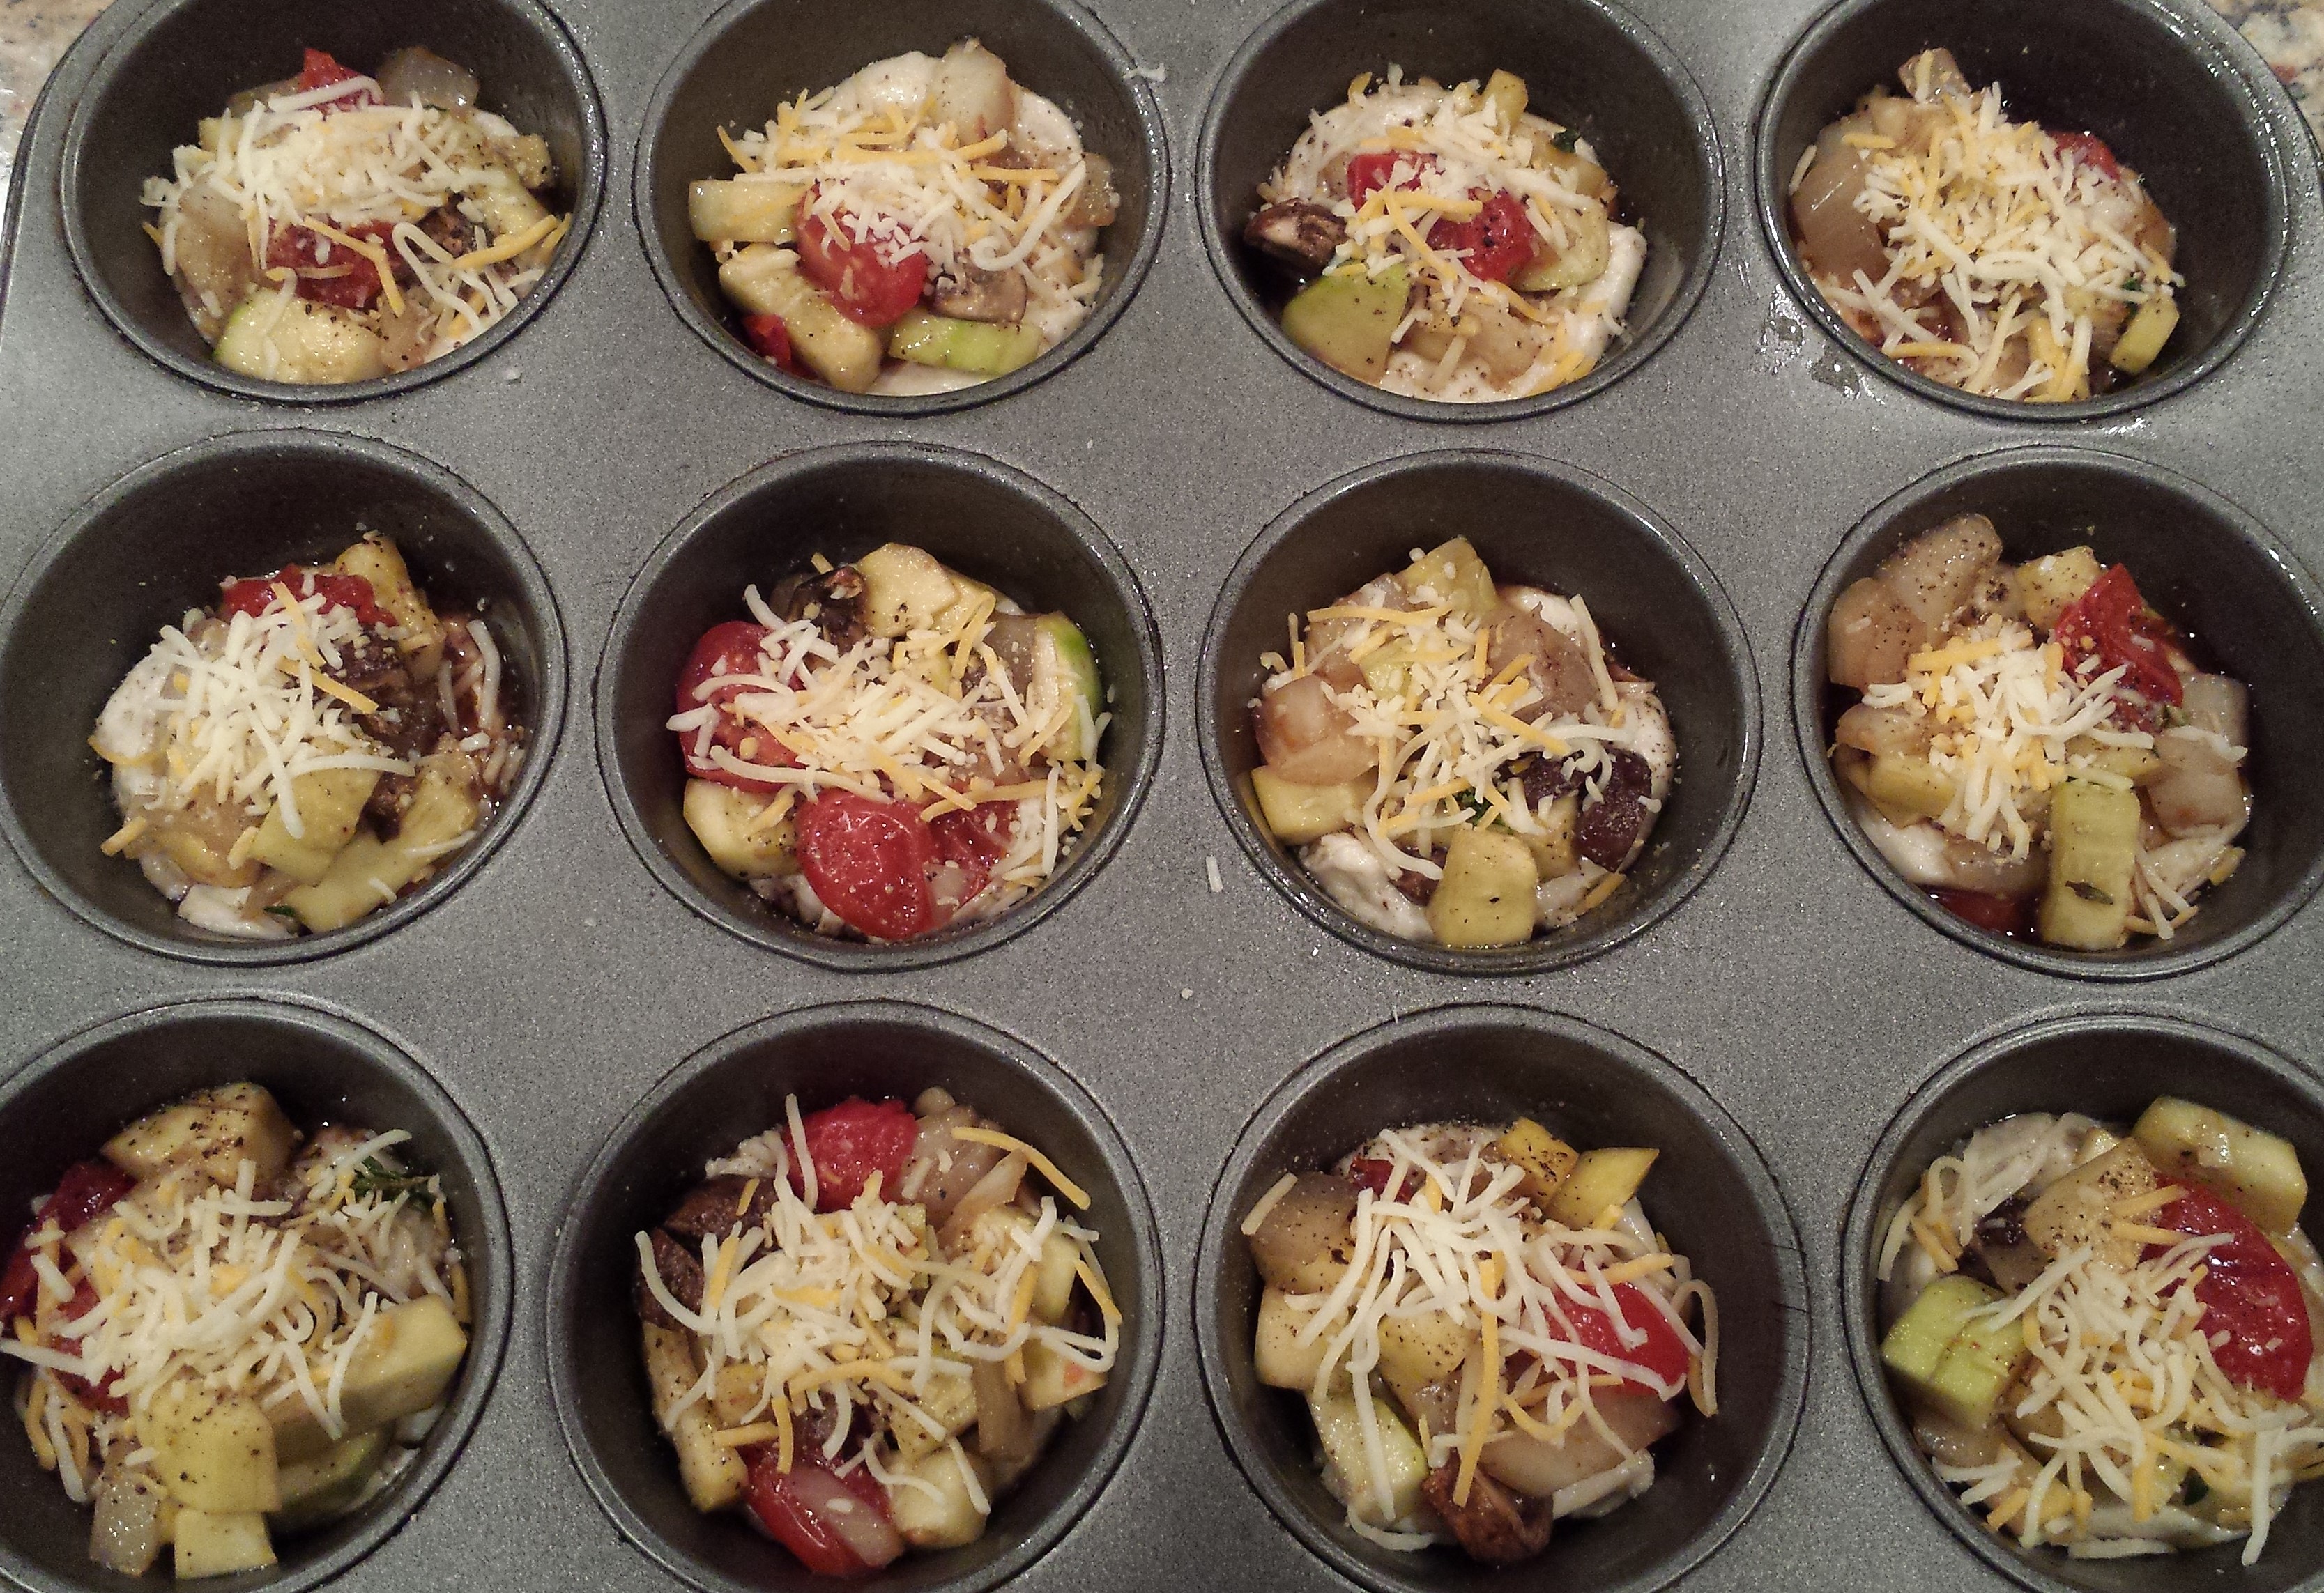
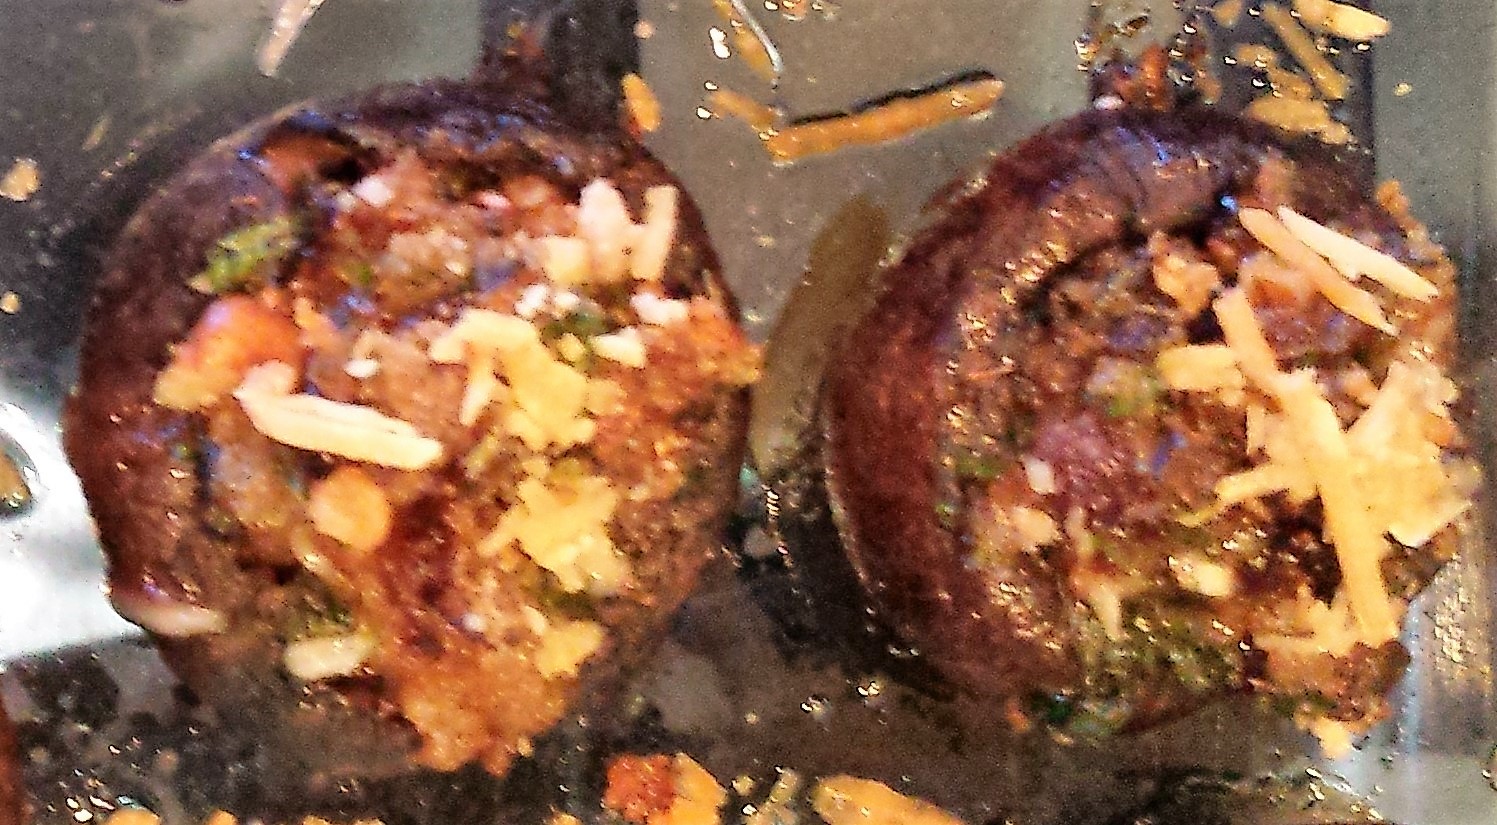
  • Fill mushrooms with about 1/2 – 1 tsp of stuffing and place in a baking dish.
  • Sprinkle grated parmesan cheese over each mushroom.

20151225_132239  20151225_132355

  • Bake for 20-25 minutes, until cheese browns.
  • Cool for about 5 minutes before serving.

20151225_141224  20151225_141222

Ideas

  • Mushrooms – cremini are my favorite, but you can use any button shaped mushroom you like.
  • Red onion – you can substitute shallots or sweet onions if you prefer.
  • Breadcrumbs – a flavored, finely ground breadcrumb is best, but feel free to experiment.
  • If the stuffing is not fine enough for you, place it in a blender before adding the sherry/chicken stock. Pulse it several times so it is almost a paste in consistency.

Go back

Your message has been sent

Warning
Warning
Warning

Warning.


Mini Lemon Chiffons

If you live in Southern California (like I do) or anywhere else that has an abundance of citrus, this is the time of year when you need to figure out what to do with all the lemons that your tree is producing. Or in my case, my mom’s lemon tree. My friends and coworkers also have lemon trees or their neighbors do, so it’s difficult to give many away. I’ve been making lemonade, freezing lemon juice, and have even made lemon jam – which is super yummy and will be another post soon. Here is a simple, velvety smooth, and not too sweet way to use a couple more lemons.

Ingredients20151219_121601

  • 3 egg yolks, slightly beaten
  • 1 cup water
  • 1/4 cup sugar
  • 1 pkg (3 oz) lemon gelatin
  • 2 T lemon juice
  • 1/2 cup water
  • 3 egg whites
  • dash of salt
  • 1/4 cup sugar
  • 4 tsp grated lemon rind

Instructions 

  • Combine egg yolks and one cup of water in saucepan. Cook over low heat for about 1 minute.
  • Add 1/4 cup sugar and stir until it dissolves.
  • Continue cooking over low heat and stir often until mixture slightly thickens and just comes to a boil.
  • Remove from heat.
  • Add gelatin and stir until dissolved.

20151219_121752  20151219_121854  20151219_122334

  • Add 1/2 cup water, lemon juice and 2 tsp lemon rind. Stir thoroughly.
  • Pour into another container and place into refrigerator until slightly thickened. Atleast 45 minutes.

20151219_122733  20151219_122700

  • In another mixing bowl, beat egg whites and salt until foamy.
  • Gradually add in 1/4 cup of sugar and continue beating until mix has peaks.

20151219_122239  20151219_122558

  • Remove lemon mix from refrigerator. Add egg whites to the lemon mix and blend well.

20151219_130224  20151219_130311

  • Spoon into dessert dishes and chill until firm, atleast 2 hours.
  • Garnish with whipped cream and remaining lemon rind.

20151219_202743  20151219_202903

Ideas

  • Make your own whipped cream. It’s super easy and tastes so much better than any that you can purchase in the store. Simply pour some cream into a bowl and mix at high speed. After about a minute, add some sugar (small amounts at a time) to the mix. Try 2 teaspoons to about 1/2 cup of cream. Once cream begins to whip nicely, taste a small amount and decide if it needs more sugar. Whip to desired consistency.
  • This goes great in small containers or slightly larger.

Go back

Your message has been sent

Warning
Warning

Warning.

Roasted Vegetable Tarts

I made these yummy tarts for the first time the other night when having some friends over for dinner. Now, all us women know that many of the guys in our lives would happily pass on the vegetables at dinner. This is a great way to get them to eat them and like it as it combines vegetables with a dinner roll or biscuit. You can use any combination of vegetables when making your tart, but my recommendation is below. Happy eating!

Ingredients20151219_124828

  • 1 packages of refrigerator rolls or biscuits
  • 1 yellow squash, cut into small pieces
  • 1 zucchini, cut into small pieces
  • 1 medium sweet onion, coarsely chopped
  • 3 medium-large sized mushrooms
  • 2 oz shredded cheese
  • 1/2 cusp cherry tomatoes, halved
  • 3 tsp fresh thyme
  • salt and pepper
  • 2 T olive oil
  • 1 T balsamic vinegar

Instructions

  • Dice the vegetables and place into a bowl in the microwave. Cook on high heat for 30 seconds.
  • If cooking all at once, cook for 1 minute.
  • Remove from microwave and drain any water at the bottom of the bowl.
  • Add the thyme, some salt & pepper (to taste), olive oil and balsamic vinegar to the veggies and mix well.

20151219_180323  20151219_180505

  • Using 2 full-size muffin tins, lightly spray with non-stick cooking spray.
  • Unroll the refrigerator rolls/bisquits and separate. Bisquits generally have 10. You will cut the thicker bisquits in half to make 12.
  • Put into bottom of muffin tins and press down.
  • Add a heaping tablespoon of the vegetable mix to each muffin tin.
  • Sprinkle with a little extra salt and pepper.
  • Add a small amount of shredded cheese to the top of each.

20151219_183645

  • Bake for 10-12 minutes or until golden brown.
  • Cool about 5 minutes before removing from pan.
  • Can be served hot or at room temperature.

20151219_190534

Ideas

  • Other vegetables – this would be great with some diced red or yellow pepper as well.
  • Why cut bisquits down? Trust me. A thinner breading at the bottom of the tarts is so much better.
  • This also makes a great appetizer.
  • You can also prepare the vegetable filling up to one day before using. Dice all the vegetables, heat in microwave, drain excess liquid, refrigerate.

Go back

Your message has been sent

Warning
Warning

Warning.

Chocolate Chip Pudding Cookies

This is one of my all time favorite cookies. While there are many varieties of chocolate chip cookies and an abundance of recipes, this one always yields a soft, moise, cake-like cookie. My mother made these when I was growing up. When we made for my great grandmother, we omitted nuts because she didn’t like them. Of course, when we made them just for ourselves, these cookies has 2/3 cup of walnuts added to the recipe below. My husband has the misfortune of being allergic to tree nuts, so I’m back to the no nut version of these. They are delicious either way. Try them, you won’t regret it. As always, happy eating!

Ingredients20151220_123524

  • 2-1/4 cup flour
  • 1 tsp baking powder
  • 1 cup softened butter
  • 1/4 cup sugar
  • 3/4 cup brown sugar
  • 1 tsp vanilla extract
  • 1 package instant vanilla pudding
  • 2 eggs
  • 12 oz chocolate chips

Instructions

  • Heat oven to 375 degrees.
  • Soften butter by leaving on counter for at least 30 minutes or by putting in a dish and cook in the microwave on high heat for 30 seconds.
  • In a large mixing bowl, combine butter, sugars, vanilla extract and pudding mix.
  • Beat until creamy.
  • Add the eggs and beat until mixed.

20151220_124423 20151220_124639

  • Gradually add in flour and baking powder.
  • Once dry ingredients are fully integrated, add the chocolate chips (and nuts) and mix well.

20151220_124915  20151220_125039  20151220_125050

20151220_125430  20151220_125529

  • Place about 1 tablespoon of cookie batter at a time onto a cookie tray. Flatten the “balls” of dough a little with your fingers or back of spoon. This cookie doesn’t spread a lot like some other versions.

20151220_125758  20151220_130439

  • Place in oven and cook 8-10 minutes.
  • Remove from oven and let cool about 6 minutes on tray before moving to a rack until fully cooled.

20151220_131257  20151220_134150

Ideas

  • Add nuts – walnuts, pecans, macadamia. Which ever type you prefer. I recommend 1/2 the volume of the chocolate chips. Therefore 12 oz of chocolate chips and 6 oz of nuts.
  • Parchment paper – I always use this when making cookies. Why? Cookies are super easy to remove from the cookie tray and cleaning up is a breeze.
  • Browning – unlike other chocolate chip cookies you may have made, these do not brown a lot on the top. That is NORMAL. You will see that the bottom of the cookie is nice and brown — then it’s time to remove from the oven. Waiting for the top to brown will give you a cookie that is dry and with a burnt bottom. 😦
  • Be prepared for cookie stealing. I had to take the image of the cookies on the wire rack before the last ones were out of the oven. 6+ cookies had already mysteriously disappeared when my back was turned.


Go back

Your message has been sent

Warning
Warning

Warning.

Getting Ready For Christmas – Edible Gifts

For many years, I’ve been the person in the Christmas gift giving group who is known for homemade items. This started when I was a child and my mom was an amazing pickler and preserver with all of the wonderful fruits and vegetables we grew in our garden. I really started getting into this when I lived in Maryland and had a garden plot in the park. I had so very many vegetables coming from that 16×20 foot plot there was no other option than to make pickles.

Pickles, now everyone immediately thinks of the cucumber version, but pickling is really just a process, with vinegar and sugar, of preserving vegetables (and some fruits) in jars. That year, I pickled cherry tomatoes, beets, carrots, tomatoes (piccalilli), corn, watermelon rinds and garlic.

Other than pickling, I have a history of making jams, mustards, flavored butter, flavored vodka, and hand scrubs, among others. This year, I’m making a mix of items:

  • Jam – blueberry and mixed berry
  • Jelly – lemon
  • Pickles – garlic with herbs (still in process)
  • Vinegar – italian seasoned white wine vinegar (still in process)

What would you make, given the chance? Do you want recipes? Let me know and I’ll post.

Happy making and giving!

20151212_185502  20151213_174440  20151213_174446

Go back

Your message has been sent

Warning
Warning

Warning.