Roasted Lemon Chicken

This recipe is a result of one of those “what do you mean I don’t have XX” in my freezer moments. So, as you know, I’m a huge fan of Costco. They sell roasting chickens in a two-pack. We are only three people in my family, so cooking one at a time is perfect. I freeze the second one. In any case, I went to my freezer and pulled out a bag of chicken and placed it in my refrigerator overnight to start the defrost process. The next evening, I got home from work and took the chicken out and placed it in a bowl of cool water in my sink to finish the defrost process. I started preparing everything else I needed for dinner, put on my kitchen gloves and opened up the bag. Voila! Surprise, surprise, this was chicken parts and not a whole bird. Not sure how that happened, but my mistake becomes your gain. I apologize for not having my standard “ingredients” image as I was so surprised by my chicken parts, I forgot to take the picture. Dinner actually cooked faster and was delicious. So, without further ado, happy cooking (and eating).

Ingredients

  • 3-4 lbs of chicken part, bone-in
  • 2 T unsalted butter, melted
  • Salt
  • Pepper
  • Mixed fresh herbs (parsley, thyme)
  • 2 tsp crushed garlic
  • 1-1/2 cups chicken broth
  • 2 lemons

Instructions

  • Preheat oven to 450 degrees.
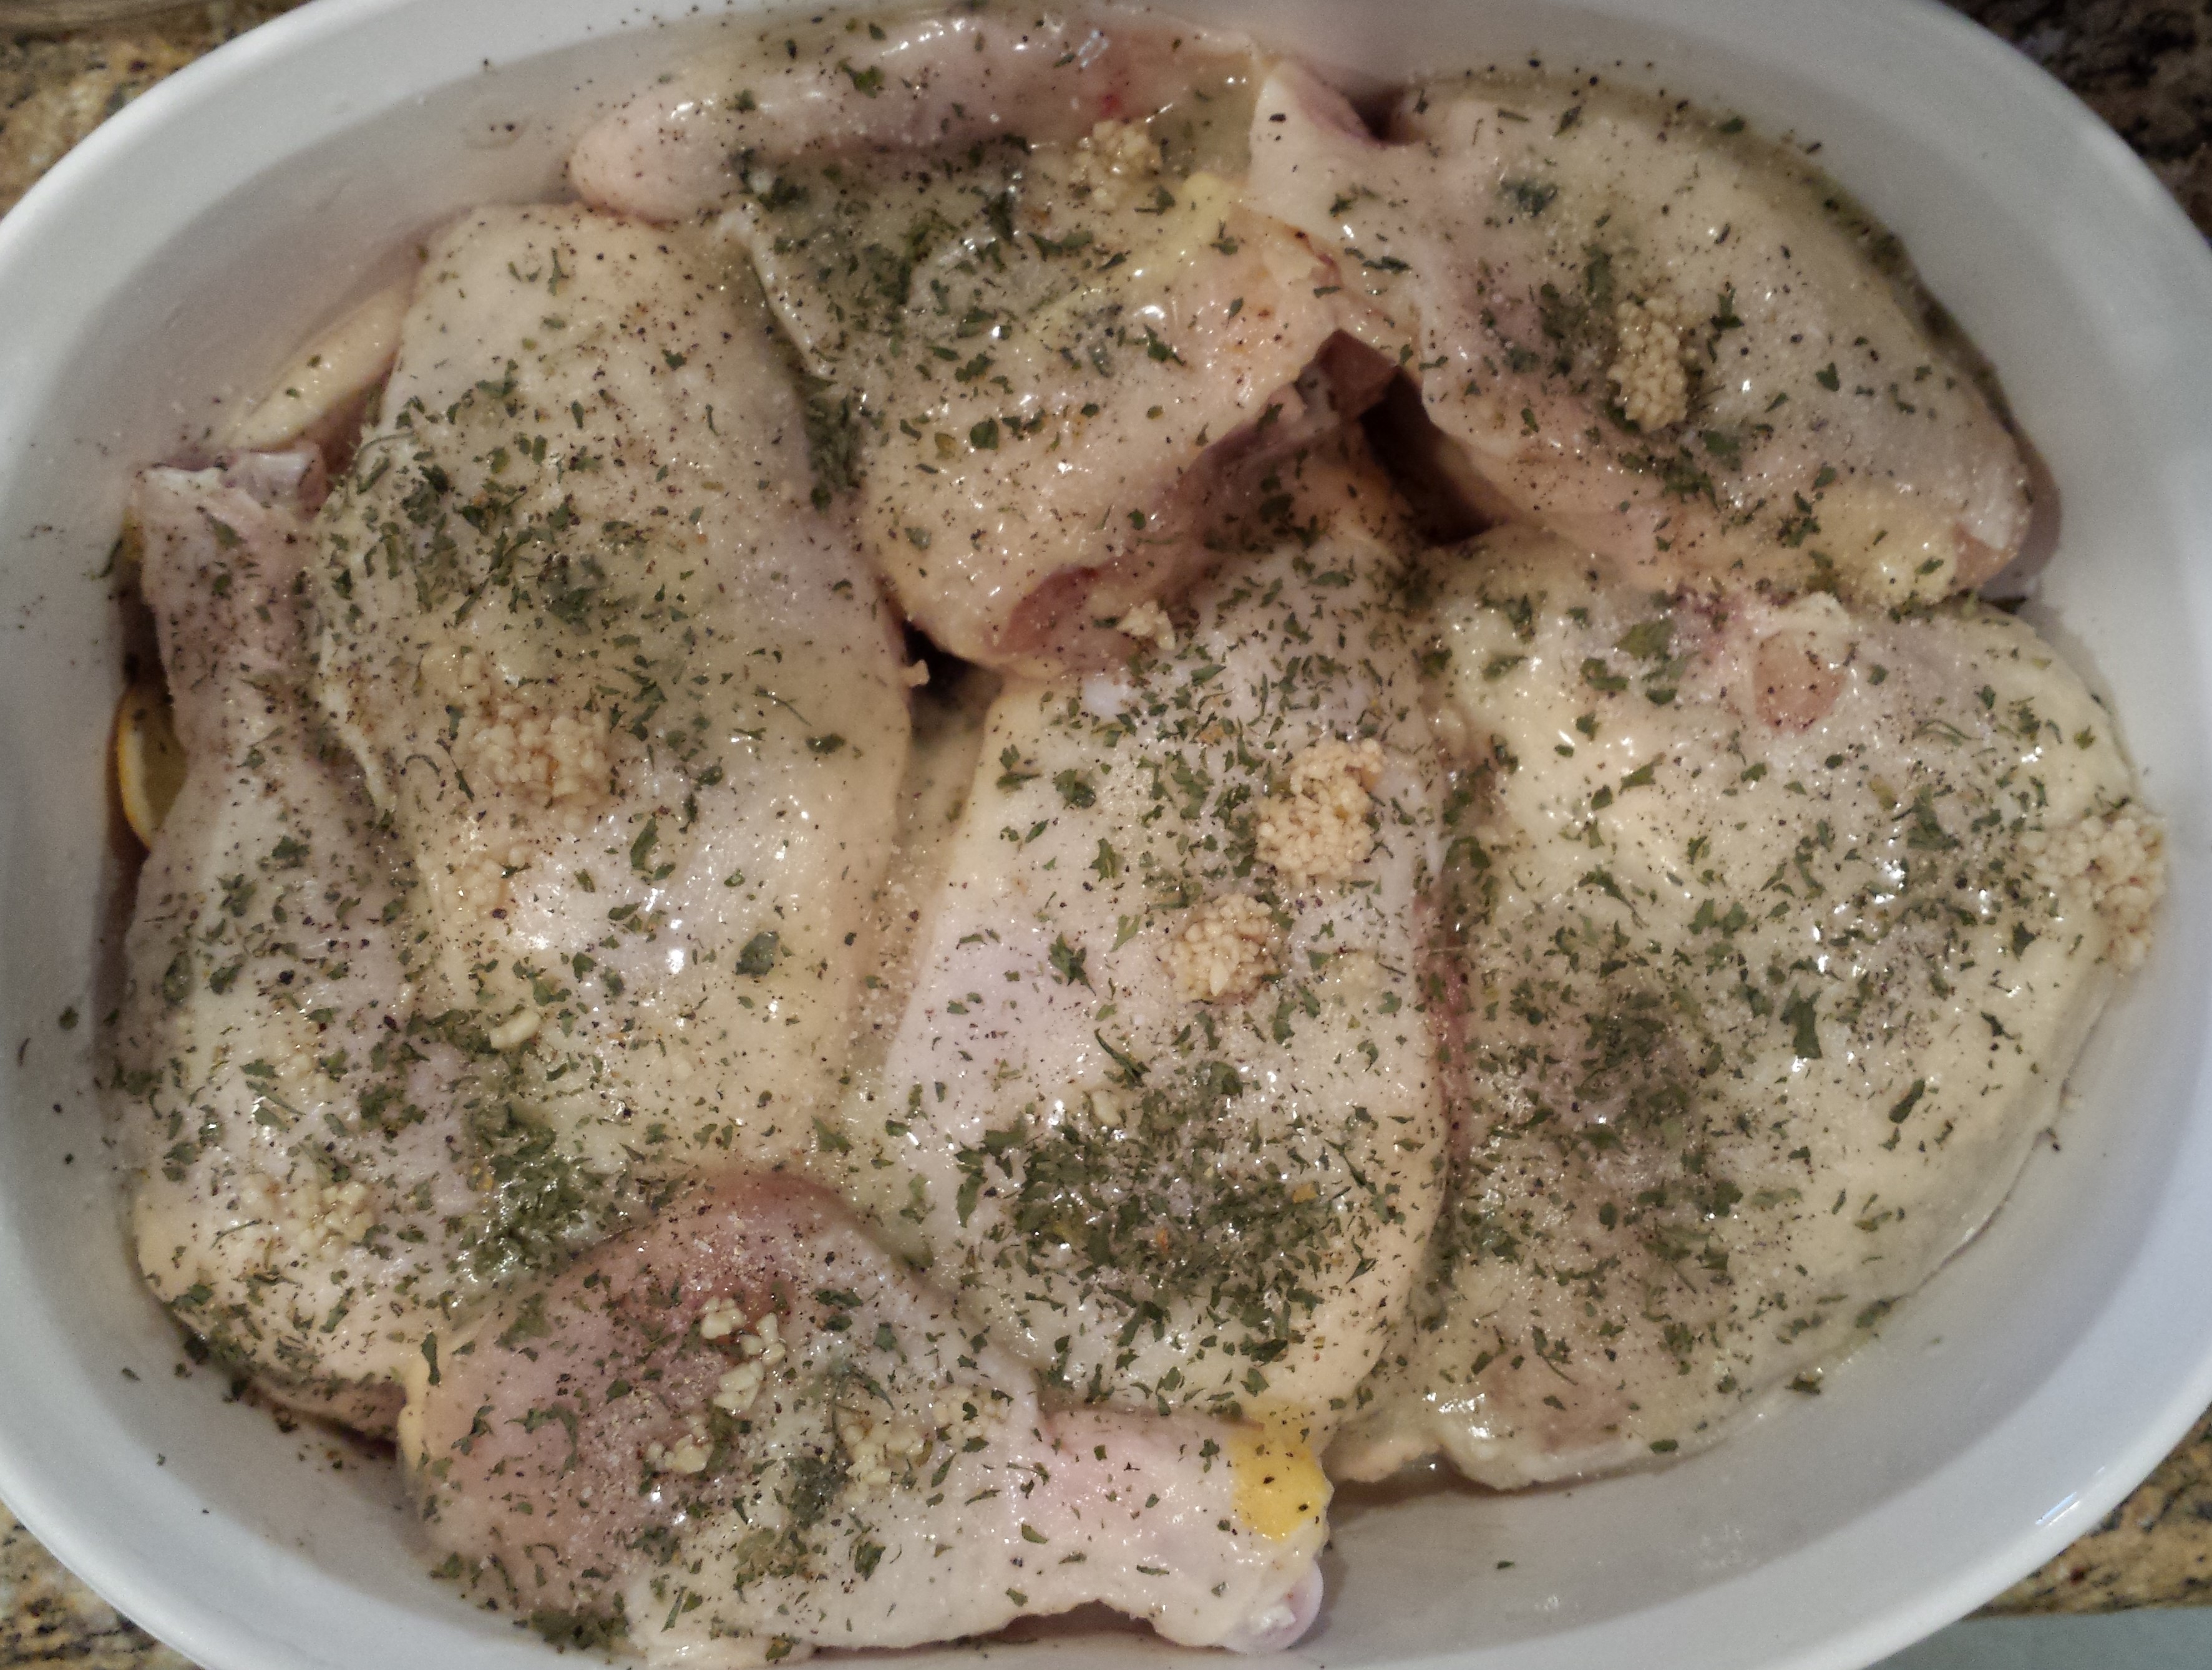
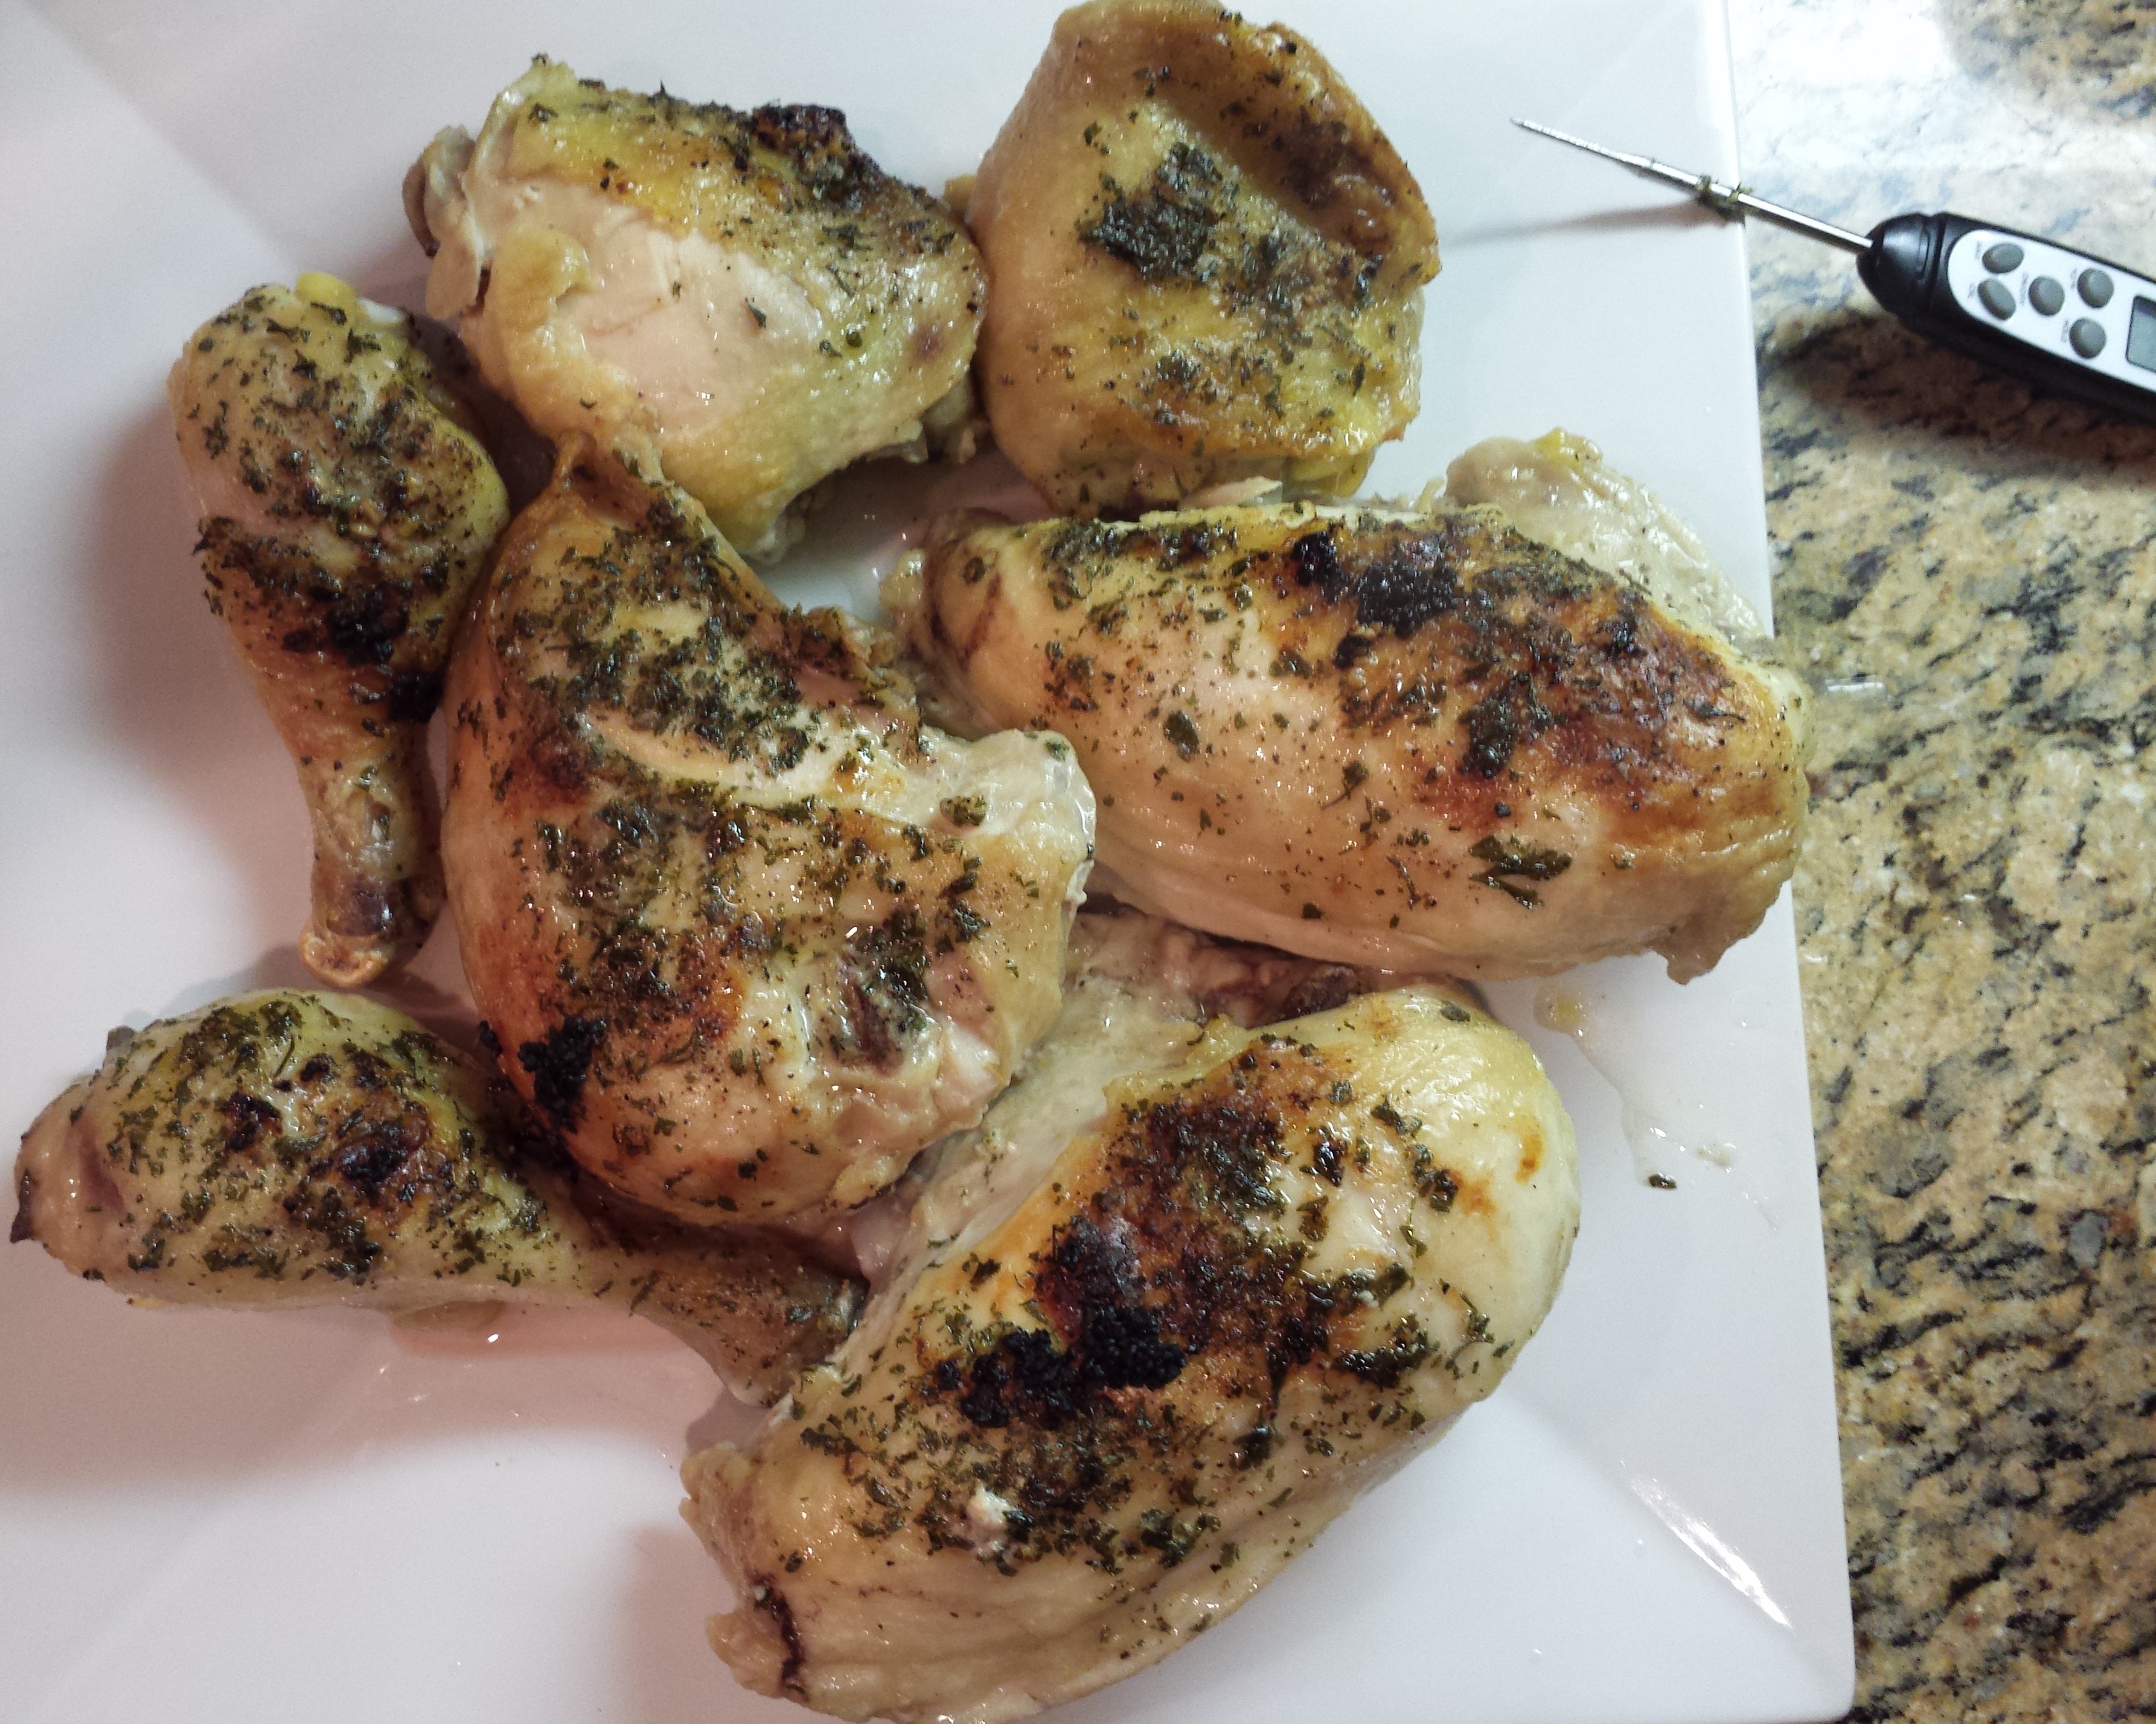
  • Rinse chicken and pat dry with a paper towel.
  • Pat ground pepper and salt onto all of the pieces.
  • Add 2 tsp of crushed garlic and thin slices of one whole lemon to the bottom of the roasting pan.
  • Place chicken into a large baking dish.
  • Brush all exposed parts with butter.
  • Add additional salt and pepper if needed
  • Pat mixed fresh herbs onto the chicken.

20160306_174502  20160306_181026

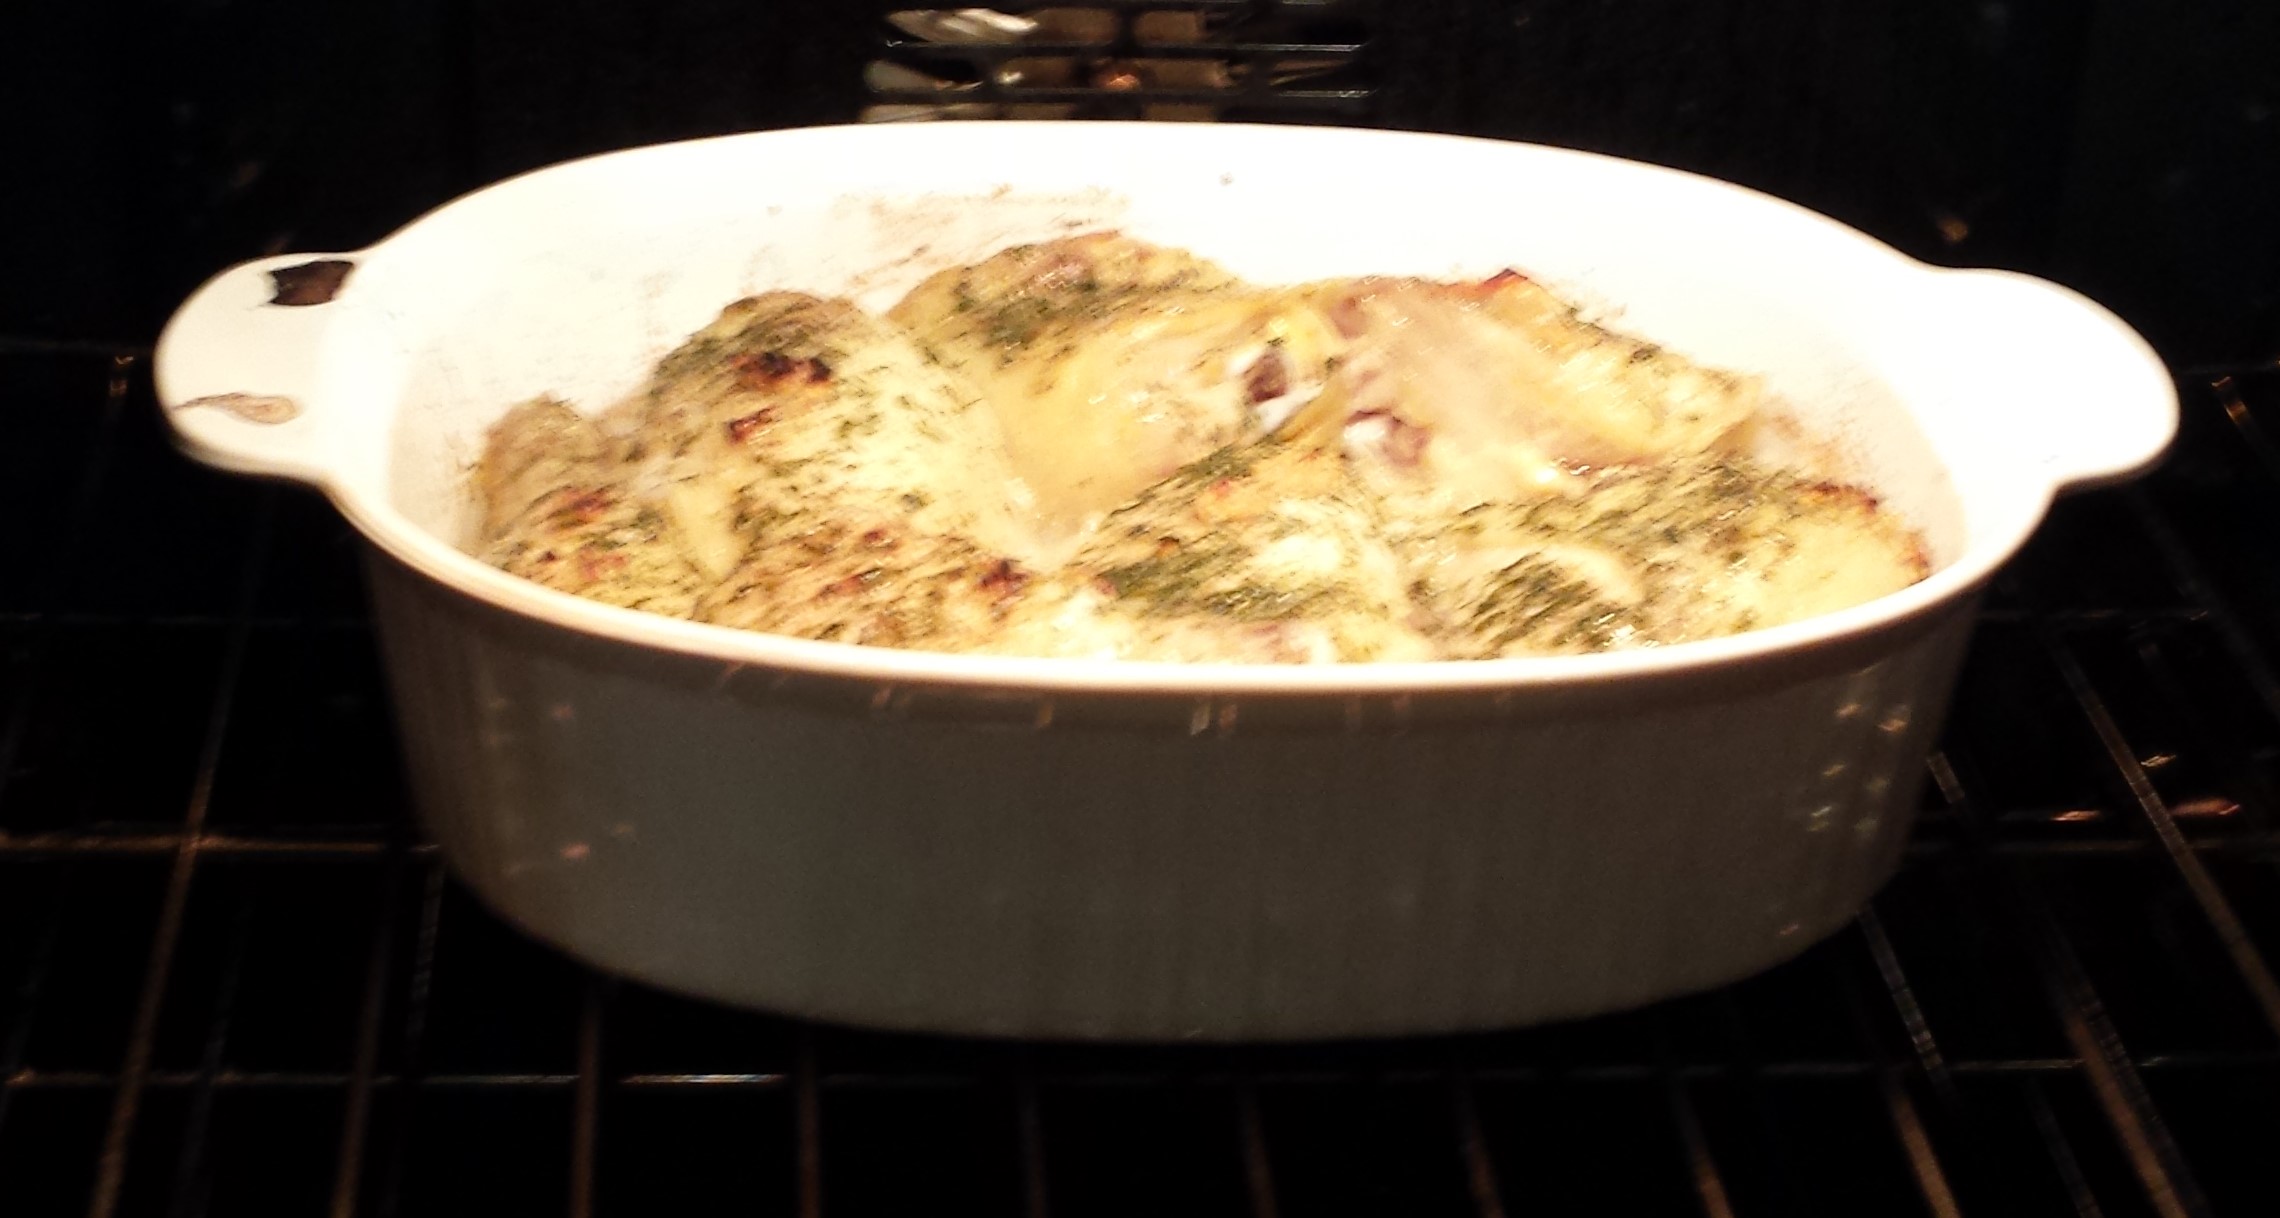
  • Place into oven on the lower rack.
  • Cook approximately 30 minutes. Check to see if meat temperature registers 160 degrees. If it does, remove from oven. If not, cook longer, but watch closely so you do not overcook.

20160306_181354  20160306_183903

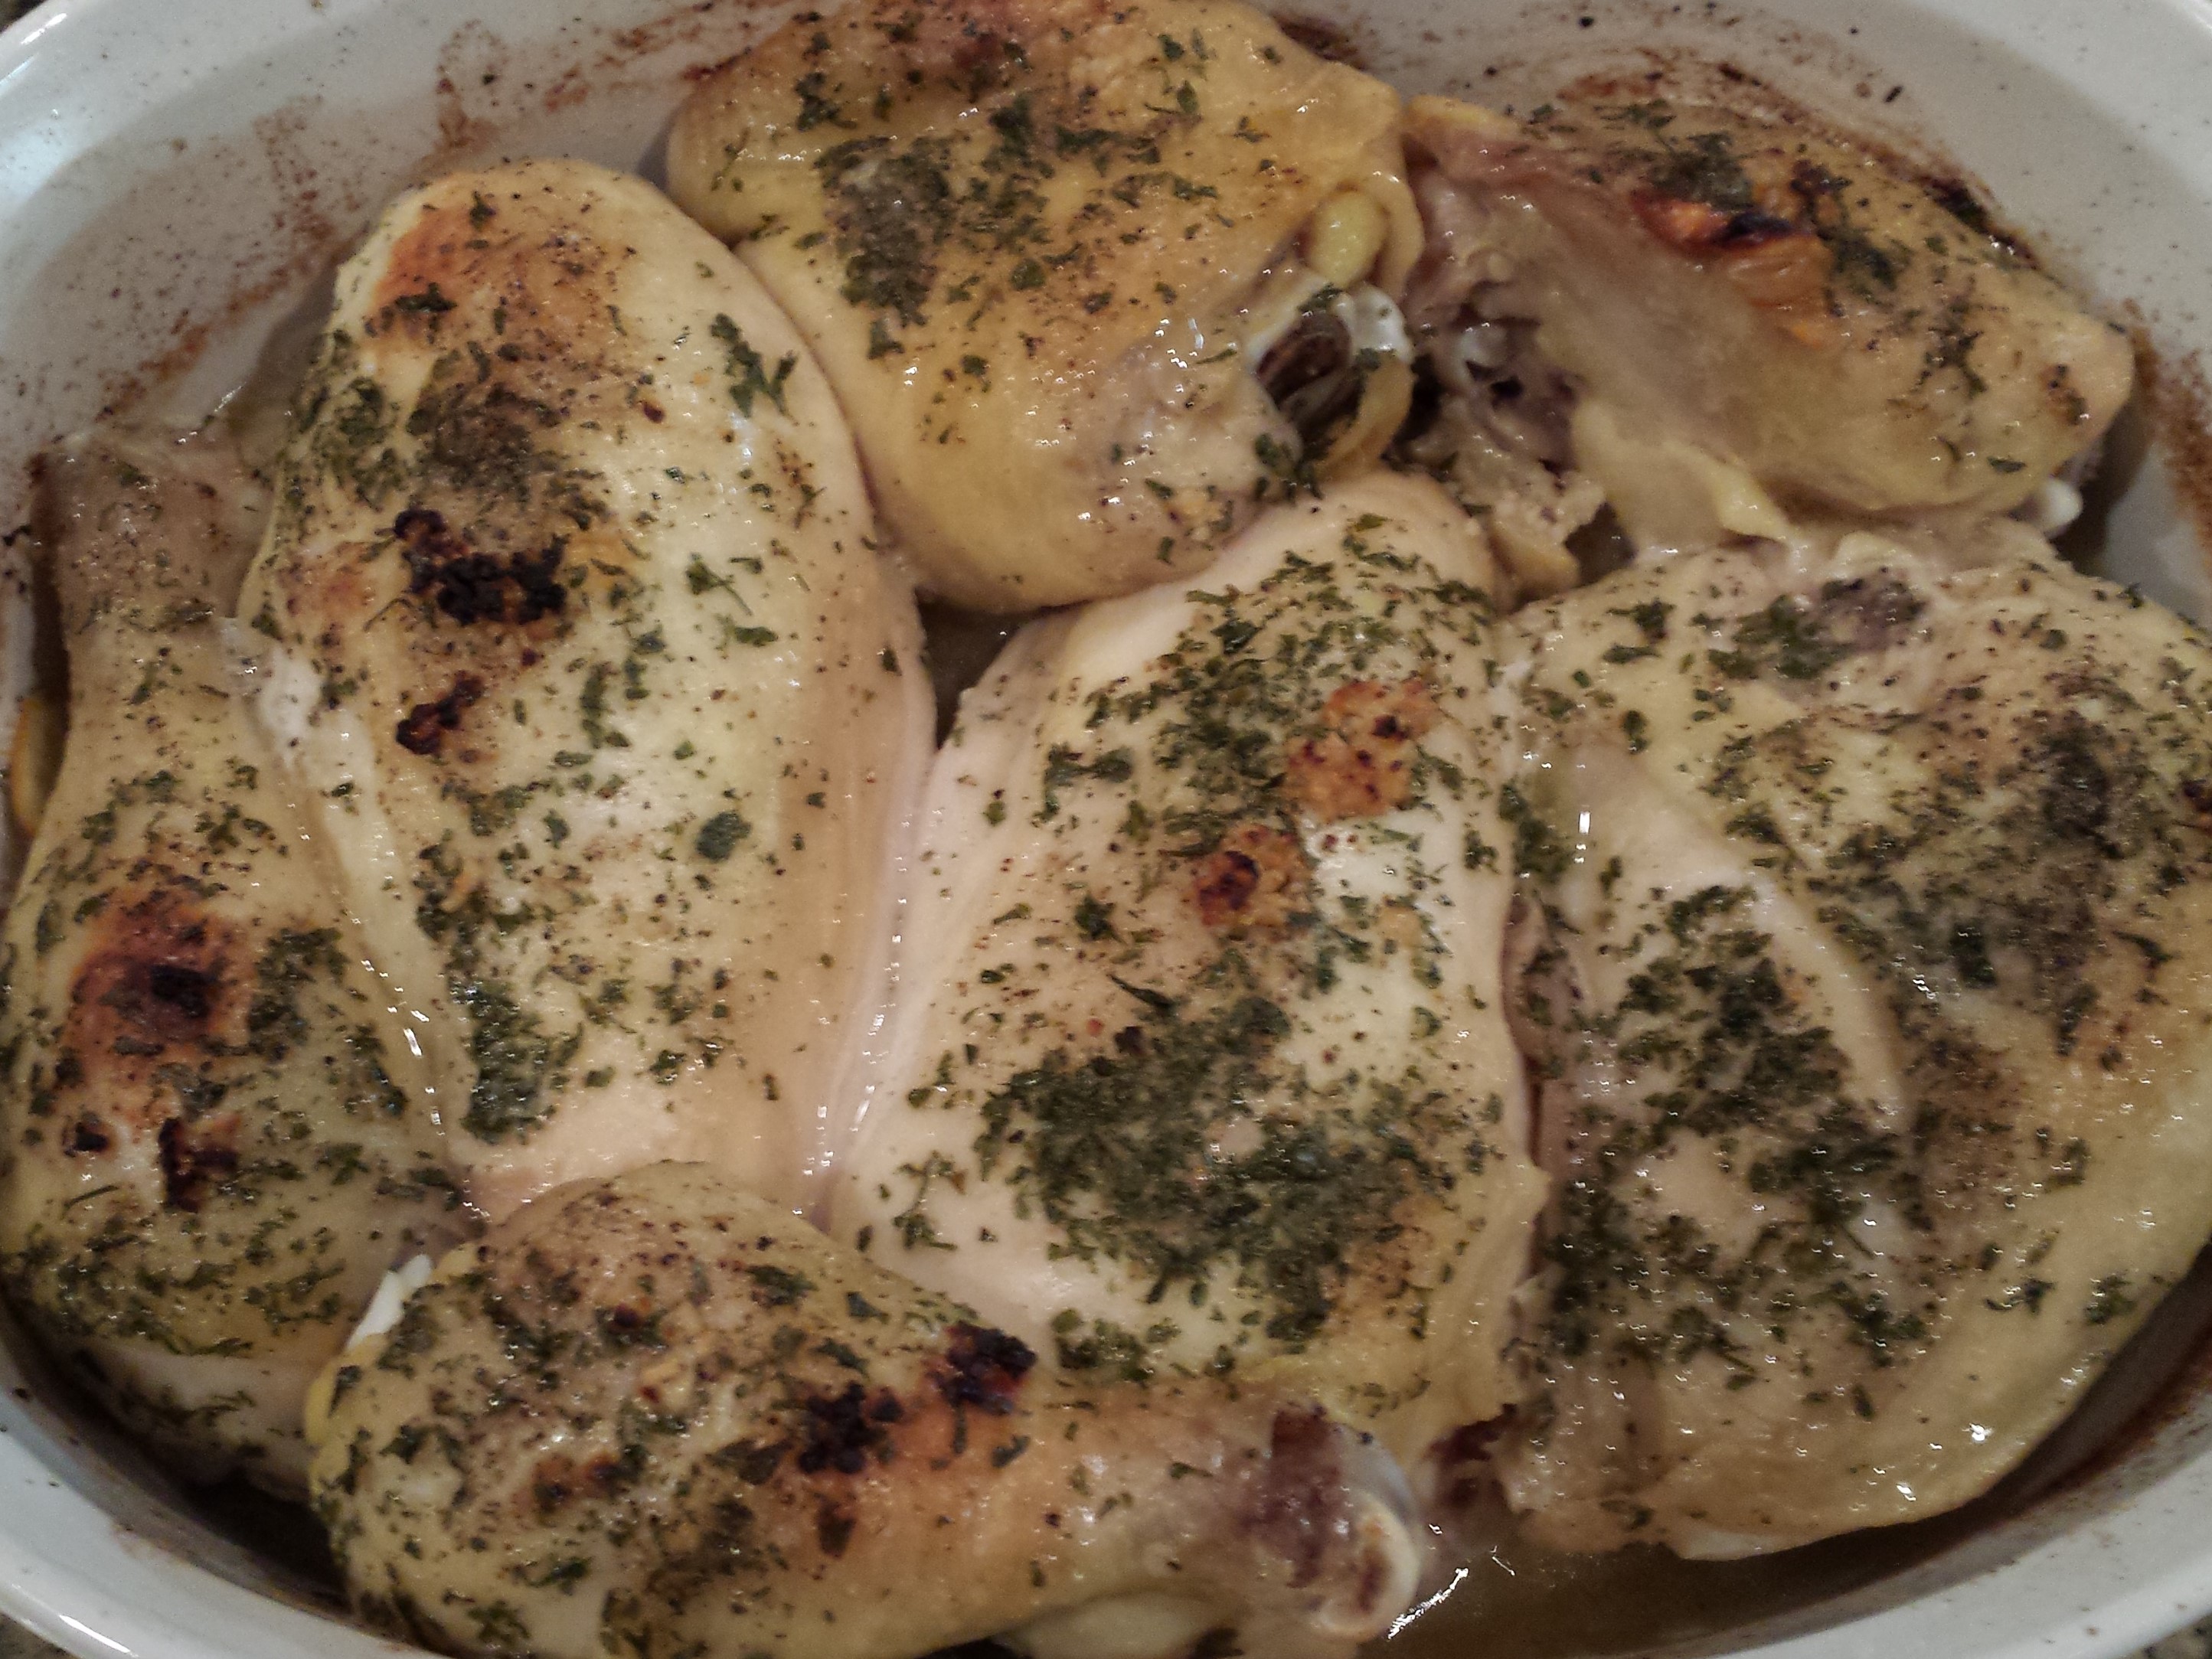
  • Once removed from the oven, transfer chicken to a cutting board and let rest before serving

20160306_183952


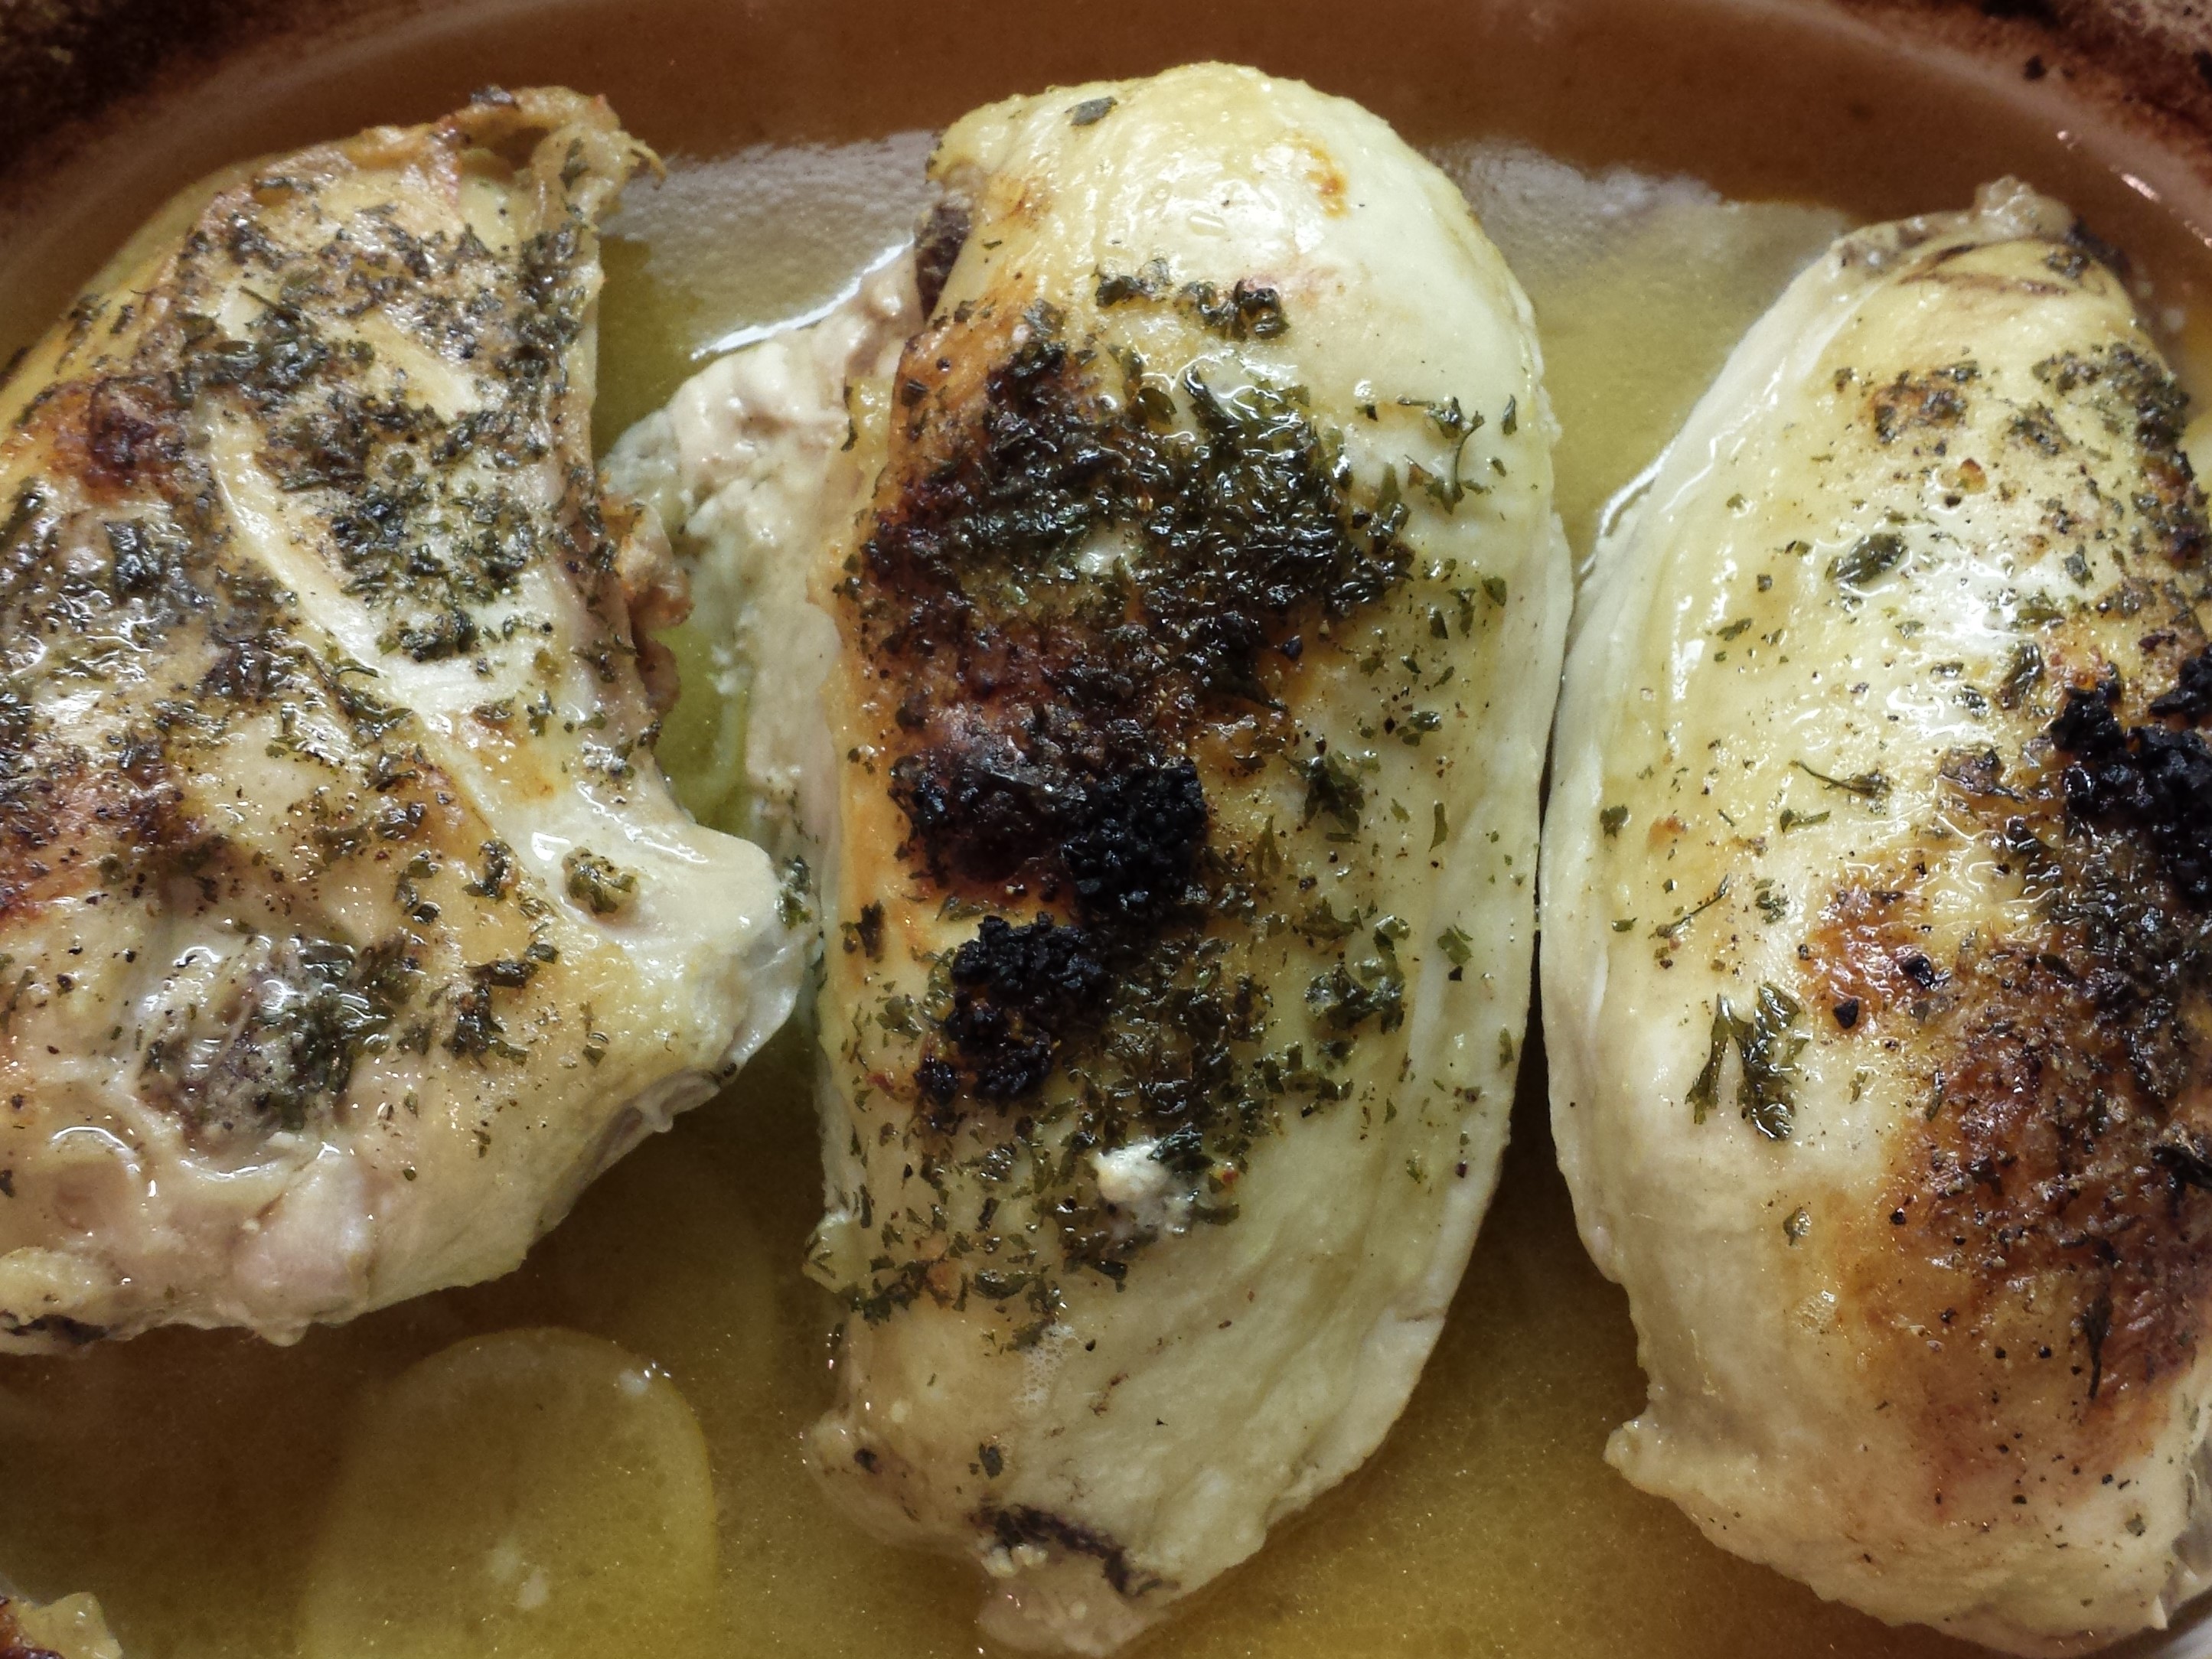
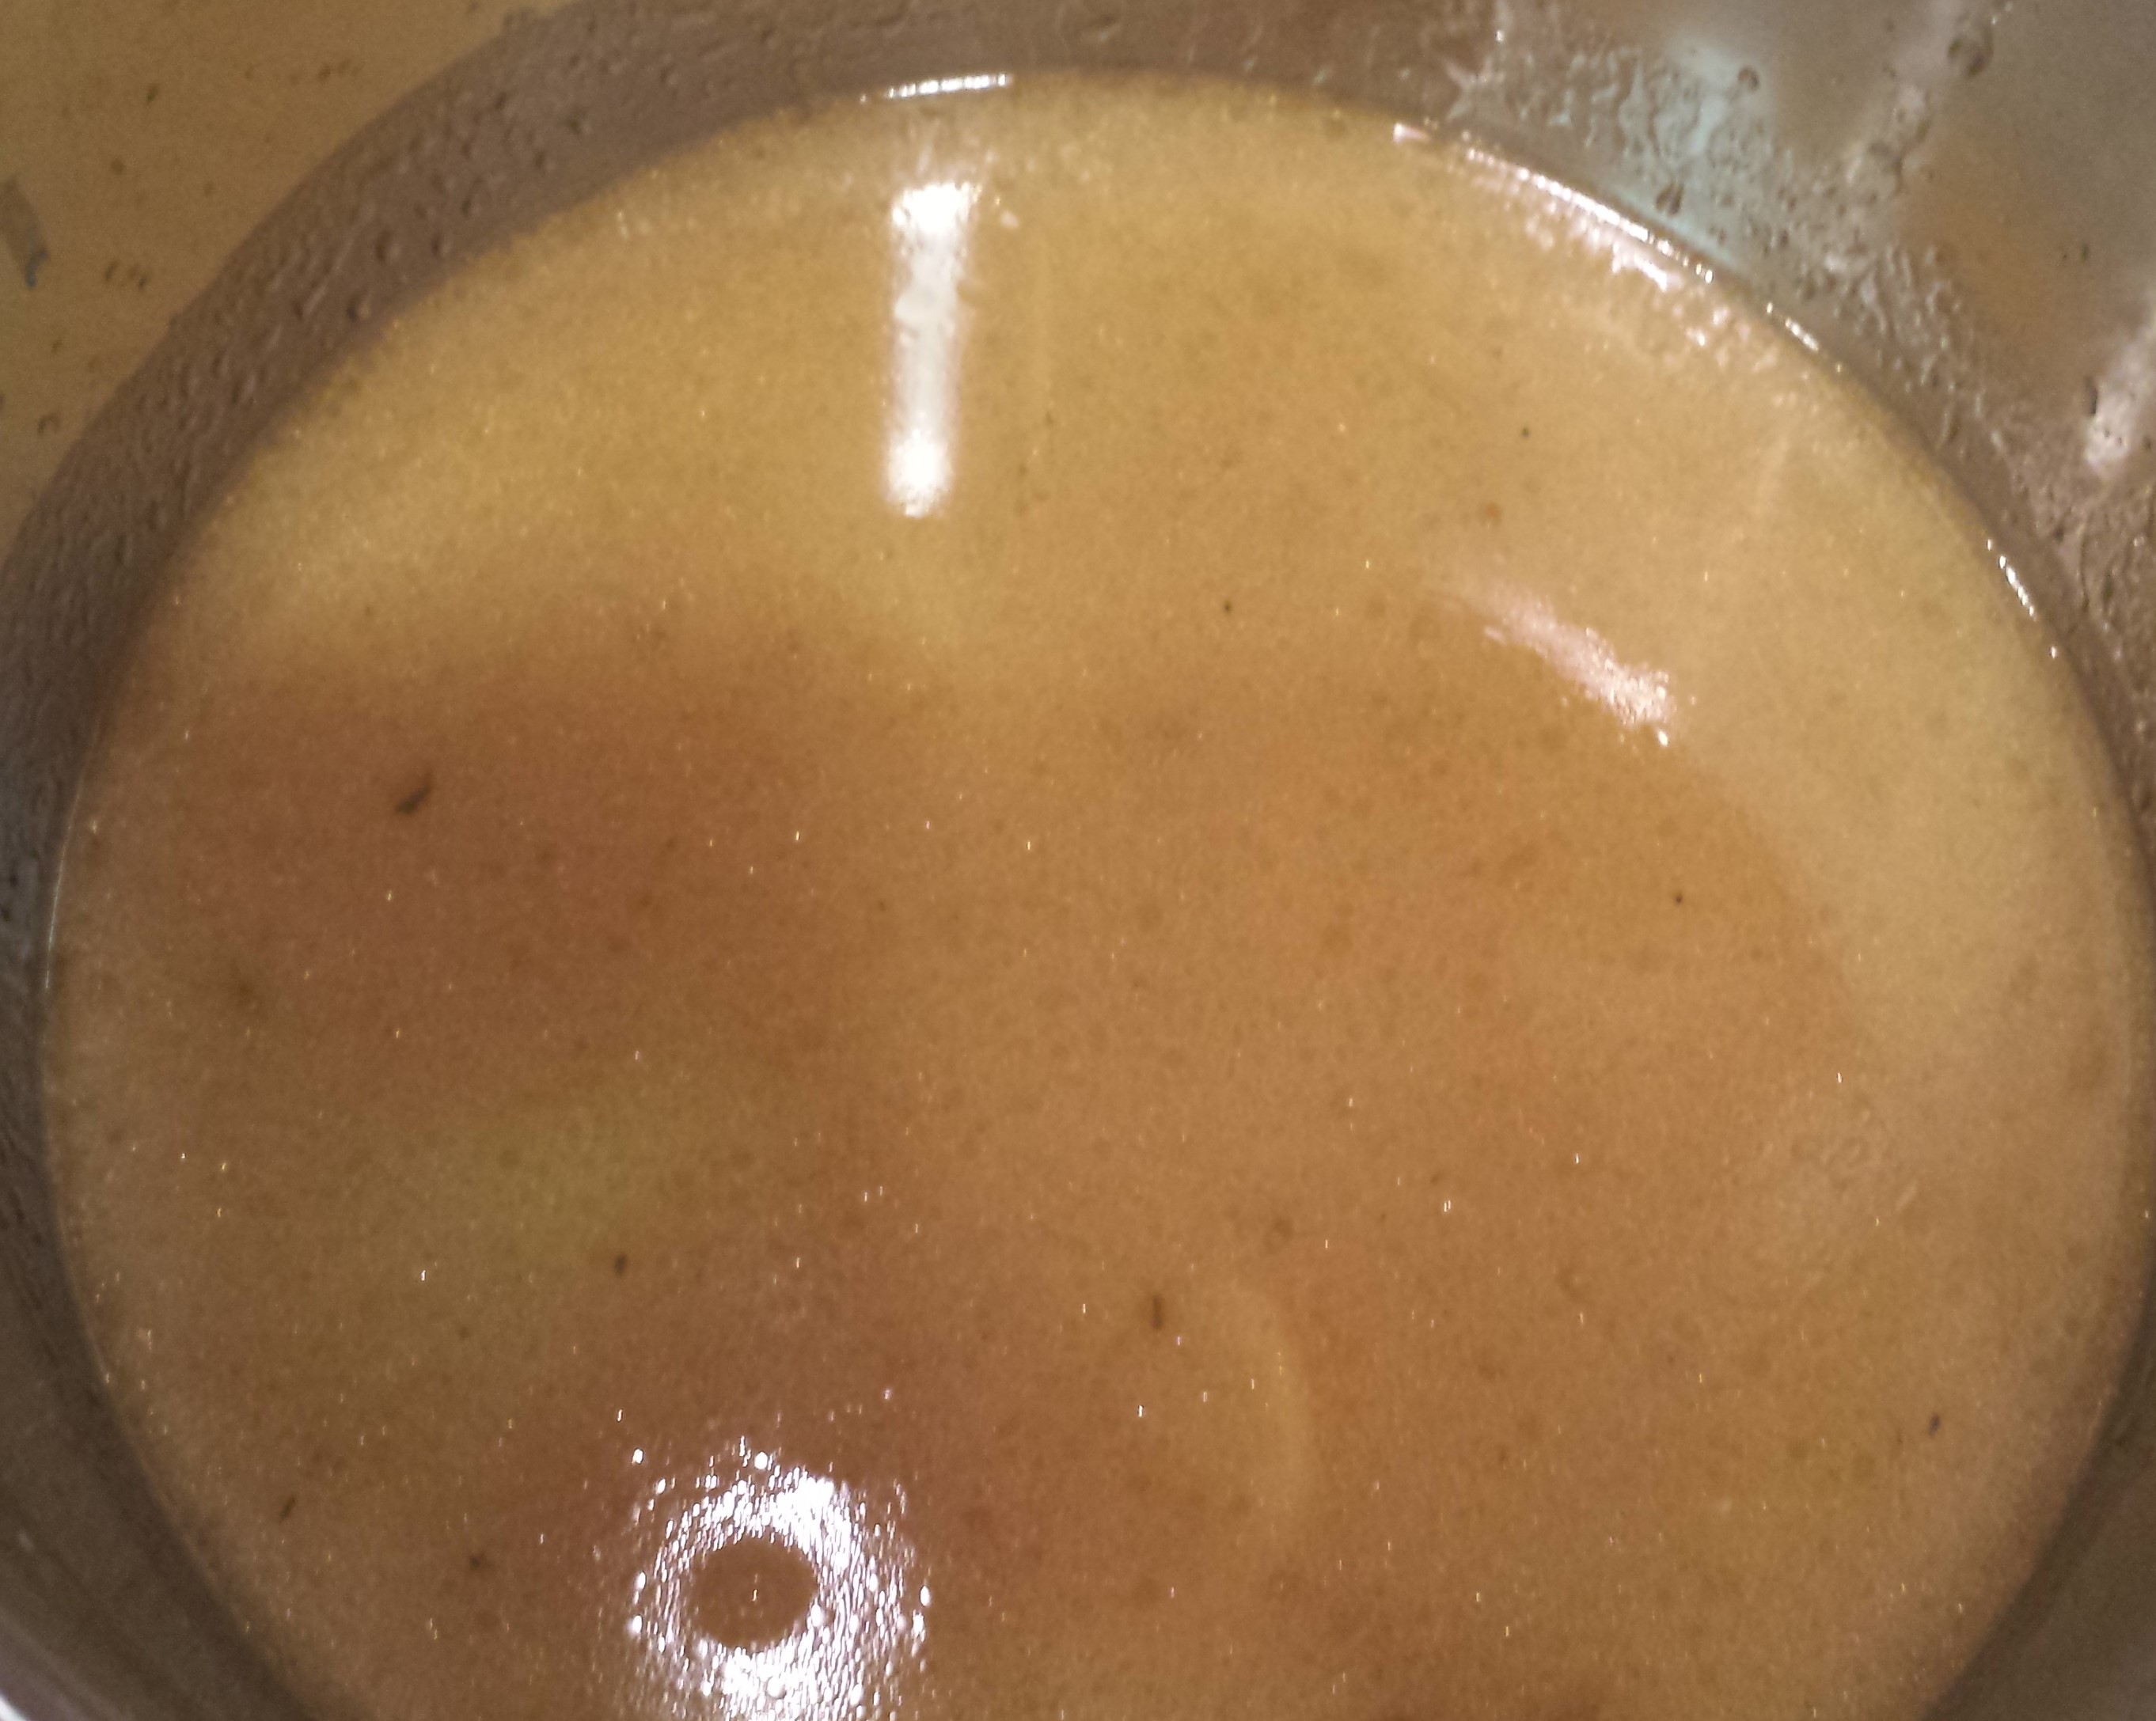
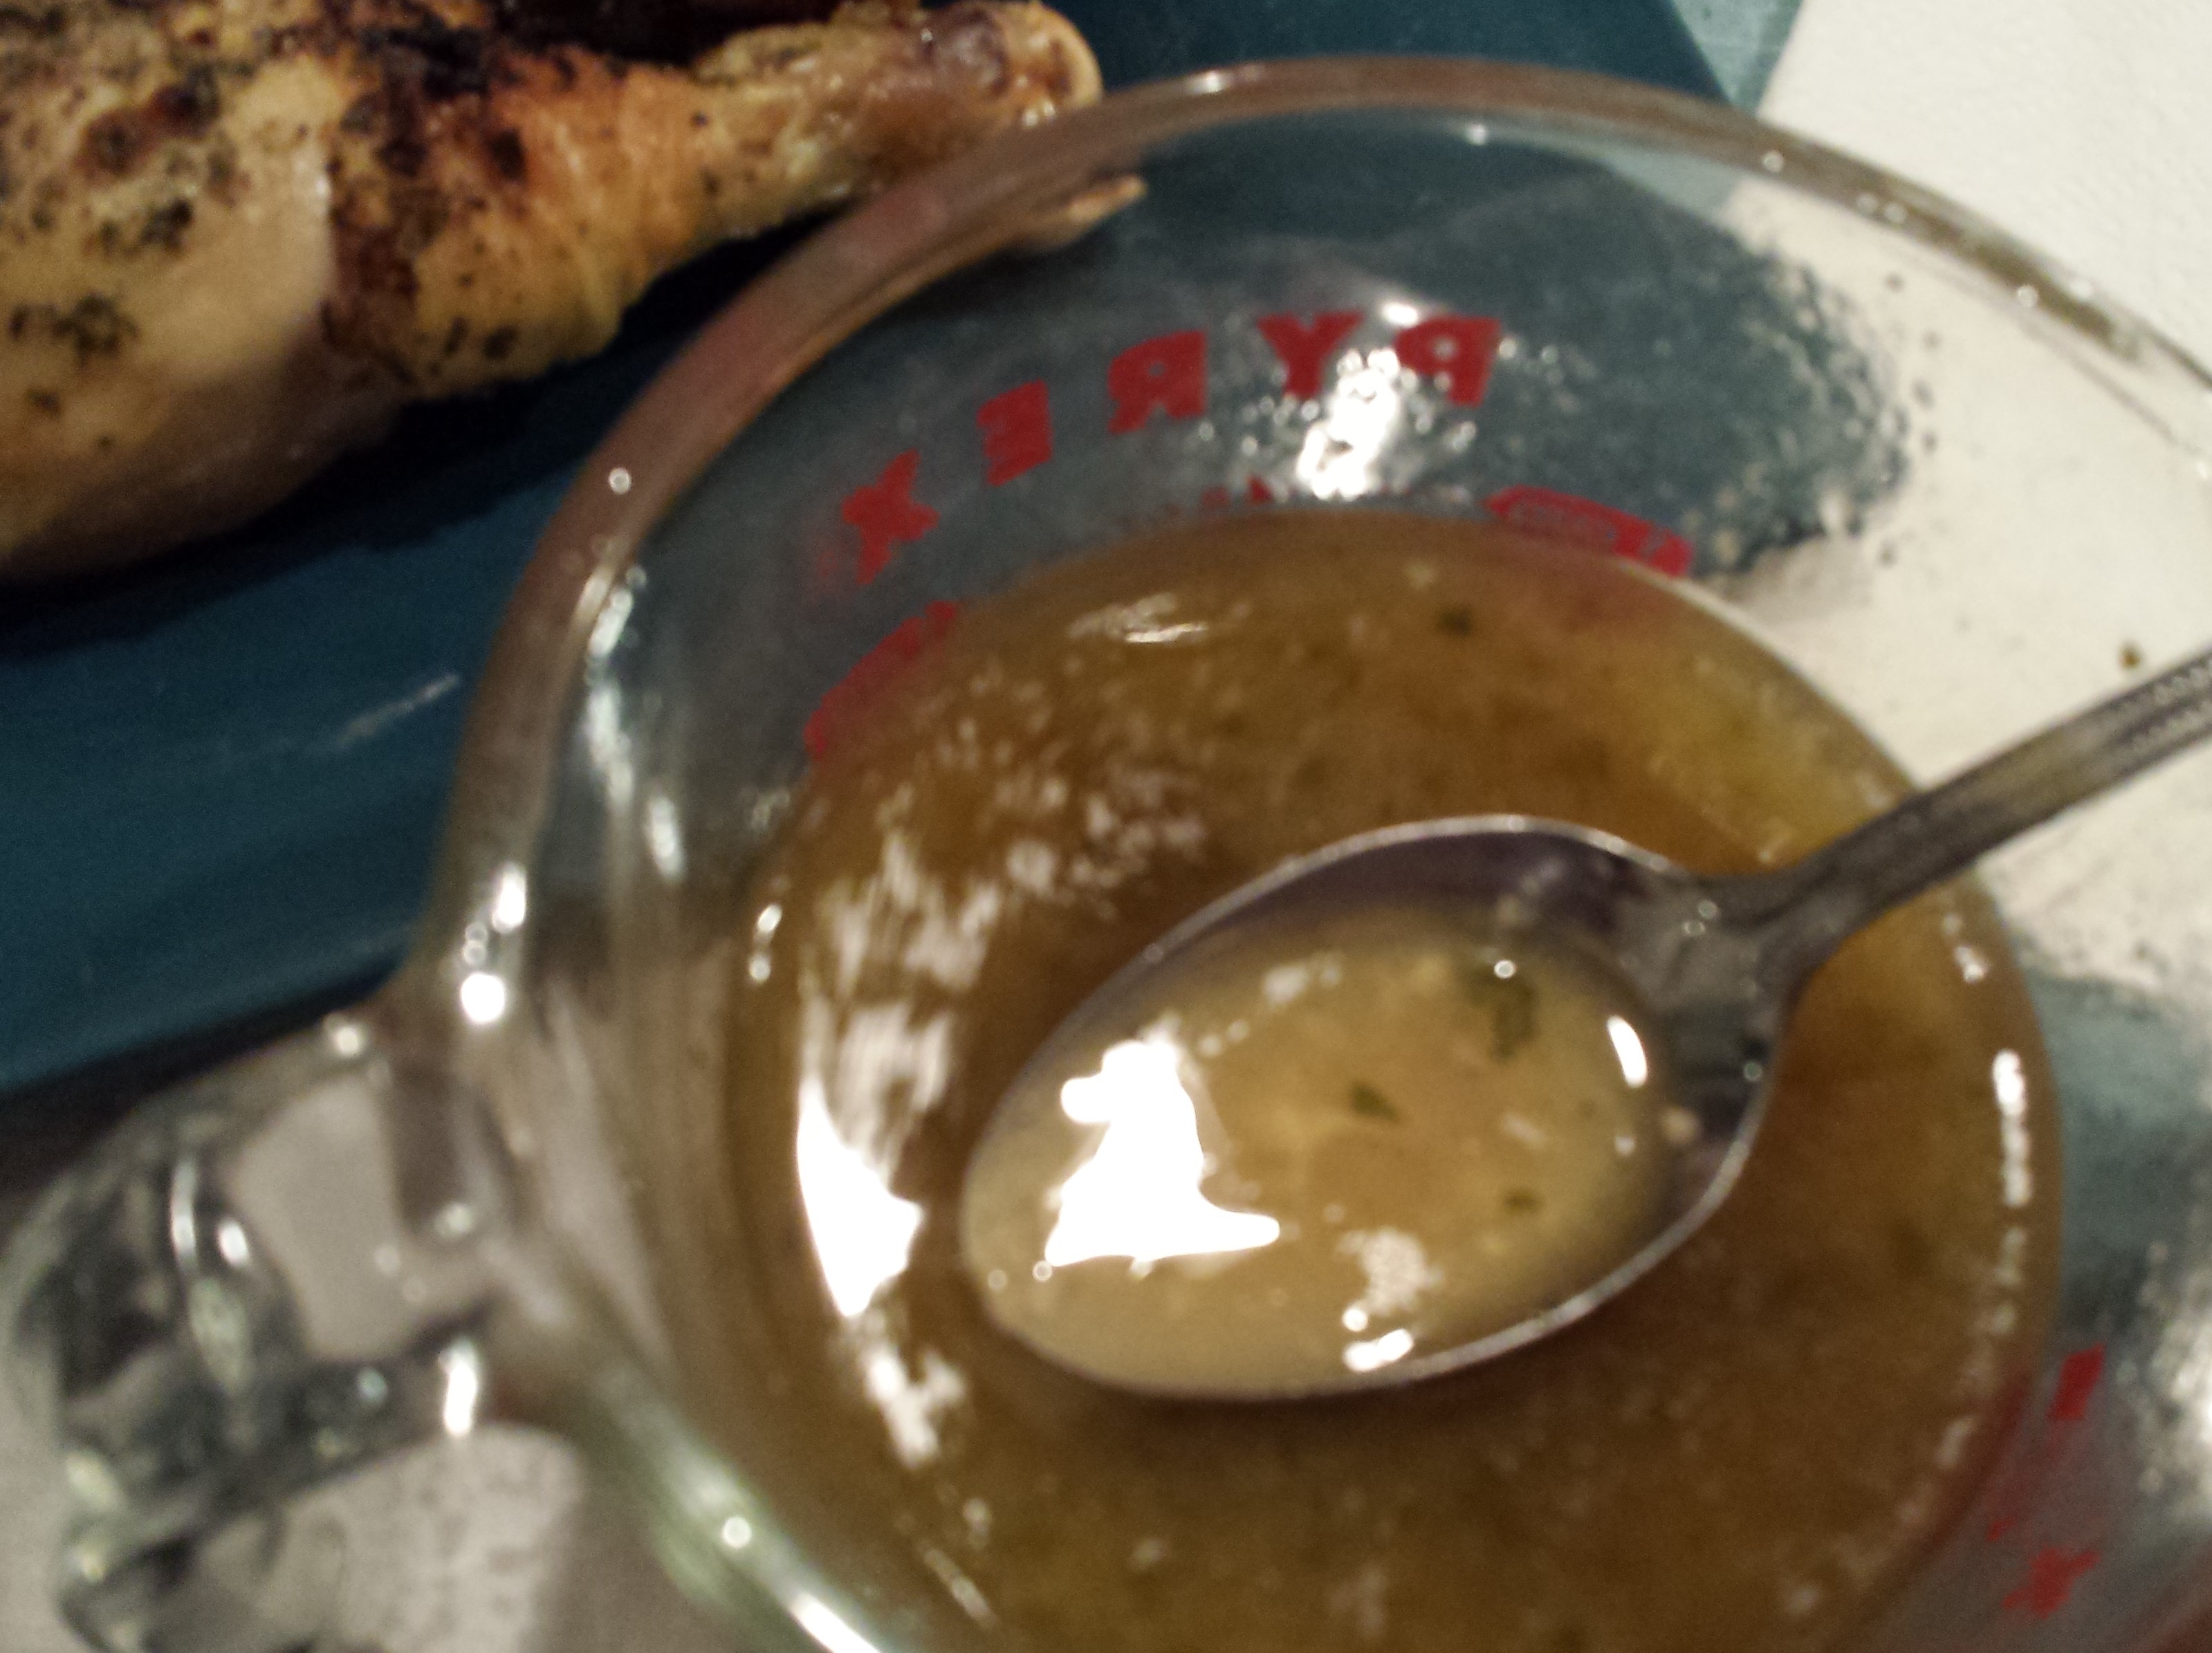
  • While chicken is resting, prepare lemon and herb sauce.
  • Pour any accumulated juices and the cooked sliced lemons into a large sauce pan. Add 1-1/4 cups of chicken broth and 2T of fresh lemon juice.
  • Bring to a boil and simmer for 5-10 minutes.

20160306_184054

  • Spoon sauce over chicken.

20160306_185242  20160306_185303

20160306_185324


Ideas

  • You can, of course, use a whole chicken for this recipe. It’ll be just as good, but will require a bit more manipulation to ensure that the skin is crisp all over.
  • For mixed herbs, use fresh if you have them. If not, small amounts of dried herbs go a long way. And use, the herbs you like best.
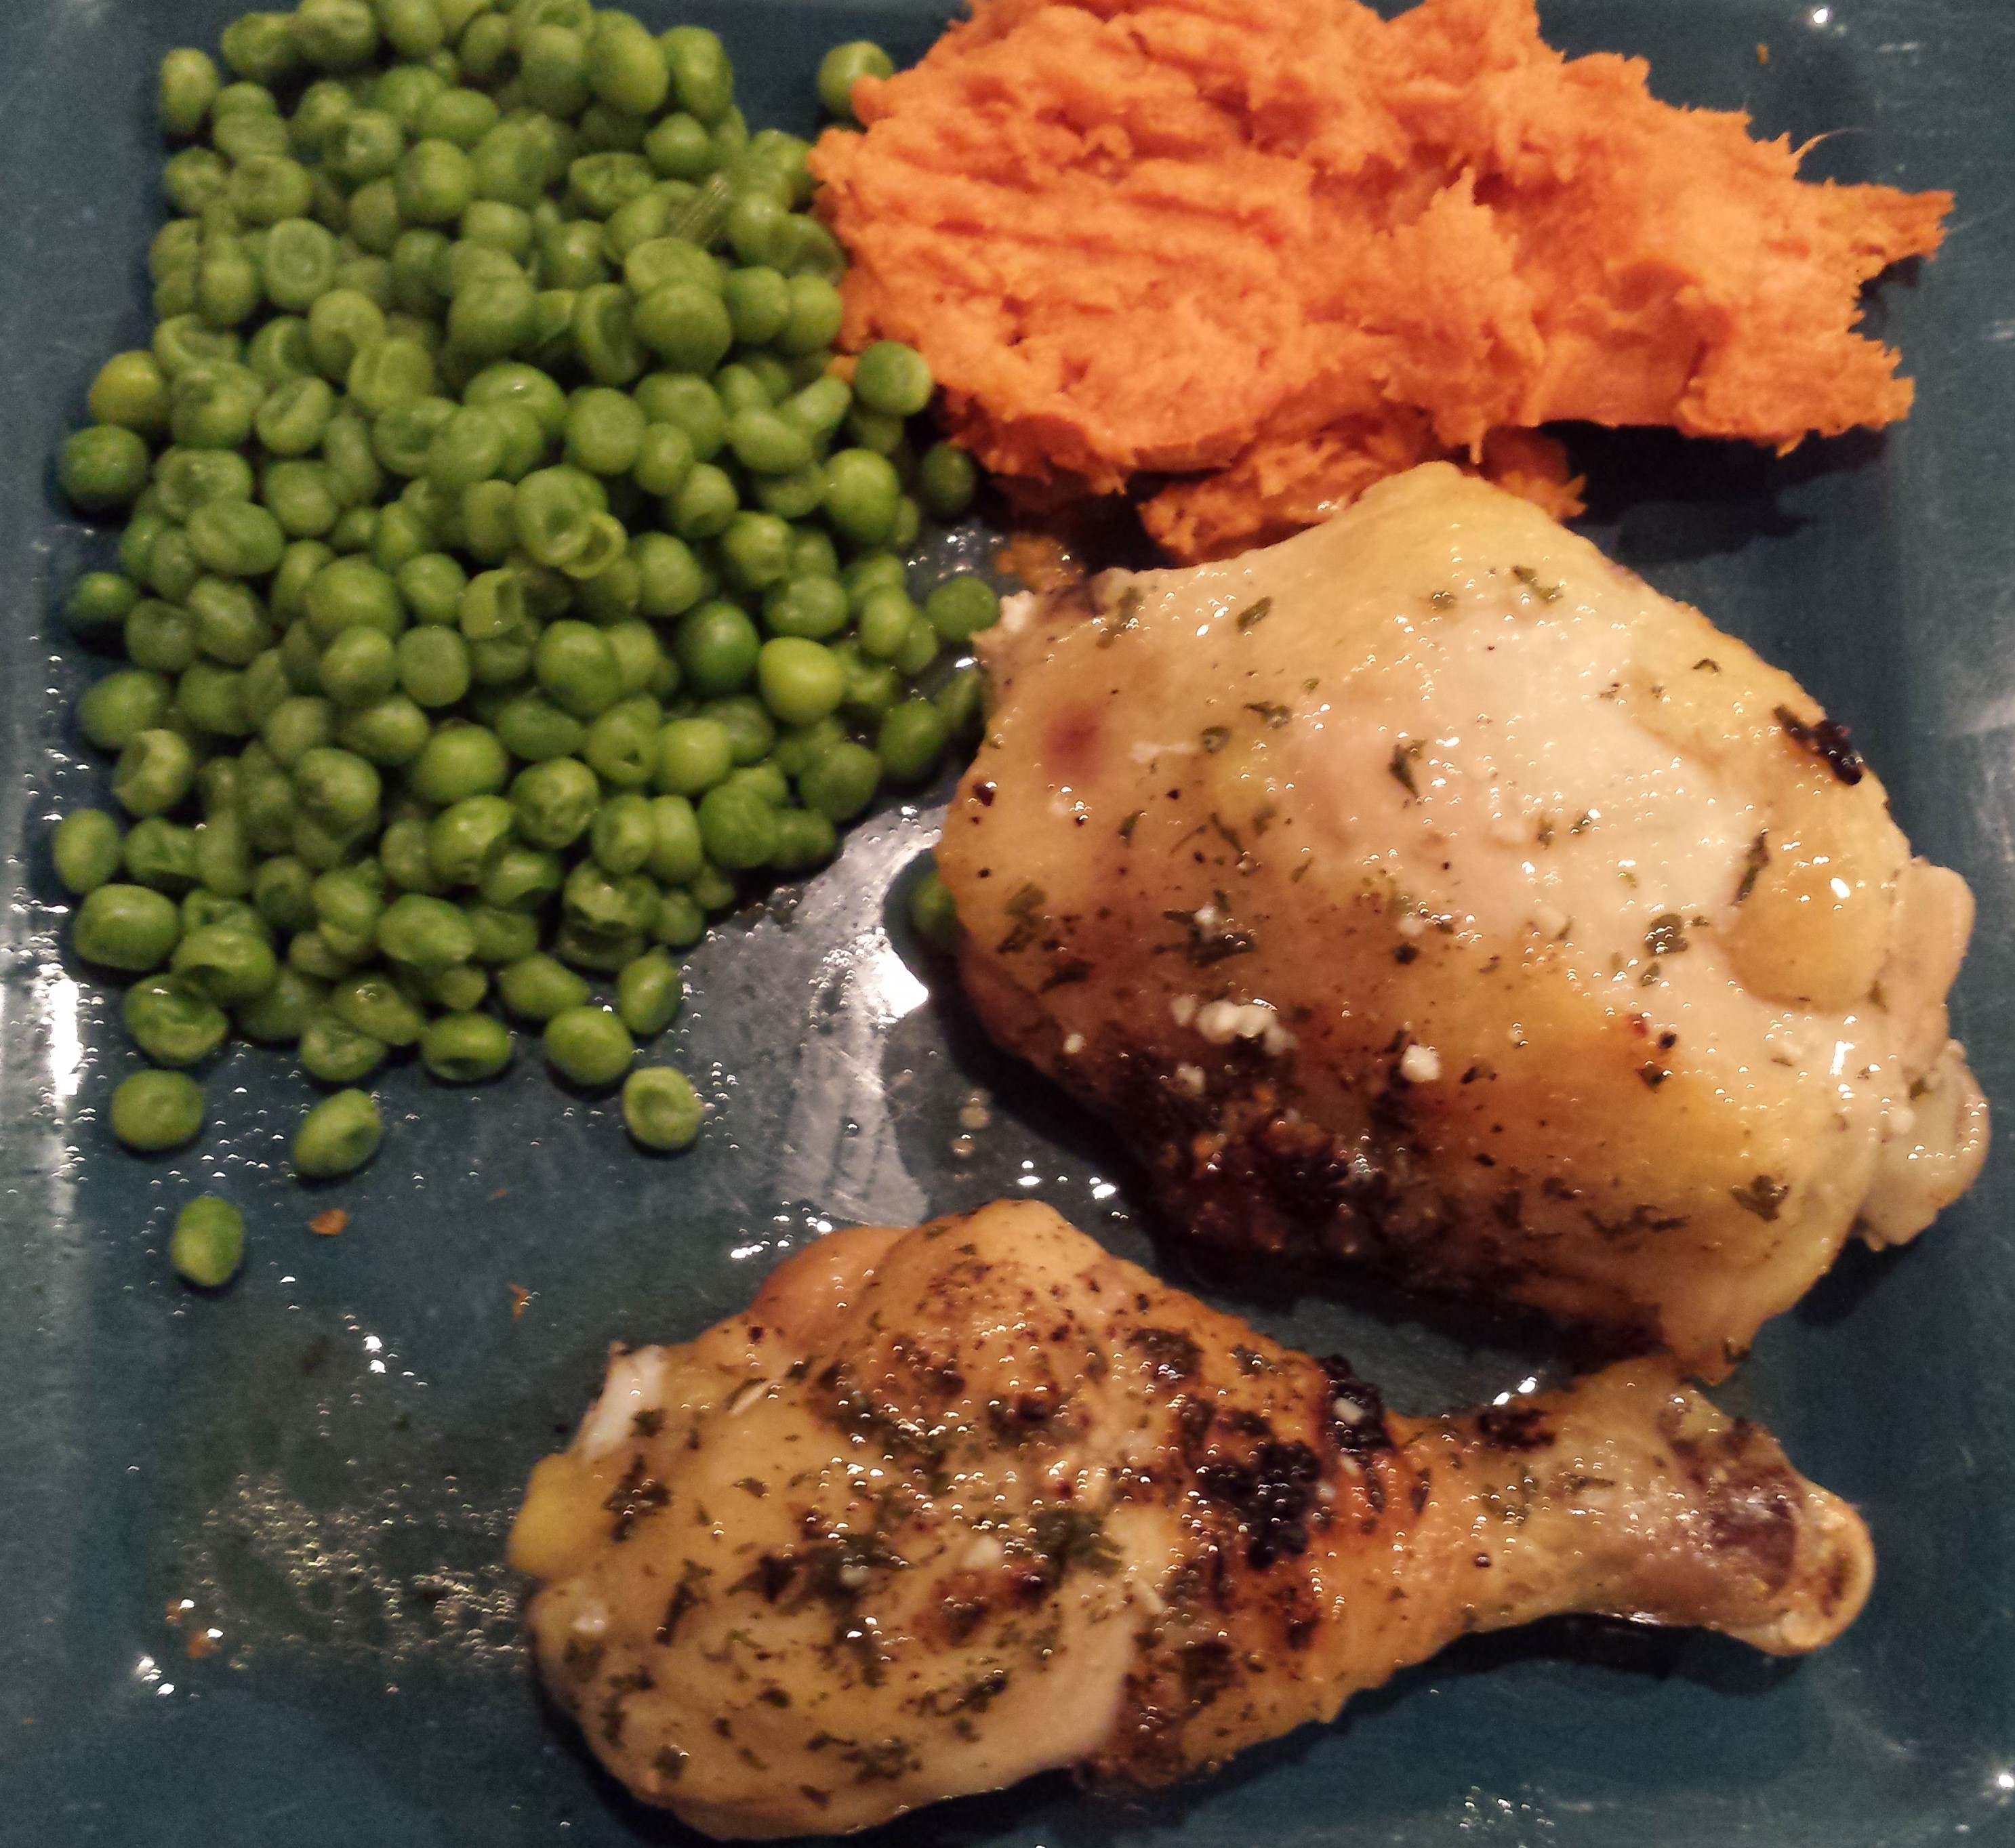
  • Serve with a vegetable and starch like potatoes, sweet potatoes or rice.

Chocolate Banana Bread

Who doesn’t love a moist, flavorful slice of bread? This bread can be a dessert or a breakfast item. When it’s warm, you can eat it plain or add butter, your choice. As for me, this is one of my favorites, but I do not make it often as my husband is allergic to bananas. No kidding! Poor guy. My impetus for baking this usually because I bought a bunch of bananas and for one reason or another didn’t get to eat them all. As they are starting to get overripe, I know it’s time to make some bread. Most banana bread or muffin lovers can certainly understand this. So, enough with the introduction already, and on to the recipe.

Ingredients20150808_170601

  • 2 cups all-purpose flour
  • 3/4 cup sugar (minus 2 T)
  • 3/4 tsp baking soda
  • 1/2 tsp salt
  • 6 T unsalted butter, melted and cooled
  • 2 large eggs, lightly beaten
  • 1/4 cup plain yogurt
  • 1 tsp vanilla extract
  • 3 very ripe bananas, mashed well (yielding ~1-1/2 cups)
  • 1-1/2 ounces  (1/2 cup) bittersweet chocolate bits

20150808_172830  20150808_172149

Instructions

  • Adjust an oven rack to the lower-middle position. Pre-heat oven to 350 degrees.
  • Spray a 9×5″ loaf pan with non stick vegetable spray.

20150808_173825

Use 2 separate bowls, one for dry ingredients, one for wet.

  • Mix the flour, sugar, baking soda, chocolate and salt together in one bowl.
  • Mix the mashed bananas, melted butter, eggs, yogurt and vanilla in the second bowl.

20150808_173229  20150808_173314  20150808_173416

  • Gently fold the banana mix into the flour mix with a rubber spatula. Mix until just combined.
  • Using a rubber spatula, scrape the batter into the prepared loaf pan and smooth.

20150808_173439  20150808_173610  20150808_173754

  • Give the loaf pan a firm shake to help the mix settle and smooth.
  • Bake about 55 minutes, until golden brown and toothpick inserted into the center comes out with just a few crumbs attached.
  • Remove from oven and cool for 10 minutes.
  • Remove from loaf pan and cool on a wire rack for at least one hour.

20150808_173940  20150808_184806  20150808_192012

Ideas

  • If you can find some banana yogurt, use it as a substitute for plain yogurt for an even more banana flavor.
  • Some recipes recommend shaving the chocolate instead of using chips. This gives more uniform chocolate coverage throughout the bread. I like the chips as I prefer to have more concentrated chocolate sections in my bread, but your choice.

20150808_201026

Chocolate Chip Pudding Cookies

This is one of my all time favorite cookies. While there are many varieties of chocolate chip cookies and an abundance of recipes, this one always yields a soft, moise, cake-like cookie. My mother made these when I was growing up. When we made for my great grandmother, we omitted nuts because she didn’t like them. Of course, when we made them just for ourselves, these cookies has 2/3 cup of walnuts added to the recipe below. My husband has the misfortune of being allergic to tree nuts, so I’m back to the no nut version of these. They are delicious either way. Try them, you won’t regret it. As always, happy eating!

Ingredients20151220_123524

  • 2-1/4 cup flour
  • 1 tsp baking powder
  • 1 cup softened butter
  • 1/4 cup sugar
  • 3/4 cup brown sugar
  • 1 tsp vanilla extract
  • 1 package instant vanilla pudding
  • 2 eggs
  • 12 oz chocolate chips

Instructions

  • Heat oven to 375 degrees.
  • Soften butter by leaving on counter for at least 30 minutes or by putting in a dish and cook in the microwave on high heat for 30 seconds.
  • In a large mixing bowl, combine butter, sugars, vanilla extract and pudding mix.
  • Beat until creamy.
  • Add the eggs and beat until mixed.

20151220_124423 20151220_124639

  • Gradually add in flour and baking powder.
  • Once dry ingredients are fully integrated, add the chocolate chips (and nuts) and mix well.

20151220_124915  20151220_125039  20151220_125050

20151220_125430  20151220_125529

  • Place about 1 tablespoon of cookie batter at a time onto a cookie tray. Flatten the “balls” of dough a little with your fingers or back of spoon. This cookie doesn’t spread a lot like some other versions.

20151220_125758  20151220_130439

  • Place in oven and cook 8-10 minutes.
  • Remove from oven and let cool about 6 minutes on tray before moving to a rack until fully cooled.

20151220_131257  20151220_134150

Ideas

  • Add nuts – walnuts, pecans, macadamia. Which ever type you prefer. I recommend 1/2 the volume of the chocolate chips. Therefore 12 oz of chocolate chips and 6 oz of nuts.
  • Parchment paper – I always use this when making cookies. Why? Cookies are super easy to remove from the cookie tray and cleaning up is a breeze.
  • Browning – unlike other chocolate chip cookies you may have made, these do not brown a lot on the top. That is NORMAL. You will see that the bottom of the cookie is nice and brown — then it’s time to remove from the oven. Waiting for the top to brown will give you a cookie that is dry and with a burnt bottom. 😦
  • Be prepared for cookie stealing. I had to take the image of the cookies on the wire rack before the last ones were out of the oven. 6+ cookies had already mysteriously disappeared when my back was turned.


Go back

Your message has been sent

Warning
Warning

Warning.

Apple Pie

A classic apple pie is the dessert of choice in my household. The smell of a freshly cooked pie brings me back to Massachusetts and my mother’s kitchen. She has always been an amazing cooker, baker and preserver. I hope I can pass that along to my daughter as well. But back to the apple pie, which is why you are here. There are many ways to make an apple pie. For me, the simpler the better. I do not like to have a bunch of additional ingredients or fancy designs (I save that for other pies), just a nice “A” in the crust put there with the tines of a fork.

You will see that I used store bought crust in the making of this pie. Sacrilege to some, but a life saver to others. For years, I only made pies with homemade crust, but then I got married, had a baby, a full-time job, etc. and just don’t have the time. Often for the holidays, I will still make my own crust, but it’s been super busy this year and I was working today… you get the point. As you will see, a store bought crust doesn’t have to diminish your results. Many times I’ve served my pies to people who would be shocked to learn that the crust wasn’t homemade. One caution though, purchase the premium brand crust as you will see a difference.

So, get your ingredients together, preheat that oven and get peeling. Happy baking!

Ingredients

  • 3-1/2 lbs of apples (1-1/2 lbs should be granny smith)20151125_164109
  • 3/4 cup plus 1 T sugar
  • 2 T flour
  • 1 T fresh lemon juice
  • 1 tsp grated lemon zest
  • 1/4 tsp salt
  • 1/4 tsp nutmeg
  • 1/2 tsp cinnamon
  • 2 pie crusts
  • 1 egg white, lightly beaten

Instructions

  • Preheat oven to 500 degrees. Place a large rimmed baking sheet on the lowest rack.
  • Peel and core the apples. Slice into 1/4 inch thick pieces and place into a large bowl.

20151125_164658  20151125_165346  20151125_170148

  • Add 3/4 cup of sugar, the flour, lemon juice, lemon zest, salt, nutmeg and cinnamon to the bowl and toss to cover all the apple slices.

20151125_170643  20151125_170659  20151125_170938

  • Place one crust into the bottom of a standard pie plate.
  • Spread the apples into the plate. Do not be afraid to pile these nice and high. Ensure that the different varieties are present in all sections of the pie.
  • Place the other crust on the top and crimp the edges with your fingers.
  • Cut vent holes into the top with a knife or using the tines of a fork create a pattern in the middle of the pie crust.

20151125_171136  20151125_171419

  • Brush the crust with the egg whites and sprinkle sugar over the crust.

20151125_171600  20151125_171620  20151125_171713

  • Protect the crust edges with aluminum foil or a pie crust protector (as I’ve used).
  • Place pie onto the pre-heated baking sheet and turn over temperature down to 425 degrees.
  • Bake for 25 minutes.

20151125_171731  20151125_171848

  • Turn the baking sheet 180 degrees. Reduce the oven temperature to 375 degrees and back another 30-35 minutes.
  • If using tin foil to protect the crust edges, remove now.
  • Pie is done when the juices are bubbling and the crust is a deep golden brown.

20151125_174736  20151125_182250

  • Remove from oven and move pie to a wire rack for cooling.
  • Serve cool or reheat and add ice cream for apple pie a la mode.

20151125_182323  20151125_182318

Ideas

  • Apples – most recipes will mention using two types of apples in your pie and while that is better than one, my recommendation is to use three types of apples. One of your apples should be granny smith, but feel free to experiment. In the pie you see here, I used golden delicious and fiji apples as well. Why? Different types of apples will yield a variety of different textures and flavors to your pie.
  • Amount of apples to use – I can’t say this enough, do not be afraid to pile them high.
  • Feel free to add other items to your pie like raisins, craisins, fresh cranberries, strawberries or plums. If you add any of these items, don’t add more than 1 cup full. You want this to be primarily an apple pie.
  • Do not forget to use and pre-heat the baking sheet. This is what helps the bottom crust cook and helps to minimize any sogginess of the lower part of your pie.
  • Pie crust – absolutely, make your own crust if you have the time and the inclination. Homemade, fresh pie crust is generally best.

Go back

Your message has been sent

Warning
Warning
Warning

Warning.

Blueberry-Orange Quick Bread

Who doesn’t enjoy a nice dessert or breakfast quick bread? This is a variation of the breads that most of us are familiar with like banana nut, zucchini, date nute, and so many more. My husband is allergic to nuts, so I do not use them with this recipe, but you can. I’ve added that optional information on how much and the way to prep them. Here’s to a quick and easy (and delicious) bread to add to your recipe repertoire. Enjoy!

Ingredients

  • 2 cups all-purpose flour20150808_162934
  • 1 cup sugar
  • 1 tsp salt
  • 1 tsp baking powder
  • 1/4 tsp baking soda
  • 2/3 cup buttermilk
  • 6 T (3/4 stick? unsalted butter, melted and cooled
  • 1/3 cup orange juice
  • 1 large egg
  • 1 T grated orange zest (optional)
  • 1-1/2 cups blueberries
  • 1/2 cup toasted pecan, chopped coarse (optional)

Instructions

  • Heat oven to 375 degrees.
  • Coat a 9×5 inch loaf pan with vegetable oil spray.
  • In a large bowl, add the flour, sugar, salt, baking powder and baking soda.

20150808_163622  20150808_163644

  • In a separate bowl, whisk the buttermilk, melted butter, orange juice, egg, and orange zest.
  • Fold the buttermilk mixture into the dry ingredients with a rubber spatula.

20150808_163908  20150808_164426

  • Mix until just moistened. Do not over mix.
  • Add the blueberries and pecans (if using).

20150808_164513  20150808_164542

  • Pour mix into loaf pan.
  • Bake until golden brown and a toothpick inserted into the center comes out with just a few crumbs attached. About 55-60 minutes.

20150808_164818  20150808_174755

  • Let cool in the pan for 10 minutes.
  • Remove from pan and cool on a wire rack for about 1 hour.

20150808_181134  20150808_201235

20150808_201248

Ideas

  • Flour – I prefer unbleached (why add more to your food than necessary), but use what you have.
  • Buttermilk – If you don’t have any, you can make some in your kitchen with regular milk. It’s best to have buttermilk though. Add either 1 T of white vinegar or fresh lemon juice to 1 cup of milk. Let stand for about 5 minutes.
  • Orange juice – if you have oranges and can squeeze them for the juice, this is best.
  • Pecans – toast them in a frying pan. Heat to medium and toss them often. Cook for about 5 minutes.
  • Cooling on wire rack – I don’t like to get grooves on the bottom of my bread, so I place a paper towel on top of the rack.

Go back

Your message has been sent

Warning
Warning

Warning.